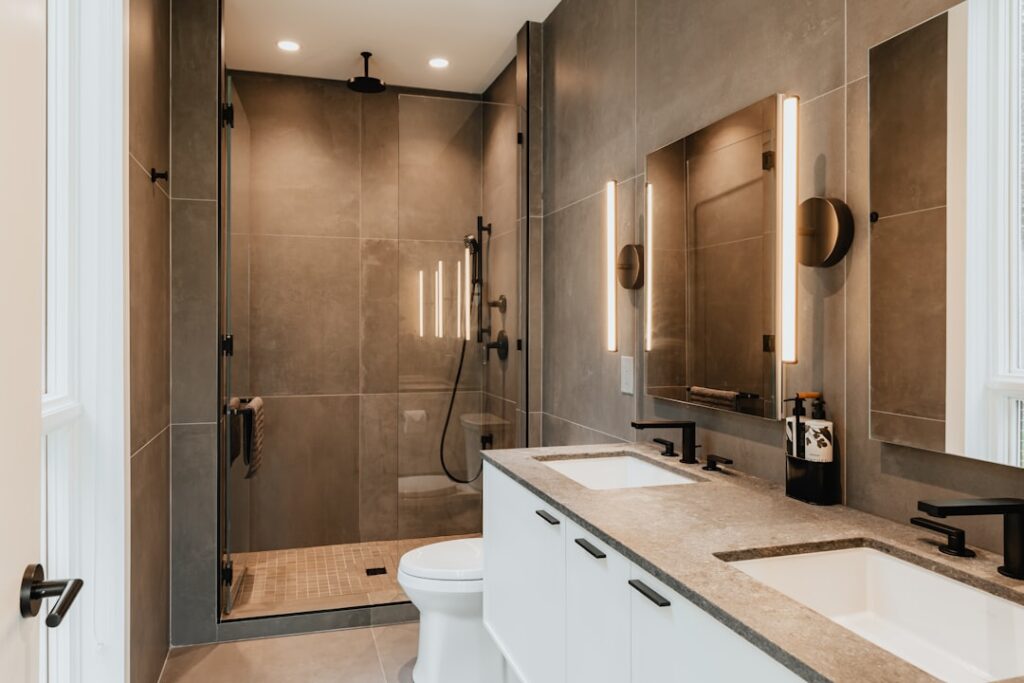
The corner shower is the most space-efficient bathing layout in residential construction, which is why every small bathroom and every primary suite remodel eventually considers one. Searching for corner shower pictures turns up thousands of glossy shots that hide the real-world details: how the glass actually closes, what the threshold height feels like, where the water collects when the slope is wrong. The successful designs share a handful of choices that the photos do not call out. Here is what to study when you scroll those galleries.
Part of our Bathroom Remodeling & Flooring guide — explore the full guide →
The Three Standard Sizes
Corner shower kits come in three sizes that fit American framing. The 32 x 32 in unit fits the smallest residential bathroom and is rough on anyone over 5 ft 10 in. The 36 x 36 in is the comfortable minimum and the most-installed residential size. The 48 x 36 in offset corner unit (sometimes called a “neo-rectangle”) is the upgrade pick when the wall length allows. Larger custom corner showers at 60 x 36 in or 60 x 42 in feel spacious but lose the space-saving advantage that drove the corner layout in the first place.
Measure twice before committing. Drywall, backer board, and tile add 1 to 1-1/2 in per wall over the rough framed dimension, which can shrink a 36 in shower to 33 in inside.
Neo-Angle vs Square Corner
Neo-angle showers cut the corner with a 45-degree angled front, which opens up the bathroom visually. Square-corner units run flush to both walls with a straight glass front. Neo-angle reads more upscale in photos but loses about 4 in of interior usable space at the angled front. Square corners maximize interior space and accommodate corner-mounted shower benches better. For most bathrooms under 50 sq ft, square wins; for primary suites with room to breathe, neo-angle adds visual interest.
Pan, Curb, and Threshold Options
Prefab acrylic and fiberglass corner pans from Sterling, Kohler Choreograph, and Swanstone run $400 to $900 and install in an afternoon. They include a built-in 4 in curb that meets International Residential Code (IRC) section P2709 for a minimum 2 in threshold. Custom tile pans built with a Schluter Kerdi or Wedi system run $800 to $2,500 in materials plus labor, but allow curbless installations with a linear drain for an accessible, modern look. Curbless installs require the bathroom subfloor to be lowered or built up before tiling, which adds $1,500 to $3,500 in framing work.
The IRC requires the shower floor to slope 1/4 in per foot toward the drain. Less slope and water pools; more and people feel like they are standing on a hill.
Glass Options That Photograph Well
Three glass configurations dominate the picture results. Sliding bypass doors on a square corner are the budget choice ($300 to $700 from Delta, MAAX, or Vigo) and work well for tight bathrooms. Pivot doors on a neo-angle are the most photogenic and cost $900 to $2,200 for frameless 3/8 in tempered glass. Fixed glass panels with a single hinged door give the most open feel and run $1,800 to $4,500 for a custom configuration. Frameless 1/2 in glass on long panels needs structural support; expect U-channel or clamps at the top and bottom or a stabilizing bar to the ceiling.
Tile Patterns That Hold Up
The single biggest tile mistake in corner showers is using large-format tile on the floor. A 12 x 12 in floor tile cannot slope evenly toward a center drain in a 36 in pan; the cuts at the perimeter look forced and the slope reads as bumpy. Use 2 in mosaic tile or smaller for the shower floor to follow the slope cleanly. The wall tile can be any size; 12 x 24 in subway-style porcelain in a horizontal layout reads modern and large-format 24 x 48 in slabs read luxe.
DCOF (dynamic coefficient of friction) matters for floor tile. ANSI A137.1 requires a wet DCOF of at least 0.42 for shower floors. Check the spec sheet before buying.
Niches, Benches, and Storage
A recessed wall niche between studs at 14 in wide x 12 in tall x 3-1/2 in deep adds usable storage without intruding on the shower footprint. Schluter Kerdi-Board pre-fab niches ($75 each) install before tile and avoid waterproofing failures at the corners. A foldable teak bench from Decoteak ($180) is the better choice than a built-in bench in a small corner shower, since a built-in bench eats 14 in of width permanently and shows in the corner shower pictures as a space-killer.
Fixtures and Valve Placement
Place the mixing valve on the opposite wall from the showerhead, not on the same wall, so you can turn on the water without standing in the cold spray. For a square corner shower, the valve on the long entry wall and the head on the back wall is the right layout. Thermostatic valves from Moen U by Moen ($420), Delta MultiChoice 17T ($280), or Kohler DTV+ ($1,100) add precise temperature control. For a rainhead, mount the shower arm at 84 in off the finished floor; standard wall-mount heads work at 78 to 80 in.
Lighting the Shower Without Glare
Most corner showers in photos use one or two recessed LED downlights rated for wet locations. Halo HLB6 wet-rated LED downlights ($28 each) work well at 6 in diameter, mounted directly above the shower head and centered over the floor. NEC Article 410 requires shower-zone fixtures to be GFCI-protected and listed for wet locations. Add a separate dimmer switch outside the bathroom for the shower light so morning brightness and nighttime softness both work.
Realistic Total Cost
A basic 36 x 36 in prefab corner shower with an acrylic pan, framed sliding door, and standard valve runs $1,800 to $3,500 installed. A mid-range tile shower with a custom pan, frameless neo-angle door, and Schluter waterproofing lands at $5,500 to $9,500. A high-end curbless shower with linear drain, full-height frameless glass, and rain head plus body sprays hits $12,000 to $22,000. The best corner shower pictures usually show that high-end install. Knowing the cost gap helps you decide which version is worth pursuing for your bathroom.