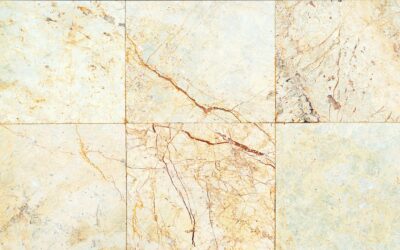
Scrolling through endless bathroom tile pictures is the easy part; figuring out which looks will translate into your own space, and your own budget, is where most renovations stall. The most photographed bathrooms share a few principles you can copy regardless of style: a clear focal point, restraint in pattern, and the right tile in the right zone. This guide breaks down the looks behind the most inspiring images so you can borrow the ideas, not just admire the photos. Here’s what makes each design work.
Part of our Bathroom Remodeling & Flooring guide — explore the full guide →
Classic Subway Tile
The most enduring look in bathroom tile is the humble 3-by-6-inch subway tile, and it appears in countless inspiration photos for good reason. It’s affordable, timeless, and endlessly adaptable. A standard white subway with a brick-offset pattern reads clean and bright, while the same tile set in a herringbone or vertical stack instantly modernizes the look.
Want to add interest without changing the tile? Switch the grout. A dark grout against white subway tile creates a graphic, defined grid that photographs beautifully and shows fewer water spots than bright white grout.
Hexagon and Penny Tile Floors
Small-format floor tiles dominate the prettiest bathroom pictures because they bring vintage charm and practical grip. Hexagon and penny rounds, often in white with a black accent border or scattered pattern, evoke classic early-1900s American bathrooms. The abundance of grout lines also adds slip resistance underfoot, a real plus on a wet floor.
These tiles come pre-mounted on mesh sheets, which makes installation more manageable than setting hundreds of individual pieces. They’re a smart choice for a small floor where you want big character.
Large-Format and Marble-Look Tile
At the opposite end of the spectrum, oversized tiles, 12-by-24 inches and larger, create the sleek, seamless look you see in modern, spa-style bathrooms. Fewer grout lines mean a cleaner appearance and less grout to scrub. Large-format porcelain that mimics marble or natural stone delivers a luxury feel at a fraction of the cost and maintenance of the real thing.
These work especially well on shower walls and as continuous floor-to-wall surfaces. Just note that large tiles demand a very flat, level substrate, so prep work matters more here than with small tiles.
Patterned and Encaustic-Look Tile
If a bathroom photo stops you in your tracks, there’s a good chance a bold patterned floor is doing the work. Encaustic-look cement and porcelain tiles, with their Moroccan, geometric, and floral motifs, turn a plain floor into a showpiece. The trick the best designs use is restraint: a busy patterned floor pairs with simple, solid walls so the room doesn’t overwhelm.
Use pattern in one zone, the floor, a single accent wall, or a niche, rather than everywhere at once. That balance is exactly why magazine-worthy bathrooms look striking instead of chaotic.
Choosing Tile by Zone
The most successful bathrooms use different tile in different areas based on function, not just looks. Matching the material to the demands of each zone is the secret behind durable, beautiful results:
- Shower floor: small mosaic or textured tile for slip resistance and easy slope to the drain
- Shower walls: larger tile or subway for fewer grout lines and easier cleaning
- Bathroom floor: slip-rated porcelain that handles water and traffic
- Accent niche or feature wall: a splurge tile, glass mosaic, marble, or bold pattern
Always check the slip rating, expressed as a coefficient of friction, for any floor tile in a wet area. Polished surfaces look gorgeous in pictures but can be dangerously slick when wet.
Color and Grout Choices
Color sets the entire mood. Crisp whites and soft grays keep a small bathroom feeling open and bright, while deep greens, navy, and matte black bring drama to a powder room or a feature wall. Warm earth tones and terracotta have surged in popularity for a cozier, organic feel.
Grout is the detail that makes or breaks the finished look. Matching grout to the tile creates a seamless field, while contrasting grout highlights the pattern and shape. For floors, choose a mid-tone grout that hides dirt better than pure white.
Mixing Tiles Without Clashing
Many inspiring bathrooms combine two or three tiles, and the ones that look intentional follow a simple formula. Keep one tile dominant, add a second as an accent, and let a third be a small detail. Vary the scale, a large wall tile with a small mosaic floor, so the surfaces contrast clearly rather than competing.
Tie the palette together with a shared color thread running through all the tiles. When the combination shares an undertone, even very different tiles feel like they belong in the same room.
Porcelain vs. Ceramic vs. Natural Stone
The tile material behind those beautiful pictures affects durability, cost, and upkeep as much as the pattern does. Knowing the tradeoffs helps you choose a look you can actually live with:
- Porcelain: dense, water-resistant, and tough; ideal for floors and wet areas, and it convincingly mimics marble and wood
- Ceramic: softer and more affordable, great for walls and lower-traffic floors, easy to cut and install
- Natural stone (marble, travertine, slate): stunning and unique, but porous and requiring periodic sealing
For bathroom floors that get wet daily, porcelain is usually the practical winner. Save real marble for a feature wall or vanity surround where its beauty shines but it sees less standing water and abuse. Ceramic bridges the gap on walls where cost matters.
From Picture to Plan
Once a look inspires you, translate it into a buildable plan. Order samples and view them in your bathroom’s actual lighting, since tile color shifts dramatically between a showroom and a real space. Calculate your square footage and add 10 to 15 percent for cuts and waste, and confirm the slip rating for any wet-zone floors.
The best bathroom tile pictures are starting points, not blueprints. Borrow the focal point, respect the zone-by-zone logic, keep your pattern disciplined, and you’ll end up with a finished bathroom that looks every bit as good as the photo that inspired it, while actually standing up to daily use.
Prefer to explore on your own?
See how new flooring looks in your actual room in seconds — free, no signup.
Try the free Floor Studio →