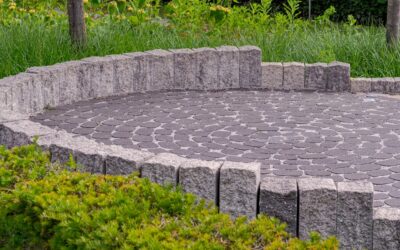
Ask ten homeowners what kind of sand goes under and between patio pavers and you will get ten different answers, most of them wrong. Choosing the correct patio paver sand is one of the most misunderstood parts of a paver project, and getting it wrong leads to shifting stones, weed-choked joints, and a patio that ripples within a season. The confusion is understandable, because a proper paver installation actually uses two or three different sand-and-gravel products, each with a distinct job. This guide clears up exactly which material goes where and why it matters.
Part of our Decks & Outdoor guide — explore the full guide →
A durable paver patio is built in layers, like a cake. From the bottom up, you have a compacted gravel base, a thin bedding sand layer that the pavers sit on, and a joint sand that fills the gaps between stones to lock them together. Using the right product for each layer is what separates a patio that lasts decades from one that fails fast.
The Base Layer: Not Actually Sand
Confusingly, the bottom “base” layer is not sand at all. It is crushed stone, commonly called paver base, road base, or Class II road base, a mix of crushed gravel and stone dust. This material compacts into a rock-solid, well-draining foundation that carries the load of the patio and everything on it.
You typically install 4 to 6 inches of compacted paver base for a walkway or patio, and up to 8 to 12 inches for a driveway that bears vehicle weight. Compact it in 2-inch lifts with a plate compactor, since a base compacted all at once stays loose underneath and settles later. Skipping or skimping on this layer is the number-one cause of paver patios that sink and heave, so never substitute plain sand here.
Bedding Sand: The Setting Layer
On top of the compacted base goes a thin, uniform layer of bedding sand, and this is where the pavers actually rest. The correct product is coarse, sharp, angular sand, often sold as concrete sand or ASTM C33 sand. Its angular grains lock together and hold the pavers in position without shifting.
Crucially, do not use fine, rounded sand like play sand or mason sand for the bedding layer. Rounded grains roll against each other and let pavers migrate, and fine sand holds water and washes out. Spread the bedding sand about 1 inch thick, screed it perfectly flat with a straight board riding on pipe rails, and resist the urge to compact it before laying pavers. You set the pavers into the loose screeded sand, then compact everything together at the end.
Joint Sand: Locking the Pavers Together
Once the pavers are down, sand fills the narrow joints between them to lock the field into a solid surface. Here you have two choices, and the difference is significant for how your patio performs over time.
- Regular joint sand: fine sand swept into the joints; cheap but washes out and allows weeds and ants
- Polymeric sand: sand blended with polymers that harden when wetted, resisting washout, weeds, and insects
Polymeric sand is the modern favorite for good reason. After sweeping it into the joints and misting it with water, the polymers activate and bind the sand into a firm yet slightly flexible joint that stays put through rain and freeze-thaw cycles. It costs more, around $25 to $40 a bag versus a few dollars for plain sand, but it dramatically cuts maintenance and keeps weeds and ants out of your joints.
How Much Sand You Need
Estimating quantities keeps you from making three trips to the store. For bedding sand at 1 inch deep, one cubic yard covers roughly 300 square feet, or figure about 0.5 cubic feet per 6 square feet. Most homeowners buy bedding and base materials by the cubic yard for larger patios and by the bag for small projects.
Joint sand coverage depends heavily on your joint width and paver thickness, but a single bag of polymeric sand typically covers 30 to 100 square feet depending on those factors. Wider joints and thicker pavers consume far more. Buy a little extra joint sand, because you will lose some to cleanup and want a reserve for topping off joints after the first year. Base material is the biggest quantity by far, so calculate your square footage times the compacted depth carefully.
Applying Polymeric Sand Correctly
Polymeric sand rewards careful application and punishes shortcuts. The pavers and joints must be completely dry when you start, or the polymers will activate prematurely and leave a hazy residue on the paver faces that is a nightmare to remove. Sweep the sand diagonally across the pavers to fill every joint, then use a plate compactor to settle it and add more until the joints are full to just below the paver chamfer.
The critical final step is the most misunderstood: sweep and blow every last grain of sand off the paver surfaces before wetting. Any polymeric sand left on top will harden into a stubborn film. Only then mist the joints with a fine spray, not a blast, activating the polymers without washing the sand out. Follow the bag’s watering instructions exactly, and let it cure fully before walking on the patio.
Common Mistakes to Avoid
The biggest error homeowners make is using the wrong sand in the wrong layer, especially substituting fine play sand for the coarse bedding sand, which guarantees a wavy, shifting patio. The second is under-building or under-compacting the gravel base, which leads to settling. The third is applying polymeric sand on wet pavers or failing to clean the surface before watering, which leaves that dreaded haze.
Maintaining Paver Joints Over Time
Even the best joint sand needs occasional attention to keep a patio looking sharp. Over years, weather, foot traffic, and pressure washing can erode joint sand, leaving gaps that invite weeds and let pavers shift. Inspect your joints each spring and top off any that have dropped below the paver chamfer. With polymeric sand, you sweep in fresh material, compact it, clean the surface, and re-mist to reactivate the polymers, restoring a tight, locked joint.
Be gentle when pressure washing a paver patio, since an aggressive nozzle blasts the joint sand right out and undoes the polymeric bond. Use a fan tip, keep the wand moving, and hold it at a shallow angle rather than digging straight into the joints. If you do wash out sand, plan to re-sand afterward. This light annual upkeep keeps weeds and ants from gaining a foothold and preserves the interlock that makes the whole patio behave as one solid surface.
Edge Restraints: The Missing Piece
Sand alone will not hold a patio together at its perimeter, which is where edge restraints come in. Without a solid edge, the outer pavers gradually spread outward under load, opening gaps that let the whole field creep and the joint sand wash away. Plastic paver edging spiked into the compacted base along the patio’s perimeter locks the edges in place and is invisible once soil or grass covers it.
For a more permanent edge, some installations use a concrete or mortared border, though rigid edges must still allow drainage. Whatever method you choose, install the edge restraint before or immediately after your final compaction, spiking it firmly into the base rather than just the bedding sand. This single component, often skipped by DIYers, is what keeps the perfect patio you built from slowly migrating outward and pulling its joints apart season after season.
Sand and the Final Compaction Step
The order of operations at the end of the job matters as much as the materials. After laying all the pavers into the screeded bedding sand and installing edge restraints, you run a plate compactor over the entire surface, ideally with a rubber pad or a piece of old carpet to protect the paver faces. This vibrates the pavers down into the bedding sand and locks the field. Only after this compaction do you sweep in the joint sand and compact again to settle it.
Take the time to use crushed paver base for the foundation, coarse concrete sand for bedding, and polymeric sand for the joints, and compact properly at each stage. Choose your patio paver sand with each layer’s specific job in mind, and your patio will stay flat, tight, and weed-free for decades, rewarding the extra care with years of low-maintenance outdoor living.