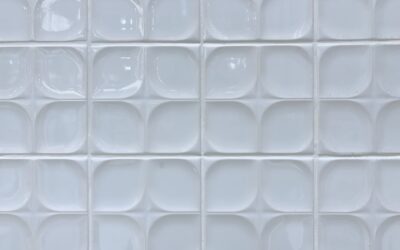
A pedestal sink looks elegant and saves space, but it leaves you with a small problem: there’s no countertop to anchor a traditional backsplash. Choosing the right pedestal sink backsplash means protecting the wall from splashes while working with that narrow, freestanding footprint. The good news is you have several attractive options, from real tile to renter-friendly peel-and-stick, and each suits a different budget and skill level.
Part of our Kitchen Remodeling guide — explore the full guide →
Why a Pedestal Sink Needs a Backsplash at All
Without a counter and the usual short backsplash ledge, the wall directly behind and beside a pedestal sink takes the full brunt of splashing, toothbrush spray, and hand-washing. Over time that moisture damages paint, breeds mildew, and stains drywall. A backsplash gives you a wipeable, water-resistant zone that keeps the wall clean and adds a designed focal point to an otherwise plain stretch of wall.
Sizing the Backsplash for a Pedestal Sink
Because there’s no counter to define the width, you decide how far the backsplash spreads. A common approach is to make it a bit wider than the sink basin, roughly the width of the bowl plus a few inches on each side, and tall enough to catch splashes, often 18 to 30 inches up from the sink. Some homeowners go bold and run the backsplash floor to ceiling as a full accent wall behind the sink, which turns the lack of a counter into a design opportunity rather than a limitation.
Option 1: Small Tile
Tile is the most durable and timeless choice. Small tiles work especially well behind a pedestal sink because their scale suits the compact area and they’re easy to cut around the sink and plumbing.
- Mosaic sheets (penny round, hexagon, or small squares) cover the area quickly and add texture and pattern.
- Subway tile in a 3-by-6 or smaller format gives a classic, clean look that fits any style.
- A vertical tile panel just behind the sink, framed by painted wall, creates a niche-like focal point.
Use mastic adhesive on the dry wall area (reserve thinset for any spots near direct water), seal the grout, and caulk where the tile meets the sink. Tile is the most water-resistant and longest-lasting option, ideal if this is your forever bathroom.
Option 2: Peel-and-Stick
For renters, quick refreshes, or DIYers who’d rather skip mortar and grout, peel-and-stick backsplash products are a strong choice. Modern peel-and-stick tiles come in gel, vinyl, and metal-look versions that convincingly mimic real tile.
- Fast and clean install: Cut with scissors or a utility knife and press onto a clean, smooth wall, no tools required.
- Removable: Many lift off without damaging paint, perfect for rentals.
- Affordable: A whole pedestal-sink backsplash can cost well under $50.
The honest caveat: peel-and-stick is splash-resistant, not fully waterproof, so seal the edges with a bead of clear caulk and avoid placing it where it gets soaked directly. For a low-splash powder room sink, it holds up nicely.
Option 3: Paint
The simplest and cheapest option is a durable, washable paint. A semi-gloss or satin bathroom paint, ideally one with mildew resistance, creates a wipeable surface that resists splashes for a powder room or low-use sink. You can even create a faux backsplash by painting a defined rectangle or color block behind the sink, or add a stencil pattern for visual interest. Paint won’t match tile for waterproofing, but for a guest bath that sees light use, it’s a budget-friendly and easily refreshed solution.
How to Choose the Right Option
- For a main, high-use bathroom: Go with small tile for maximum durability and water resistance.
- For a rental or quick update: Choose peel-and-stick for easy, damage-free install and removal.
- For a low-use powder room on a tight budget: A semi-gloss painted backsplash is perfectly adequate.
- For a design statement: Run tile or peel-and-stick floor to ceiling behind the sink as an accent wall.
Finishing Touches
Whatever material you pick, caulk the seam where the backsplash meets the wall edges and the sink to seal out moisture. Center the design on the sink basin so it looks intentional. If your pedestal sink sits against an outlet or light fixture, plan the layout around it for a clean, professional result. A pivoting mirror or sconces above can frame the backsplash and complete the vignette.
Design Ideas to Make It Stand Out
Because a pedestal sink leaves so much open wall, the backsplash becomes a real design opportunity rather than an afterthought. A few approaches that look intentional and polished:
- Vertical accent strip: Run a narrow column of tile floor to ceiling directly behind the sink, framed by paint, to draw the eye up and make a small bathroom feel taller.
- Patterned moroccan or encaustic tile behind the sink turns a plain wall into a focal point.
- A framed niche look using a contrasting tile rectangle, like a piece of art behind the faucet.
- Continuous color story: Match the backsplash tile to the floor tile for a cohesive, designer feel.
- Pair with sconces mounted on either side of a mirror to bracket the backsplash and complete the vignette.
Working Around the Plumbing
One quirk of a pedestal sink is the exposed wall behind the pedestal column, where supply lines and the drain often show. When you install a backsplash, decide whether to tile behind the pedestal or stop the backsplash at the sink basin level. Many homeowners extend the backsplash material down behind the pedestal to hide the plumbing wall and create a cleaner look. If you’re using peel-and-stick or tile, measure carefully around the pedestal base and any visible pipes, and seal the cut edges with caulk. A little planning here prevents an awkward gap between the finished backsplash and the bare wall behind the column.
The Bottom Line
A pedestal sink backsplash solves the no-counter problem with style. Small tile gives you durability and a timeless look, peel-and-stick offers a fast and removable update, and washable paint covers a tight budget. Size it to the sink, seal the edges, and you’ll protect your wall while turning a plain space behind the sink into a polished design feature.