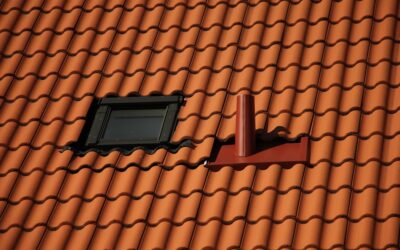
That pipe sticking up out of your shingles is doing more than you think. A plumbing vent pipe roof penetration is what lets your drain system breathe, and without it your sinks glug, your traps siphon dry, and sewer gas finds its way into the house. I get calls every year from homeowners who think the pipe is decorative or, worse, who capped it to stop a draft and then wondered why the whole bathroom started to smell. This is one of the most misunderstood parts of a house, and one of the most common leak points on any roof.
Part of our Roofing guide — explore the full guide →
Here is how the vent stack actually works, what the code requires for height and clearances, how the flashing boot keeps water out, and how to fix the two problems that plague these pipes: leaks at the penetration and frost closing the opening in cold climates.
- What the Vent Pipe Actually Does
- Code Heights and Clearances
- Sizing the Vent Stack
- Flashing the Penetration Right
- Fixing a Leaking Vent Boot
- Frost Closure in Cold Climates
- Maintenance and When to Call a Pro
- Air Admittance Valves as an Alternative
- Preventing Leaks Before They Start
- Plumbing Vent Repair: Diagnosing the Problem and Working Safely
What the Vent Pipe Actually Does
Every fixture drain has a P-trap, the U-shaped bend that holds a plug of water to block sewer gas. When you drain a tub or flush a toilet, that rushing water pushes air ahead of it and pulls a vacuum behind it. Without a vent, the vacuum sucks the water right out of nearby traps, and once a trap is empty, nothing stops the gas from the sewer or septic system from rising into your rooms.
The vent pipe is the pressure-relief valve for the whole drain-waste-vent system. It runs up from the drain lines, ties the branches together, and exits through the roof, giving air a path in and out. Air enters at the top to break the vacuum behind draining water and lets sewer gases escape harmlessly above the house instead of bubbling back through your fixtures. No vent, no reliable trap seal.
Code Heights and Clearances
The dimensions here are not suggestions; they exist to keep gas away from you and to keep the pipe from freezing shut. Under the International Residential Code, a vent terminal must extend at least 6 inches above the roof surface. In snow country, most local codes bump that up so the pipe clears the typical snow depth, often 12 inches or more, so a drift never buries the opening.
Clearance from openings matters just as much:
- Keep the vent at least 10 feet horizontally from any window, door, or air intake, or run it at least 3 feet above the opening if it must be closer.
- If the terminal is within 10 feet of a walkable roof deck or a vertical wall, extend it well above so gas dissipates.
- Terminate a minimum of 6 inches above the roof, more where snow accumulates.
These numbers keep smelly, and in rare cases hazardous, sewer gas from being drawn back into the living space through a nearby window.
Sizing the Vent Stack
Vent size follows the drainage load it serves. The main stack in a typical house is usually 3-inch or 4-inch pipe where it exits the roof, while individual fixture vents may be 1-1/2 or 2 inches before they tie into the larger stack. Undersizing the vent starves the system of air and brings back the glugging and slow drains you were trying to avoid.
In very cold regions, plumbers deliberately increase the pipe diameter as it passes through the attic and roof, stepping a 2-inch vent up to 3 or 4 inches near the top. The larger opening resists frost closure, which I will get to, and gives moist air room to escape before it condenses and freezes at the tip. If you are adding a bathroom or reworking drains, get the vent sizing right on paper before you cut anything.
Flashing the Penetration Right
The vent pipe is a hole in your roof, and holes leak if they are not flashed correctly. The standard solution is a pipe boot: a metal or plastic base flange with a flexible rubber or neoprene collar that seals around the pipe. The flange slips under the shingles on the uphill side and laps over the shingles below, so water sheds over it, never behind it.
The weak link is almost always the rubber collar. Sun and heat degrade neoprene, and after 10 to 15 years it cracks, curls, and lets water run straight down the pipe into the attic. When I inspect a roof, a dried-out vent boot is one of the first leaks I look for. Do not caulk over a failed boot and call it fixed. Replace it, or slip a one-piece rubber retrofit boot over the pipe and seal it to the roof if you are not ready to lift shingles.
Fixing a Leaking Vent Boot
If you have a water stain on the ceiling that lines up with a vent stack, the boot is the prime suspect. A proper repair means lifting the shingles above the flange, removing the old boot, sliding in a new one under the upper shingles and over the lower ones, and fastening with roofing nails sealed with a dab of roofing cement. Reset the shingles so the flange is covered on top and exposed on the bottom.
For a faster fix that buys years, an EPDM retrofit boot slides over the existing pipe and clamps down, sealing to the roof surface with a bead of polyurethane sealant. It is not as clean as a full reflash, but it stops the leak in 20 minutes. Whatever you do, resist the urge to just smear tar around the base. Tar cracks in a season and traps water underneath, and you will be back on the roof next spring.
Frost Closure in Cold Climates
In deep cold, warm, humid air rising up the vent hits the freezing pipe near the roof and condenses. That moisture freezes to the inner wall, and over a hard cold snap the ice can grow until it seals the pipe completely. Once the vent is capped by ice, traps start siphoning and drains slow down, usually during the coldest week of the year when you least want a plumbing problem.
The prevention is that oversized terminal I mentioned: stepping the pipe up to 3 or 4 inches through the roof so it takes far longer to ice shut. Keeping the attic run of pipe insulated where practical also helps by delaying condensation. If a vent does freeze closed, pouring warm water down it from the roof or running warm air up from inside will reopen it, but the real fix is the larger diameter terminal installed before winter.
Maintenance and When to Call a Pro
Vent stacks are low maintenance, but they are not zero maintenance. Once a year, from the ground or a ladder, check that the terminal is open and not blocked by a bird nest, leaves, or a tennis ball a kid lobbed onto the roof. A blocked vent produces the same symptoms as a missing one: glugging drains, slow fixtures, and the occasional whiff of sewer gas. A vent screen or cap keeps critters and debris out without restricting airflow.
Reflashing a boot or clearing a simple blockage is within reach for a handy homeowner comfortable on a roof. Rerouting a stack, correcting a code clearance, or chasing a phantom sewer-gas smell is plumber territory, because the venting ties into the whole drain-waste-vent design. Treat that pipe with respect. It is quietly protecting your air quality every time water goes down a drain.
Air Admittance Valves as an Alternative
Not every fixture can be tied to a stack that runs all the way through the roof, especially in a kitchen island or a remodeled bathroom far from the main vent. That is where an air admittance valve, often called an AAV or a Studor vent, comes in. It is a one-way mechanical valve that opens to let air into the drain when a fixture drains and pulls a vacuum, then snaps shut to block sewer gas from escaping into the room. It vents the fixture without a pipe penetrating the roof.
AAVs are useful, but they are not a universal replacement for a roof vent. Local codes vary on where they are allowed, and every drain system still needs at least one open vent to the outside to relieve positive pressure, which an AAV cannot do since it only opens inward. Install an AAV within the manufacturer’s height rules above the trap arm, keep it accessible for the day it wears out, and never bury it inside a sealed wall. For an island sink, though, a code-approved AAV solves a venting problem that would otherwise mean tearing open a roof.
Preventing Leaks Before They Start
The smartest move with any roof penetration is to inspect it before it fails. Once or twice a year, look at every vent boot on the roof, from a ladder or with binoculars from the ground. The rubber collar is the part that dies first, so watch for cracks radiating from the pipe, a collar that has curled up at the edge, or daylight and gaps where it meets the pipe. Catching a hardening boot and swapping it costs a few dollars and twenty minutes. Missing it costs a ruined ceiling and a wet attic.
When you reroof, upgrade to a longer-life boot rather than reusing the cheapest neoprene. All-metal storm collars, adjustable lead flashings, and boots with a UV-stable silicone collar last far longer than a bargain rubber one that bakes out in a decade. Seal the fasteners, lap the flashing correctly under the upper shingles, and you buy yourself years of worry-free service from the one hole in your roof that has to stay open.
Plumbing Vent Repair: Diagnosing the Problem and Working Safely
Most plumbing vent repair jobs fall into three groups: a leak where the pipe meets the roof, a blockage at the top of the stack, or damage somewhere inside the house. Figuring out which one you have before anyone climbs a ladder saves time and keeps the risk low.
Match the Symptom to the Likely Cause
- Water stain on a ceiling near the stack: usually a cracked boot collar or lifted flashing at the roof.
- Gurgling drains, slow fixtures or a toilet that bubbles when a tub drains: often a blocked vent opening or a vent line that was never connected correctly.
- Sewer smell indoors with traps full of water: could be a cracked vent pipe in the attic or a wall, a failed joint or a loose connection.
- Problems only during hard freezes: points to ice building up inside the terminal.
Start From the Attic and the Ground
Use binoculars from the yard to look at the boot and the open end of the pipe. In the attic, bring a flashlight and look along the vent pipe for water trails, dark staining on the roof deck, cracked fittings or a pipe that has pulled apart at a joint.
Roof and Ladder Safety
If the work requires climbing, set yourself up carefully:
- Use a ladder rated for your weight plus tools, set on firm, level ground at a safe angle, and extend it about 3 feet past the roof edge.
- Have a helper hold the ladder and stay nearby while you are up.
- Work only on a dry, calm day, wear shoes with soft, grippy soles and keep tools in a bag or on a line.
- Stay clear of overhead power lines.
Leave the job to a roofer or plumber if the roof is steep, the house is two stories or taller, the shingles are brittle or wet, or you feel uneasy at height. Pros bring fall protection and roof anchors.
Clearing a Blocked Vent
From a safe position, remove visible debris such as leaves or a nest by hand with gloves on. For a deeper clog, a plumbing snake fed down from the top usually clears it. Avoid chemical drain cleaners in a vent, and never cap or seal the opening to stop odors or drafts, since the drain system needs that airflow.
Repairing Cracked Pipe Inside the House
A cracked vent section in the attic or a wall has to be cut out and replaced with properly joined fittings that match the existing pipe material. Because vent work connects to the whole drain system and may need a permit, a licensed plumber is the right call for replacing pipe, adding a vent or correcting a vent that does not meet code.