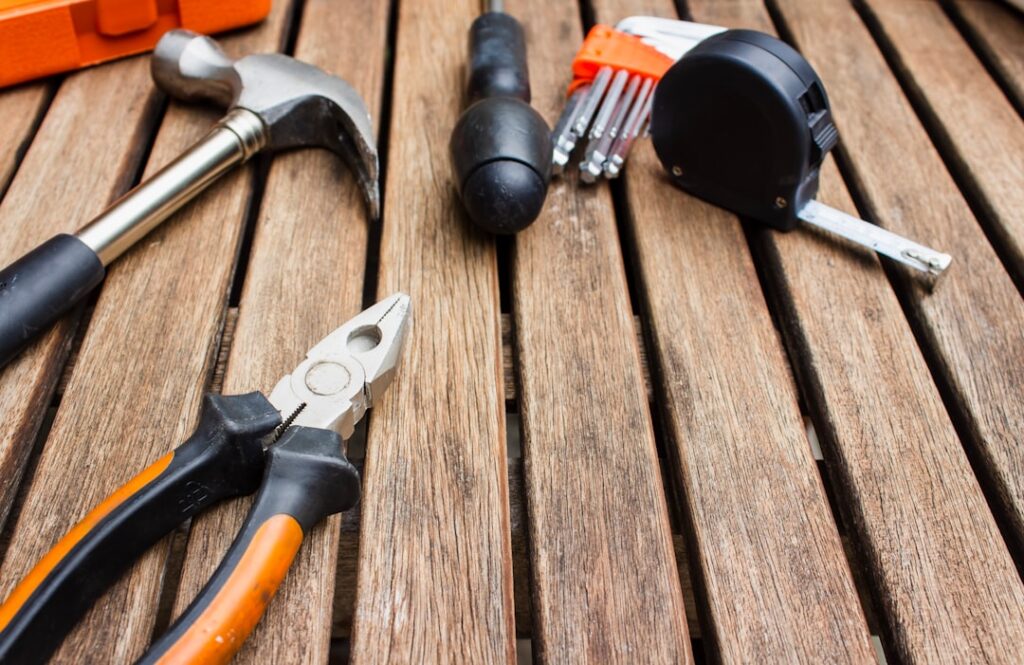
The difference between a laminate floor that looks factory-installed and one that looks like a weekend guess usually comes down to the kit. Professional laminate flooring tools aren’t exotic or expensive, but each one solves a specific problem — tight joints, clean cuts, snug last rows, and gaps that disappear under the trim. Buy or rent the right handful and even a first-time installer can lay a floor that passes for pro work. Here’s the complete list, what each tool does, and what you’ll spend.
Layout and Measuring Tools
Every clean install starts with accurate layout. Skip this and you’ll finish with a sliver row against the far wall or a pattern that drifts off square.
- 25-foot tape measure ($10–$20): The backbone of every measurement. A wide, stiff blade reaches across rooms without buckling.
- Speed square or combination square ($8–$25): Marks fast, accurate 90-degree and 45-degree cut lines on planks.
- Chalk line ($8–$15): Snaps a straight reference line to keep your first rows dead straight across the room.
- Carpenter’s pencil or fine marker ($3–$6): Wide lead survives rough plank surfaces without snapping.
- Moisture meter ($30–$120): Checks subfloor moisture before you start; concrete over the limit will ruin the floor later.
Take five minutes to measure the room’s width in planks. If the final row would be under 2 inches, trim your first row so you finish with two balanced rows instead of an ugly sliver.
Cutting Tools
Cutting is where most amateurs struggle. Chipped edges and ragged ends show, so match the tool to the cut.
- Laminate cutter / guillotine ($60–$140): A manual shear that snaps planks cleanly with no dust and no noise. Ideal for straight crosscuts and a favorite on job sites for speed.
- Miter saw with fine-tooth blade ($120–$300): Fast, precise crosscuts and angle cuts. Use a blade with 60 or more teeth to reduce chipping.
- Jigsaw ($40–$150): Cuts curves and notches around pipes, door casings, and vents. Use a reverse-tooth or laminate blade to keep the finished face clean.
- Table saw or circular saw ($100–$400): Rips planks lengthwise for the final row and around cabinets.
- Oscillating multi-tool ($50–$150): Undercuts door jambs and casings so planks slide underneath for a professional finish.
Cut with the decorative side down on a circular or table saw, and decorative side up on a miter saw or jigsaw, so any chipping lands on the hidden face.
Installation Tools: The Core Kit
These are the tools specifically designed for locking laminate together tightly and cleanly. They’re inexpensive and make the biggest visible difference.
- Tapping block ($8–$20): A shaped block you tap to close joints without damaging the plank’s locking edge. Never hammer a plank directly.
- Pull bar ($10–$25): A flat steel bar that hooks the last plank in a row and pulls the joint tight where you can’t swing a tapping block.
- Spacers ($6–$12 per pack): Hold the 1/4-inch to 3/8-inch expansion gap around walls so the floor can move with humidity.
- Rubber mallet ($10–$20): Delivers controlled taps to the block without cracking the core.
- Installation kit ($20–$35): Bundles a tapping block, pull bar, and spacers, often the cheapest way to get all three.
The expansion gap is the single most overlooked detail. Without it, a floor can buckle as it expands in summer humidity. Spacers make it automatic.
Underlayment and Prep Tools
A flat, clean, quiet subfloor is half the job. These tools handle prep.
- Utility knife ($8–$15): Trims underlayment and scores tricky cuts. Keep spare blades on hand.
- Straightedge or 6-foot level ($20–$50): Finds high and low spots; the subfloor should be flat within 3/16 inch over 10 feet.
- Floor scraper ($15–$30): Removes old adhesive, paint, and debris from the subfloor.
- Shop vacuum ($60–$150): Clears grit before and during the install so nothing telegraphs through the planks.
Finishing and Safety Tools
The last details separate a tidy install from a sloppy one, and they keep you safe.
- Undercut saw or oscillating tool for door jambs, as noted above
- Brad nailer or finish nailer ($90–$250) for installing baseboard and quarter-round over the expansion gap
- Knee pads ($15–$40) — you’ll spend hours on the floor; your joints will thank you
- Safety glasses and hearing protection ($10–$30) for any powered cutting
- Dust mask or respirator ($10–$30) when sawing, since laminate dust is fine and irritating
Buy or Rent? A Cost Breakdown
For a one-time install, you don’t need to own everything. A sensible split:
Buy the inexpensive core kit — tapping block, pull bar, spacers, and mallet for around $30 to $50 total — plus a utility knife, tape, and square you’ll use again. Rent the big-ticket items like a miter saw or table saw for $40 to $70 a day if you don’t already own them. A manual laminate cutter is worth renting or buying at $60 to $140 if you have a large area, since it dramatically speeds up straight cuts and produces zero dust.
All in, a homeowner tackling a single room can outfit for roughly $80 to $200 by buying the cheap essentials and renting the power tools. That’s a fraction of the $2 to $5 per sq ft you’d pay a pro to install, and the tools pay for themselves on the first room.
How the Core Tools Work Together
Understanding the workflow makes the tool list click. You start by prepping and measuring: the moisture meter and level confirm the subfloor is ready, the chalk line sets your straight starting reference, and the tape and square lay out your rows so you avoid a sliver against the far wall. Then you roll out underlayment, trimming it with the utility knife.
As you lay each row, the tapping block and mallet close the long-edge joints, and the pull bar handles the ends and last row where the block won’t fit. Spacers hold the expansion gap along every wall while you work. When you reach doorways, the oscillating tool undercuts the jamb so the plank slides beneath the casing for a clean, professional line — a detail that instantly separates good installs from amateur ones. Finally, the finish nailer sets baseboard and quarter-round to hide the expansion gap. Each tool has a moment, and skipping one usually shows up as a visible flaw in the finished floor.
Tools You Can Skip (and Common Substitutes)
Not every “must-have” list item is truly necessary. If money is tight, here’s where you can trim without hurting the result:
- Skip the guillotine cutter for a small room and use a fine-tooth miter saw you likely already own
- Skip the brad nailer and hand-nail baseboard, or use construction adhesive for quarter-round
- Substitute a scrap plank as a tapping block in a pinch, though a real block protects the locking edge far better
- Borrow or rent the miter saw and jigsaw rather than buying for a one-time job
What you should never skip: spacers, a pull bar, and a proper tapping block. They’re cheap, they protect the floor’s locking system, and they’re the difference between tight joints and gaps that collect dirt.
Final Advice
You don’t need every tool on this list for a small bedroom, but the core installation kit and a quality saw are non-negotiable for a clean result. Invest in the tapping block, pull bar, and spacers, respect the expansion gap, and match your cutting tool to each cut. With the right professional laminate flooring tools in hand, the job goes faster, the joints close tighter, and the finished floor looks like you paid someone to do it.
Prefer to explore on your own?
See how new flooring looks in your actual room in seconds — free, no signup.
Try the free Floor Studio →