Track lighting once meant a clunky metal rail bolted across the ceiling, hard to ignore and harder to love. A modern recessed track lighting system solves that by dropping the track into a channel flush with the ceiling, so all you see are the adjustable heads and clean lines. You get the flexibility of aimable spotlights with the discreet look of recessed cans, a combination that works beautifully in kitchens, galleries, and open-plan living spaces.
The appeal is real, but so is the planning. Recessed track requires a drywall channel, careful load calculations, and a layout that actually lights what you want to highlight. This guide covers the system types, how to plan a run, and what installation involves so you can decide whether it fits your space and your skills.
What Sets Recessed Track Apart
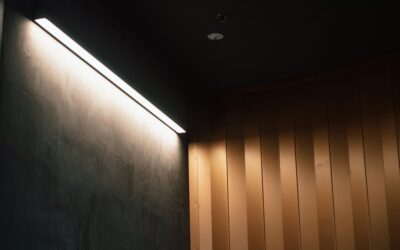
Standard surface-mount track sits proudly below the ceiling on brackets. A recessed system installs the track inside a slot cut into the drywall, so the rail body disappears and only a thin trim and the movable heads remain visible. From most angles you see a series of small directional lights that appear to float, with none of the industrial hardware.
That clean profile is the main reason designers specify it in higher-end rooms. It delivers the same adjustability as surface track, letting you slide heads along the run and pivot them toward art, counters, or a reading chair, while reading as elegantly as fixed recessed downlights. The trade-off is a more involved install, since you are cutting into the ceiling rather than screwing to its surface.
Types of Track Systems
Before buying anything, understand that track comes in incompatible standards. The three connector types are not interchangeable, so heads from one system will not fit another.
- H-type (Halo): a widely available three-wire single-circuit standard, easy to find heads for.
- J-type (Juno): another common single-circuit system with a different connector geometry.
- L-type (Lightolier): less common, older, and harder to source parts for.
Beyond connector type, you can choose single-circuit track, where every head shares one switch, or multi-circuit track that lets you control groups of heads separately. There is also low-voltage track, which runs 12 volts through a transformer for small precise heads, versus line-voltage track that carries 120 volts directly. Pick the standard first, then buy all your components, the track, connectors, and heads, within that same family.
Planning Your Layout
Good track lighting starts with knowing what the light is for. Decide whether each run provides general ambient light, task light over a work surface, or accent light aimed at specific features. Those goals dictate head spacing and placement.
As a rule of thumb, space heads 18 to 24 inches apart for even general lighting, and closer where you want a bright task zone. For accent lighting on wall art, position the track 2 to 3 feet out from the wall and aim heads at roughly a 30-degree angle to avoid glare and hot spots. Sketch the room to scale, mark what you want to highlight, and plot head positions before you commit the track length.
Calculating Load and Length
Every track has a maximum wattage rating you must not exceed, typically printed on the packaging. Add up the wattage of all the heads you plan to hang and confirm it stays under that limit. This is far easier with LED heads, which sip 8 to 15 watts each versus 50 watts for old halogen, letting you hang more lights on a single run without overloading it.
Track sells in standard lengths, commonly 2, 4, and 8 feet, and you can join sections with connectors, including straight, L, T, and flexible pieces to route around a room. Measure your ceiling run and buy slightly long, since you can trim line-voltage track to fit. Plan where the power feed enters, usually at one end or the middle via a floating feed.
Wiring and Power Options
A recessed track needs a power source, and you have two paths. The cleanest is hardwiring the track to a ceiling junction box controlled by a wall switch, ideally on a dimmer for flexibility. This is what makes a recessed system look built-in, and it is how most permanent installations are done.
Because you are working inside the ceiling and connecting to household wiring, this is where many homeowners bring in an electrician. Running a new circuit, adding a switch loop, or tapping an existing box while meeting code and load limits is genuinely electrical work. If you are simply replacing an existing hardwired fixture at the same location, a confident DIYer can manage it, but always cut power at the breaker and verify with a tester first.
Installation Overview
Installing recessed track is more carpentry than surface track. The basic sequence looks like this:
- Locate ceiling joists and mark the channel path, keeping it clear of joists where the track body must recess.
- Cut the drywall slot to the manufacturer’s specified width for the recessed housing.
- Secure the mounting frame or channel to blocking or joists so it sits flush with the finished ceiling.
- Run and connect the supply wiring to the track’s power feed with the breaker off.
- Snap the track into the channel, patch and finish the drywall edges to the trim.
- Clip in the heads, aim them, and restore power to test.
Because it involves cutting the ceiling and matching drywall, budget more time than a surface install, often a full day for a single room including patching and touch-up.
Choosing Heads and Bulbs
The heads do the visible work, so pick them with care. Look for LED heads in the 2,700 to 3,000 Kelvin range for warm, inviting light in living areas, or 3,500 to 4,000 Kelvin for crisp task light in a kitchen. A high color rendering index of 90 or above keeps colors accurate, which matters over food prep and near artwork.
Beam angle controls the effect: a narrow 15 to 25 degree spot punches a tight beam onto art, while a wider 40 degree flood washes a broader area. Mix beam angles on the same track to layer accent and general light. Choose dimmable heads and a compatible LED dimmer so you can dial the mood from bright work light down to a soft evening glow.
Maintenance and Adjusting Over Time
One of the quiet joys of a recessed track system is how it adapts as your needs change. Rearrange the living room, hang a new painting, or turn a corner into a reading nook, and you simply slide the heads along the track and re-aim them, no rewiring or new holes required. That flexibility is the whole reason to choose track over fixed downlights, so use it.
Maintenance is minimal. LED heads last tens of thousands of hours, but when one eventually dims or fails, most systems let you unclip a single head and replace it without touching the rest. Dust the heads occasionally, since a film of dust on the lens dulls the output, and check that the heads still lock firmly in their aimed position, tightening any that have drifted loose. Because the track carries the power along its length, you can also add heads later if the system’s wattage rating has headroom, expanding the lighting as a room evolves.
Cost and What to Budget
Pricing a recessed track project depends on length, head count, and whether you hire out the wiring. The track sections themselves run roughly $20 to $60 per section depending on the standard and quality, and individual LED heads range from $25 to $100 each based on their optics and brand. A typical room with 8 to 12 feet of track and six to eight heads lands somewhere between $300 and $900 in parts.
Installation is where costs diverge. A confident DIYer replacing an existing hardwired fixture spends only on materials, while cutting the drywall channel, patching, and finishing adds time even for the handy. Bringing in an electrician to run a new circuit and switch, plus a drywaller for a clean recessed channel, can add several hundred dollars in labor. Weigh that against the polished built-in look, which no surface-mounted system can match, and for many homeowners the recessed route justifies its premium in the rooms that matter most.
Is It the Right Choice
A recessed track system rewards rooms where you want both a clean ceiling and the freedom to re-aim light as your furniture, art, or needs change. It costs more and installs harder than surface track or simple can lights, but nothing else combines that discreet look with full adjustability. If you value the ability to spotlight a painting today and a reading chair next year without cutting new holes, a recessed track lighting system is worth the extra effort. Plan the layout on paper, respect the load limits, and bring in a pro for the wiring if the circuit work is beyond your comfort.