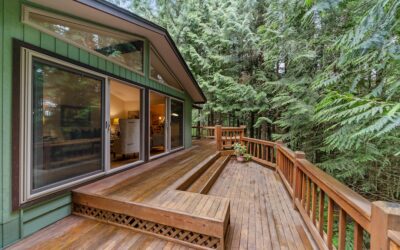
A deck that feels bouncy or shows a few soft boards is not necessarily a teardown candidate, but ignore the warning signs for one more summer and you will be writing a $20,000 check instead of a $400 one. Repairing a deck is one of the highest-payback DIY projects in the home because most failures are local: a single rotted board, a loose railing post, a missing joist hanger nail. Catch each issue early and the structure can easily run another 15 to 25 years without a full rebuild. The trick is knowing what to fix yourself and what to call a contractor about.
Part of our Decks & Outdoor guide — explore the full guide →
Start With a Top-to-Bottom Inspection
Before buying lumber, walk the entire deck with a flathead screwdriver and a notebook. Probe every board, ledger connection, joist hanger, post base, and railing connection. Anywhere the screwdriver sinks more than 1/4 inch into wood is soft and either rotted or actively decaying.
Pay closest attention to four hot spots: the ledger board where the deck meets the house, the corners of each post where moisture collects, the cut ends of joists that overhang the beam, and the bottom edges of rim joists. Roughly 80 percent of deck failures start in one of those four zones.
The Most Common Repairs
About 90 percent of deck repair calls fall into one of five categories. Most are weekend jobs for an average DIYer with basic tools.
- Replacing rotted or split deck boards
- Tightening or replacing wobbly railing posts
- Adding or replacing missing joist hangers
- Re-securing a loose ledger board
- Sanding and resealing the deck surface
Anything beyond these five (sistering joists, replacing a beam, jacking the structure) starts edging into contractor territory unless you have framing experience.
Replacing a Rotted Deck Board
This is the most common single repair. A 5/4 by 6 pressure-treated board runs about $14 to $22 in 12-foot lengths at any Home Depot or Lowes. Composite Trex Enhance or TimberTech boards run $35 to $65 for the same length.
- Unscrew the bad board with a drill and a #2 square or T25 Torx bit.
- If screws strip out, use a reciprocating saw with a 6-inch demo blade to cut the board in half. Pry each half up with a pry bar.
- Check the joists underneath. Soft joist top? Treat with a wood preservative like Copper Brown or Bora-Care before installing the new board.
- Cut the new board 1/8 inch shorter than the gap to allow for seasonal expansion.
- Secure with two #10 by 3-inch coated deck screws into each joist. Predrill near the ends to prevent splitting.
If a single board has rotted, examine the boards on either side closely. Water rarely stops at one piece.
Fixing a Wobbly Railing Post
A loose railing is a code violation and a serious safety risk. The IRC requires guardrails to withstand 200 pounds of horizontal force at any point. Loose posts typically fail because the original lag screws were too short or attached to a rim joist that has since rotted.
The proper fix uses a Simpson Strong-Tie DTT2Z hold-down at the post base, which sells for about $25. Through-bolt the post to the joist with two 1/2-inch carriage bolts. This connection meets code and will hold long after you sell the house. Surface-mount post bases like the Titan Post Anchor work for new construction but are not strong enough for retrofits onto rotted lumber.
Adding or Replacing Joist Hangers
Older decks were sometimes built with toenails only, no hangers. A Simpson Strong-Tie LUS26 hanger ($2.50 each at Home Depot) is rated for over 600 pounds. Slide the hanger under the joist, drive the included 10d Strong-Drive nails (or 1-1/2-inch SDS screws) through every nail hole, and the connection becomes essentially permanent.
Use joist hanger nails or structural screws specifically rated for the hanger. Drywall screws will snap under load and are explicitly banned by code for structural connections.
Re-Securing a Loose Ledger Board
The ledger is the deck-to-house connection, and it is the single most failure-prone part of any deck. Original construction often used nails or undersized lag screws, both of which loosen over time. Modern code requires structural through-bolts or specifically engineered ledger screws like the FastenMaster LedgerLOK ($1.50 each in bulk).
Drill 5/16-inch pilot holes through the ledger, rim joist, and into the house framing. Drive one LedgerLOK every 16 inches in a staggered pattern, top and bottom. Add Z-flashing above the ledger and a sheet of Vycor Deck Protector behind it to keep water out. This single upgrade can rescue a deck that felt borderline before.
Sanding and Resealing
A sound but weathered deck surface needs sanding and a fresh coat of sealant every 2 to 4 years. Rent a 6-inch random orbital sander from Home Depot for about $50 a day and load it with 60-grit paper. Sand in the direction of the grain, then vacuum the entire surface.
Apply Penofin Penetrating Oil, Cabot Australian Timber Oil, or Behr Premium Solid Color Stain depending on how much you want to hide. Coverage runs 200 to 300 square feet per gallon. A 300 square foot deck typically takes 2 gallons and about 4 hours of brushing or rolling.
When to Call a Pro
Some signs point to structural issues that exceed DIY scope. Sagging in the middle of the deck, multiple soft joists, visible separation between deck and house, and any movement under foot all warrant a professional inspection. Most contractors charge $150 to $300 for a structural assessment and provide a written punch list. That report often saves money even if you do the repair work yourself.
Budget Expectations
Material costs for typical DIY repairs:
- Replace 4 deck boards: $80 to $250
- Two new railing posts with proper hardware: $120 to $200
- Ten new joist hangers with nails: $40 to $60
- Full ledger upgrade with flashing: $150 to $300
- Sand and reseal 300 sq ft: $90 to $180
A full weekend of focused work usually addresses every common repair on a 200 to 400 square foot deck and adds another decade to its useful life. Walk it once, inventory the issues, then knock them out one at a time.