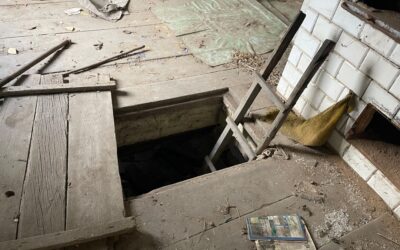
The quickest way to damage an old fieldstone foundation is to patch it with hard portland cement mortar. Repairing a stone foundation built before the 1930s usually means working with the wall’s original design rather than against it: rubble and fieldstone walls were laid with soft lime mortar that flexes slightly and lets moisture escape through the joints instead of through the stone. Swap in rigid cement and the water gets trapped, the stones spall, and the new mortar pops out within a few winters.
For most homeowners, the repair comes down to three jobs. Repoint eroded joints with a lime-based mortar, reset or replace stones that have loosened or fallen out, and deal with the water that caused the damage in the first place. A breathable lime parge can then protect the interior or exposed exterior face. What you should not attempt yourself is any wall that is bulging, leaning, cracked through its thickness or showing signs of movement; those need a structural engineer before anyone touches a trowel.
This guide covers fieldstone and rubble foundations in general. If your home sits on dressed sandstone blocks, the stone itself has specific weathering issues, but the lime-mortar principles here still apply.
Repairing a Stone Foundation: Assess Before You Start
Walk the full perimeter inside and out with a flashlight and a notebook. Sort what you find into cosmetic, maintenance and structural categories, because they call for very different responses.
- Cosmetic and maintenance issues: sandy, powdery mortar you can scrape out with a key; joints recessed more than about 1/2 inch; isolated loose stones in an otherwise plumb wall; efflorescence (white salt deposits); damp patches after heavy rain.
- Structural warning signs: a wall that bows inward or outward, visible leaning when you sight along it, stones sliding or rotating out of plane, long stepped cracks, sagging floor framing above, doors and windows that suddenly stick, or active soil washing through the wall.
If anything lands in the second list, stop and call a structural engineer. A bulging rubble wall has lost the interlock between its two faces and core, and pulling stones out to repoint it can trigger a collapse. The engineer will tell you whether the wall can be stabilized with bracing, partial rebuilding or underpinning, and a mason can then work to that plan.
Why Lime Mortar Matters
Historic stone walls were designed so that the mortar is the sacrificial, weaker element. Lime mortar is softer and more vapor-permeable than most stones, so moisture migrates out through the joints and the mortar erodes over decades instead of the stone cracking. Repointing is simply renewing that sacrificial layer.
A modern portland cement mortar reverses the relationship. It is harder and less permeable than many field stones, so water concentrates in the stone, freeze-thaw cycles break the stone faces, and the rigid joints crack when the wall makes its natural seasonal movements. For that reason, preservation masons use natural hydraulic lime (NHL) or a lime-rich mix. A premixed lime mortar mix, typically NHL 3.5 blended with graded sand, is the easiest route for DIY repointing on below-grade foundation walls; your supplier can suggest a strength suited to your stone and exposure.
Tools and Materials
- Lime mortar mix (NHL-based) or hydraulic lime plus clean, sharp, well-graded sand
- Plugging chisel, cold chisel, joint raker and 2-lb hand sledge
- Pointing trowels and tuck pointers in several widths, plus a hawk
- Stiff natural-bristle brushes and a garden sprayer for misting
- Mixing tub and margin trowel, or a paddle mixer on a drill for larger batches
- Replacement stones and small stone shims (pinning stones) if needed
- Burlap or damp sheeting for curing
- Safety gear: safety glasses, gloves (lime is caustic), and an N95 or better yet a P100 respirator
A note on dust: removing old mortar, especially with a grinder, releases respirable crystalline silica from sand and stone. Rake out joints by hand when the mortar is soft enough, which it often is. If you must use a grinder, choose one with a shroud and HEPA vacuum or use wet methods, wear a well-fitted P100 respirator, and keep the area ventilated and closed off from living spaces.
Step-by-Step: Repointing and Resetting Stones
- Rake out the joints. Remove loose mortar to a depth of roughly two to two and a half times the joint width, or until you reach sound material. Work a section at a time, no more than a few square feet, and never rake out both sides of the same stone at once in a weak wall.
- Clean and dampen. Brush out dust and debris, then mist the joints so the dry stone does not suck water out of the fresh mortar. The surface should be damp, not dripping.
- Reset loose stones. Pull any stone that rocks freely, clean the bed, butter it with lime mortar, and push the stone back in, tapping it home. Drive small pinning stones into gaps to wedge it tight. Replace cracked or crumbling stones with a similar field stone of matching size and hardness.
- Pack deep voids first. Fill deep joints in layers about 3/8 to 1/2 inch thick, letting each layer firm up to thumbprint hardness before adding the next. Packing too thick in one pass leads to shrinkage cracks.
- Finish the joint. Fill the final layer flush or slightly recessed from the stone faces. Once it stiffens, strike it with a jointer or knock back the surface with a stiff brush to expose the sand and match the original texture.
- Cure slowly. Mist the work several times a day for at least three days and cover it with damp burlap. Lime sets slowly and fails if it dries too fast, freezes, or bakes in direct sun.
Parging and Moisture Control
Parging is a thin coat of mortar over the wall face. On the interior of a basement it brightens the space and seals dust; on exposed exterior faces it sheds weather. Use a breathable lime parge, applied in two coats about 1/4 inch each, rather than a cement coating or waterproof paint that would trap moisture in the wall.
No mortar repair lasts if water keeps saturating the wall. Before or alongside the masonry work, fix the moisture sources:
- Clean gutters and extend downspouts several feet away from the foundation.
- Regrade soil so it slopes away from the house for the first several feet.
- Repair leaking hose bibs, window wells and cracked walks that funnel water toward the wall.
- Run a dehumidifier in the basement during humid months to keep interior moisture in check.
Persistent water entry may call for exterior drainage or an interior perimeter drain, which is contractor territory.
Troubleshooting
New mortar cracks or falls out
Usually caused by drying too fast, packing layers too thick, or a mix that was too wet. Cure more carefully and build up deep joints in thinner lifts.
Stones keep spalling next to old repairs
Look for earlier cement patches. Hard cement pointing next to stone concentrates moisture and freeze damage; carefully remove it and repoint with lime.
White powder returns on the wall
Efflorescence means water is moving salts through the wall. Brush it off dry, then track down and correct the water source outside.
Sand and grit keep falling out of the joints
Some erosion is normal over decades, but rapid loss points to heavy water flow through the wall. Address drainage first.
Cost Ranges
DIY repointing mostly costs time. Bagged lime mortar mix, hand tools and safety gear usually total a few hundred dollars for a typical basement. Professional repointing by a mason experienced with lime is typically priced per square foot of wall face, and rates climb with the depth of the joints, access and how many stones need resetting. Parging adds a moderate per-square-foot cost. A structural engineer’s site assessment is usually a flat fee in the hundreds of dollars, while stabilization such as bracing, partial rebuilding or underpinning can run into the thousands or tens of thousands depending on the extent of the damage.
When to Call a Mason or Structural Engineer
Hire a structural engineer for any bulging, leaning or displaced wall, for through-wall cracks, or if floor framing above has sagged. Call an experienced stone mason when large sections have failed, when stones must be rebuilt rather than reset, or when you plan to lower a basement floor or add loads above. Ask any mason whether they work with lime mortar; a crew that only uses cement may do more harm than good when repairing a stone foundation.
Frequently Asked Questions
Can I use regular cement mortar on a stone foundation?
It is best avoided. Portland cement mortar is harder and less breathable than most field stone, which traps moisture in the stones and causes spalling. Use a lime-based mortar matched to your stone instead.
How long does repointing a stone foundation last?
Properly mixed and cured lime pointing commonly lasts several decades on a well-drained wall. Poor drainage or fast curing shortens that considerably.
Is repairing a stone foundation a DIY job?
Repointing sound, plumb walls and resetting a few loose stones is manageable for a careful DIYer. Bulging, leaning or cracked walls need a structural engineer before any work begins.
Should I waterproof the inside of a fieldstone basement?
Avoid non-breathable coatings on the interior. A lime parge plus exterior drainage fixes and a dehumidifier handle moisture without trapping water inside the wall.
Do I need a respirator when raking out mortar?
Yes. Removing mortar releases silica dust. Wear a fitted N95 or P100 respirator, prefer hand tools, and use wet methods or a shrouded grinder with a HEPA vacuum if you must grind.