
After 20 years working with wood floors, I can tell you that repairing a scratch in a hardwood floor is one of the most common jobs homeowners ask about, and one of the most satisfying to do yourself. Whether it came from a dog’s nails, a dragged chair, or a piece of grit ground underfoot, most scratches are cosmetic and can be made to disappear without refinishing the entire room. The trick is matching your repair method to the depth of the damage.
In this guide I’ll walk you through diagnosing a scratch, fixing shallow surface marks, filling deeper gouges, and blending the repair so it vanishes into the surrounding grain. I’ll cover the products I actually reach for, realistic dry times, and the mistakes that make a scratch look worse than when you started.
Diagnose the Scratch Before You Touch It
Not all scratches are equal, and treating them the same way is the number one error I see. Run your fingernail across the mark. If your nail glides over it without catching, the scratch only sits in the finish layer, the polyurethane or wax topcoat, and it will be quick to fix. If your nail catches or drops into a groove, the scratch has cut through the finish and into the wood fiber itself, which needs filling.
Also identify your finish. Most floors installed in the last 30 years wear a polyurethane coat, either oil-based (warm amber tone) or water-based (clear). Older or hand-finished floors may use penetrating oil or wax. A quick test: put a few drops of water on the scratch. If it beads, you have a surface film finish like poly. If it soaks in and darkens the wood, you have an oil or wax finish, which changes the products you should use.


Fixing Light Surface Scratches
For hairline scuffs that live only in the finish, start with the gentlest option. A commercial scratch concealer or a hardwood floor cleaner with a microfiber pad often buffs out fine surface marks entirely. Clean the area first with a slightly damp cloth so you aren’t grinding dirt into the wood, then let it dry.
If the scuff persists, I like a blending pen or a wax-based touch-up marker tinted to your floor color. Draw along the scratch following the grain direction, wait 60 seconds, then wipe the excess with a soft cloth. The pigment settles into the scratch and the surrounding finish sheds the rest. For a slightly deeper surface scratch, a light rub with a walnut, believe it or not, works surprisingly well. The nut’s natural oils darken pale scratch lines. Rub a shelled walnut along the mark, let it sit five minutes, and buff.
Filling Deeper Gouges in the Wood
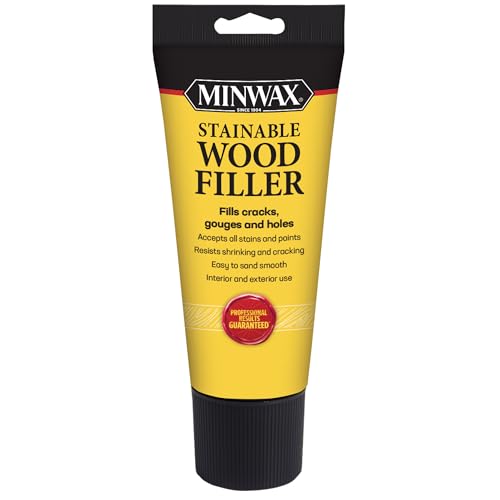
When the scratch has cut into the wood, you need to fill the void. For gouges up to about 1/8 inch deep, a tinted wood filler or a hard wax stick is your friend. Hard wax sticks, melted into the gouge with a burn-in knife or even a warmed putty knife, are what pros use because they set fast and take a finish. Choose a stick that matches the lightest tone in your floor; you can always darken with a marker afterward.
Press the filler firmly into the gouge, overfilling slightly, then scrape flush with a plastic putty knife held at a low angle so you don’t dig back into the surrounding finish. For water-based wood filler, expect 30 to 60 minutes of dry time before you can sand; solvent fillers may need two hours. Once cured, lightly sand the spot with 220-grit paper wrapped around a cork block, sanding only the repair, not the healthy floor around it.
Blending Color and Grain
A filled scratch that’s the wrong color draws more attention than the original damage. This is where patience pays off. Real hardwood is rarely one flat color, so layer your tones. Start with a base marker close to the mid-tone of your boards, then add darker grain lines with a fine-tip stain pen to mimic the streaks running through the plank. Work in thin passes and step back every few strokes to judge from standing height, which is how the floor is actually seen.
If your floor has strong graining, drag the tip of the pen in short, broken strokes rather than one solid line. Nature doesn’t draw straight lines, and neither should you. Let each layer dry a couple of minutes before adding the next so the colors don’t muddy together.
Sealing the Repair
Filler and marker pigment sit exposed until you seal them, and an unsealed repair will collect dirt and wear differently from the rest of the floor. Once your color blend looks right and is fully dry, brush a thin coat of matching polyurethane over just the repaired area with a small artist’s brush. Match the sheen: satin, semi-gloss, or gloss. A gloss patch on a satin floor will flash under light and undo all your careful blending.
Apply one thin coat, let it dry four to six hours for water-based or overnight for oil-based, then, if needed, apply a second. Feather the edges so there’s no hard ridge where the new finish meets the old. Keep foot traffic off the spot for 24 hours and avoid rugs or furniture for a few days while the finish fully hardens.
Preventing Future Scratches
Once you’ve gone to the trouble of repairing a scratch in a hardwood floor, protect your work. Felt pads under every furniture leg are the cheapest insurance in flooring; replace them yearly because they collect grit and wear thin. Place walk-off mats at exterior doors to catch the sand and grit that does most scratching, and keep pets’ nails trimmed.
Sweep or vacuum with a hard-floor setting regularly; loose grit underfoot acts like sandpaper. Never drag furniture, lift it or use furniture sliders. And keep your floor’s touch-up kit, the marker and wax stick you used, in a drawer so the next scratch is a five-minute fix rather than a weekend project.
Matching Products to Your Finish Type
The single biggest determinant of a good repair is choosing products that suit your floor’s finish, and this trips up more homeowners than any other step. On a polyurethane-finished floor, wax-based touch-up sticks and markers work well for the wood layer, but your sealing coat must also be poly, water-based over water-based, oil-based over oil-based, or the new finish may not bond and could bead up or peel. Mixing chemistries is a classic mistake that leaves a cloudy or fisheyed patch.
On a wax or penetrating-oil floor, skip the polyurethane entirely. These floors are repaired by cleaning the scratch, applying matching wood filler or a hard-wax stick, and then buffing on more of the same wax or oil to reseal, no film finish involved. The beauty of oil and wax floors is exactly this spot-repairability: you blend the repair into the surrounding surface and buff, and it disappears without any hard edge. Identify your finish with the water-drop test before you buy a single product, and you’ll save yourself a frustrating do-over.
Common Mistakes to Avoid
A few errors make scratches look worse. Over-sanding is the biggest, aggressively sanding a scratch cuts through the surrounding finish and creates a dull halo larger than the original damage. Always sand only the repair itself with fine grit and a light touch. Using a filler or marker that’s too dark is the second, since a dark line on light wood is more obvious than the scratch; start lighter than you think and build up.
Rushing the dry times is another, applying a second coat or walking on the repair before the first is cured smears the finish and traps a soft, tacky spot. And ignoring sheen, patching a satin floor with a glossy finish, leaves a shiny scar that flashes under every light. Take the extra minute to match sheen and let each stage cure, and your repair will vanish rather than announce itself.
When to Call a Professional
Most single scratches are a confident DIY job. But if you’re facing dozens of deep gouges across a whole room, gray or black water stains under the scratch (a sign of moisture damage), or scratches on an exotic or factory-finished engineered floor with a delicate wear layer, it’s worth getting a pro’s eye. Screen-and-recoat, where the top finish is abraded and a fresh coat applied over the whole floor, costs far less than a full sand-and-refinish and erases light scratching across an entire room at once. Knowing which repair fits the damage is what separates a floor that looks new from one that looks patched.
Prefer to explore on your own?
See how new flooring looks in your actual room in seconds — free, no signup.
Try the free Floor Studio →