A scratched wood floor does not always need professional repair. Most scratches can be fixed in under 30 minutes with products that cost less than $15. The key is matching the repair method to the scratch depth and using the right technique so the fix blends invisibly with the rest of the floor.
Assess the Scratch First
Run your fingernail perpendicular across the scratch. This tells you everything you need to know about the repair approach.
- No catch at all: Surface scratch — only the finish is affected. These are the easiest to fix.
- Slight catch: The scratch has penetrated the finish and reached the stain or bare wood. Needs color touch-up plus a finish coat.
- Definite groove: A deep scratch or gouge that has removed wood material. Requires filling before staining and finishing.


Quick Fixes for Light Scratches
Wood Floor Markers
Stain markers from Minwax, Rejuvenate, or similar brands are the fastest fix for light to moderate scratches. They come in standard wood tones (golden oak, red mahogany, ebony, etc.) and work by depositing a thin layer of stain-colored dye into the scratch.
- Clean the scratch with a damp cloth and let it dry.
- Shake the marker and test on an inconspicuous spot to check color match.
- Draw the marker along the scratch in the direction of the wood grain.
- Immediately wipe excess with a soft cloth before it dries on the surrounding finish.
- Let dry 5 to 10 minutes. Apply a second pass if the color is not deep enough.
Cost: $5 to $12. Lasts for months before needing reapplication in high-traffic areas.
Wax Repair Crayons
Wax crayons (also called fill sticks) work on scratches that are slightly deeper than what a marker can handle. The wax fills the scratch and adds color simultaneously.
- Select a crayon that closely matches your floor color. It is better to go slightly lighter than darker.
- Rub the crayon firmly into the scratch, pressing the wax into the groove.
- Wipe the excess wax off the surface with a soft cloth or plastic scraper. Do not use metal, which can create new scratches.
- Buff the area with a clean cloth until the repair blends with the surrounding floor.
Cost: $3 to $8 per crayon or $12 to $18 for a multi-color kit.
Walnut or Pecan Trick
This old-school method works surprisingly well on light scratches in medium-toned wood floors. Rub a raw walnut or pecan meat along the scratch. The natural oils and pigment in the nut fill the scratch and darken it to match the surrounding wood. Buff with a cloth afterward. This is a temporary fix — it may need reapplication every few weeks — but it costs nothing if you have nuts in the pantry.
Scratch Cover Liquids
Products like Old English Scratch Cover and Howard Restor-A-Finish are tinted liquids that fill and darken surface scratches. Shake the bottle, apply a small amount to a cloth, and rub into the scratch following the grain. Wipe clean. These products work on polyurethane and lacquer finishes.
Cost: $6 to $10 per bottle.
Sanding Methods for Deeper Scratches
When quick fixes are not enough, localized sanding and refinishing produces a permanent repair.
Spot Sanding a Single Scratch
- Tape off the area: Place painter’s tape 1 to 2 inches on each side of the scratch to protect the surrounding finish.
- Sand with 150-grit: Using a sanding block (never sand freehand), sand along the grain over the scratch. The goal is to remove the existing finish and smooth the scratch edges.
- Progress to 220-grit: Switch to finer sandpaper and smooth the sanded area.
- Clean thoroughly: Wipe with a tack cloth to remove all dust.
- Apply stain: Use a cotton swab or small brush to apply matching stain. Build color gradually with thin coats. Let each coat dry 5 to 10 minutes before deciding if you need more.
- Apply finish: Brush on a thin coat of polyurethane with a small foam brush. Let it dry per product instructions (typically 2 to 4 hours for water-based, 8 to 12 hours for oil-based).
- Apply a second finish coat: Lightly sand with 320-grit between coats. Apply the second coat.
- Blend: After the final coat cures, lightly buff the edges of the repair with 0000 steel wool to blend the sheen with the surrounding floor.
Screen and Recoat for Widespread Scratches
If scratches are spread across an entire room but have not penetrated to bare wood, a screen and recoat is faster and cheaper than full refinishing. This process abrades the existing finish with a floor buffer and mesh screen, then applies a fresh coat of polyurethane over the entire floor.
- Cost: $1.50 to $3.50 per square foot professionally, or $100 to $200 in rental equipment and materials for DIY
- Time: Most rooms can be screened and recoated in one day
- Limitation: Does not change the stain color or fix scratches that have gone through the stain layer
Filling Deep Gouges
Gouges that have removed actual wood material need filling before any staining or finishing.
Using Wood Filler
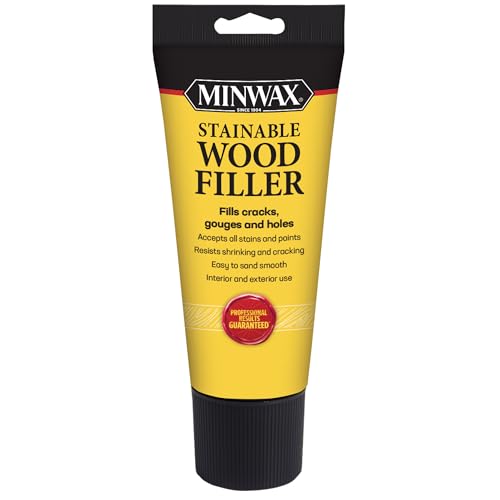
- Choose a stainable wood filler for floors where the repair will be stained (Minwax Stainable Wood Filler is widely available).
- For pre-finished floors, choose a color-matched filler that does not need staining (Mohawk, TimberMate, and DAP Plastic Wood are good options).
- Apply with a putty knife, pressing firmly to eliminate air bubbles. Overfill by a hair since most fillers shrink.
- Let dry completely (2 to 6 hours depending on depth and product).
- Sand flush with 150-grit, then 220-grit.
- Stain and finish as described in the sanding section above.
Using Epoxy Filler for Large Gouges
For gouges deeper than 1/8 inch, two-part epoxy wood filler holds up better than standard wood filler. It does not shrink, resists cracking, and bonds firmly. Mix the two parts, apply, and shape before it sets (usually 15 to 30 minutes of working time). Sand after curing.
When to Call a Professional
- Scratches over a large area: More than a third of the floor is scratched. Full refinishing ($3 to $8 per square foot) is more cost-effective than dozens of spot repairs.
- Exact color matching is critical: Professionals have access to custom stain mixing and spray equipment that produces more seamless repairs.
- The floor has a factory-applied finish: Aluminum oxide finishes (common on prefinished hardwood) cannot be spot-repaired with standard polyurethane. Professional repair involves specialized products.
- Board replacement is needed: Individual boards with severe damage can be replaced, but this requires cutting out the damaged board and weaving in a new one. This is a skilled job that costs $200 to $500 per board.
- You are unsure of the finish type: Wax, polyurethane, lacquer, and oil finishes each require different repair approaches. Applying the wrong product makes things worse.
Prevention Tips
Furniture Protection
- Apply adhesive felt pads to the bottom of every furniture leg. Replace pads every 6 months because they collect grit that scratches floors.
- Use furniture cups or coasters under heavy pieces that rarely move.
- Never drag furniture across wood floors. Lift it or use felt sliders.
Daily Habits
- Place doormats at every entrance to catch grit before it reaches the floor.
- Remove shoes at the door. Heels and hard-soled shoes concentrate force and cause dents.
- Sweep or dust mop daily in high-traffic areas. A single grain of sand underfoot acts like sandpaper.
- Use a vacuum with a hardwood floor setting (beater bar off) for thorough cleaning.
Pet-Related Prevention
- Trim pet nails every 2 to 3 weeks. Nails should not click on the floor when the pet walks.
- Place mats under food and water bowls to catch spills.
- Consider applying a harder finish (like oil-modified polyurethane or a commercial-grade water-based finish) in rooms with heavy pet traffic.
Long-Term Protection
- Recoat the floor every 3 to 5 years with a fresh layer of polyurethane. This maintenance coat prevents scratches from reaching the wood.
- Area rugs in hallways and kitchens protect high-traffic zones while adding insulation and comfort.
- Keep indoor humidity between 35% and 55%. Dry wood is more brittle and scratches more easily.
Prefer to explore on your own?
See how new flooring looks in your actual room in seconds — free, no signup.
Try the free Floor Studio →