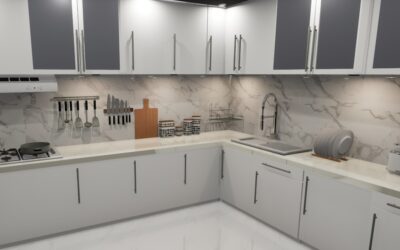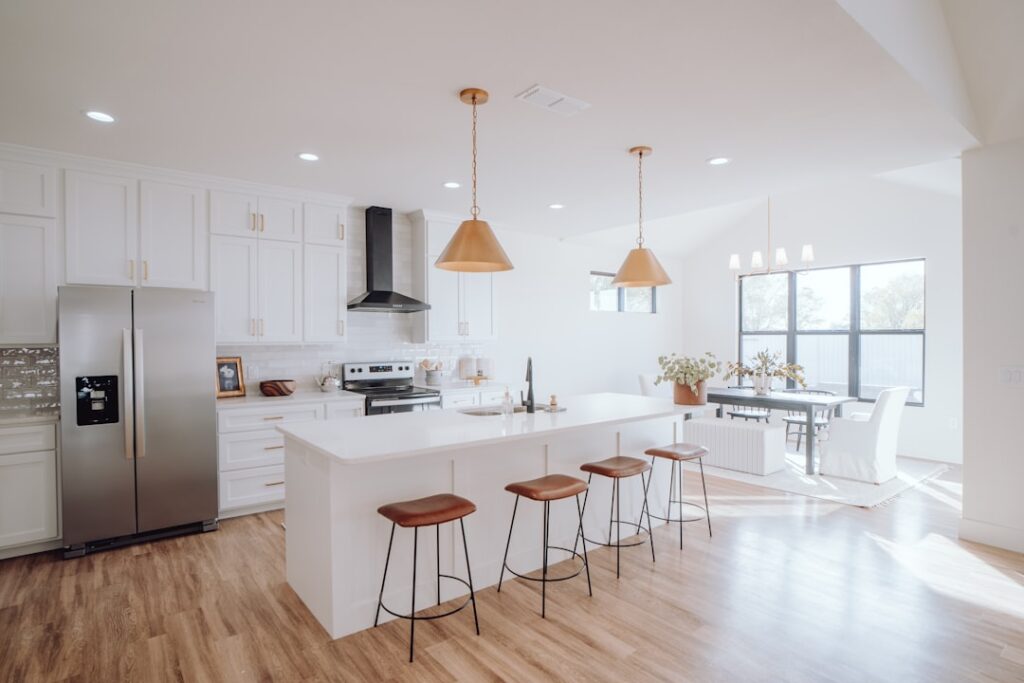
A full kitchen cabinet replacement can run $15,000 to $35,000, yet the doors and drawer fronts make up roughly 80 percent of what you actually see. That is why replacing kitchen cabinet doors before and after photos look so dramatic: the boxes stay put, the layout stays put, and the kitchen still looks brand new. The project costs a fraction of new cabinets and usually takes days instead of weeks. Here is what changes, what does not, and how to plan a door swap that delivers a real transformation.
Part of our Kitchen Remodeling guide — explore the full guide →
- Replacing Kitchen Cabinet Doors Before and After: What Actually Changes
- Is Your Kitchen a Good Candidate?
- Door Styles That Create the Biggest Transformation
- Cost of Replacing Cabinet Doors
- Measuring and Ordering Correctly
- Choosing Door Materials That Last
- DIY or Hire a Pro?
- The Installation Process
- Finishing Touches That Complete the After
- Common Mistakes to Avoid
Replacing Kitchen Cabinet Doors Before and After: What Actually Changes
The “before” in most kitchens is predictable. Think oak raised-panel doors with a yellowed finish from the 1990s, thermofoil doors peeling at the edges, or builder-grade flat slabs with visible edge banding. The cabinet boxes behind those doors are often perfectly sound, especially if they are plywood or solid face-frame construction.
The “after” depends on three choices: door style, finish, and hardware. Swap raised-panel oak for painted Shaker doors and the room shifts from dated to classic. Replace worn slab doors with flat-panel walnut veneer and the kitchen reads as modern. Add new hinges, soft-close hardware, and pulls, and the daily experience of opening a drawer feels upgraded too.
What stays the same matters just as much. Layout, countertop, cabinet heights, and interior storage are unchanged. If you hate your layout or the boxes are water-damaged, new doors will not fix that. Door replacement is the right call when the bones are solid and the problem is purely surface.
Is Your Kitchen a Good Candidate?
Before ordering, inspect the cabinet boxes carefully. Open each door and check for swelling at the sink base, sagging shelves, loose face frames, and delaminating particleboard. A few quick tests help:
- Press on the sink base floor. If it feels soft or spongy, that box needs repair or replacement first.
- Check that face frames are square by measuring diagonals on several openings.
- Confirm the cabinet sides will accept new hinge mounting plates, especially on frameless cabinets.
- Look at the exposed face frames and end panels. These will need to be refinished or veneered to match the new doors.
That last point is where many projects stumble. If your new doors are painted white but the face frames stay honey oak, the result looks unfinished. Plan to paint the frames, or order matching veneer and end panels from the door supplier.
Door Styles That Create the Biggest Transformation
Shaker
The five-piece Shaker door, with a recessed flat center panel and square frame, is the most popular replacement style in the US. It works with traditional, farmhouse, and transitional kitchens, and hides minor imperfections in older boxes.
Slab or Flat-Panel
Slab doors deliver a clean, modern look, particularly in high-gloss lacquer, matte laminate, or wood veneer. They show every misalignment, so they suit boxes that are square and level.
Beadboard and Inset-Look
Beadboard panels add cottage character, and some suppliers sell overlay doors with a detail that mimics the look of inset cabinetry. True inset doors are rarely practical on existing boxes because they demand precise frame openings.
Glass-Front Uppers
Replacing two or four upper doors with glass-front frames breaks up a heavy wall of cabinetry and gives you a display spot. Reeded or seeded glass hides clutter better than clear panes.
Cost of Replacing Cabinet Doors
Pricing varies by material and whether you hire a refacing company or order doors yourself. A typical 10-by-12-foot kitchen has 20 to 30 doors and drawer fronts.
| Option | Per Door | Typical Kitchen |
|---|---|---|
| Unfinished MDF Shaker (DIY paint) | $40 to $90 | $1,000 to $2,500 |
| Prefinished painted doors | $80 to $180 | $2,000 to $5,000 |
| Solid wood stained doors | $120 to $250 | $3,000 to $7,000 |
| Professional refacing (doors plus veneer) | $200 to $400 | $5,000 to $12,000 |
Add hinges at $5 to $20 per pair for soft-close concealed hinges, pulls at $3 to $25 each, and drawer box upgrades if you want full-extension slides. Even at the top end, the project usually lands at 30 to 50 percent of what new cabinets would cost.
Measuring and Ordering Correctly
Most door-replacement problems start with a bad measurement. Doors are sized by the opening plus the overlay, which is the amount the door covers the face frame. Standard overlay is usually 1/2 inch per side; full overlay is typically 1 1/4 inches or more.
- Measure the width and height of each face frame opening to the nearest 1/16 inch.
- Decide on overlay and add it to each side. A 14-inch-wide opening with 1/2-inch overlay needs a 15-inch door.
- For double-door openings, subtract a 1/8-inch reveal between the doors before splitting the width.
- Measure drawer openings separately, since drawer fronts often use a different overlay.
- Label every opening on a sketch and match each measurement to that label on the order form.
Order one sample door before committing to the full kitchen. It lets you check color, overlay, and hinge fit on a real box, and it prevents the expensive mistake of 28 doors that are all 1/4 inch too narrow.
Choosing Door Materials That Last
Material choice decides whether your “after” still looks good in ten years. MDF is the go-to core for painted doors because it does not expand and contract with seasonal humidity the way solid wood does. That stability means painted MDF Shaker doors rarely show the hairline cracks that appear where the rails and stiles of a painted solid-wood door meet. The weakness of MDF is water: a door next to the dishwasher that gets splashed daily needs every edge fully sealed.
Solid hardwood, such as maple, cherry, white oak, or alder, is the better pick for stained finishes where you want visible grain. Maple takes paint and stain well and is dense enough to resist dents. White oak, especially rift-sawn, gives the straight-grain look popular in modern kitchens and typically costs 20 to 40 percent more than maple.
Thermofoil and rigid laminate doors cost less and wipe clean easily, but thermofoil can peel near heat sources like the oven or a toaster. If you choose it, add heat shields on the doors next to the range. High-pressure laminate slab doors are far more durable and handle busy family kitchens well.
DIY or Hire a Pro?
Doing it yourself saves 40 to 60 percent, and the skills involved are mostly patience and careful measuring. The hardest parts are refinishing face frames to a smooth, brush-mark-free finish and adjusting 25 or more doors so the gaps line up. A reasonably handy homeowner can manage both with a quality angled sash brush, a foam roller, and a hinge-boring jig for any doors that arrive undrilled.
Hire a refacing company if your boxes need veneer, if you want stained wood faces that must match the doors exactly, or if you simply cannot give up the kitchen for more than a few days. Get at least three quotes, ask whether the price includes new drawer fronts, hinges, and end panels, and ask to see photos of finished jobs that are at least two years old so you can judge how the finish holds up.
The Installation Process
Swapping doors is a manageable weekend project for a confident DIYer. Remove the old doors and hardware, clean and refinish the face frames, then install the new hinges. Concealed European hinges need a 35 mm cup hole drilled into the back of each door, usually 1/8 inch from the edge. Many suppliers bore these for you, which is worth the small fee.
Once hung, adjust each door using the three screws on the hinge: side-to-side, up-and-down, and in-and-out. Aim for consistent 1/8-inch gaps between doors and straight lines along the top of the uppers. Finish by drilling for pulls using a template jig so every handle sits at the same height.
A pro refacing crew typically completes a standard kitchen in two to four days. A DIY project takes longer, mostly because painting face frames and waiting for coats to cure adds time.
Finishing Touches That Complete the After
The best before-and-after results come from treating the doors as one part of a coordinated refresh. Crown molding along the tops of upper cabinets makes them look taller and custom. A new light rail under the uppers hides LED tape lighting. Matching toe-kick panels finish the bottom edge of the base cabinets.
Hardware deserves attention too. Brushed brass, matte black, and polished nickel all photograph well, but choose one finish and use it consistently. On Shaker doors, a 3- to 5-inch bar pull on drawers and a knob or short pull on doors keeps proportions balanced.
If the countertop or backsplash is also dated, a new backsplash is the most cost-effective companion upgrade. Countertop replacement can wait if budget is tight, since new doors alone will already change the room.
Common Mistakes to Avoid
- Leaving face frames unfinished or mismatched to the new doors
- Choosing slab doors for out-of-square boxes, which highlights every uneven gap
- Ordering all doors at once without testing a sample
- Reusing old hinges that do not match the new door thickness or overlay
- Painting MDF doors with latex wall paint instead of cabinet-grade enamel or urethane-alkyd
Plan the project in the right order: inspect, sample, measure, order, refinish frames, install, then adjust and add hardware. Done that way, replacing kitchen cabinet doors before and after comparisons in your own kitchen will look just as striking as the photos that inspired you, at a budget that leaves room for the next project.