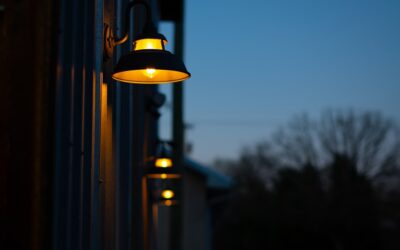
A retaining wall does structural work all day, but at night it can do something else entirely: define your outdoor space with a warm, architectural glow. Well-planned retaining wall lighting turns a plain block wall into a nighttime focal point, makes steps and grade changes safe to navigate, and extends the useful hours of a patio or garden long past sunset. The good news is that modern low-voltage LED systems make this a realistic weekend project for most homeowners. This guide covers the fixture types, layout principles, wiring, and installation steps that produce professional-looking results.
Why Light a Retaining Wall
Lighting a retaining wall serves three goals at once, and the best installations satisfy all of them. First is safety: a wall often borders a step-down, a patio edge, or a stairway, and grazing light across those surfaces prevents trips and missteps in the dark. Second is ambiance, the soft wash of light that makes an outdoor room feel finished and inviting rather than like a black void beyond the back door.
The third goal is architectural emphasis. Light skimming across the face or top of a wall reveals its texture and lines, giving your hardscape depth and dimension it simply does not have during the day. A wall you barely notice at noon can become the defining feature of the yard at night. When you plan your lighting, keep all three purposes in mind so the result is both beautiful and genuinely functional.
Types of Retaining Wall Light Fixtures
There are several fixture styles designed specifically for hardscapes, and most walls combine two or three of them. Choosing the right mix depends on your wall’s construction and the effect you want:
- Hardscape lights: thin, low-profile bars that tuck under a cap or coping stone and wash light down the wall face, the workhorse of wall lighting
- Cap lights: small fixtures mounted on top of the wall or integrated into pillar caps for accent and boundary marking
- Step lights: recessed or surface fixtures that illuminate treads and risers on stairs built into or beside the wall
- Recessed paver or block lights: fixtures set flush into the wall face for a clean, built-in look
- Spotlights and well lights: placed at the base to graze up the wall or highlight plantings above it
Hardscape lights are the most popular because they mount cleanly beneath the cap stones without visible wiring and cast an even, downward wash. If your wall is already built, retrofit hardscape lights slide under the caps; if you are building the wall, you can plan channels for wiring as you go, which is far cleaner.
Choosing Low-Voltage LED Systems
For residential retaining wall lighting, a 12-volt low-voltage LED system is the standard, and for good reason. Low voltage is safe to work with, does not require a licensed electrician for the fixture wiring, and LED fixtures sip power, so you can run many lights off a modest transformer. A quality LED hardscape light draws only a few watts and lasts tens of thousands of hours, which means years of service with no bulb changes.
Pay attention to color temperature, measured in Kelvin. For a warm, welcoming outdoor glow, choose fixtures in the 2700K to 3000K range, which reads soft and inviting on natural stone and concrete block. Cooler temperatures around 4000K look harsh and clinical outdoors. Also confirm fixtures are rated for wet or damp locations and built from corrosion-resistant materials like brass, copper, or powder-coated aluminum, since they will live outdoors through every season.
Planning Layout and Spacing
Good spacing is what separates a smooth, even wash from a spotty row of bright and dark patches. As a general starting point, place hardscape lights roughly 6 to 8 feet apart along the wall, adjusting based on the fixture’s beam spread and the wall height. Taller walls and wider beam angles let you space fixtures farther apart; short walls or narrow beams need closer spacing to avoid gaps.
Concentrate light where it matters most for safety, such as at the top and bottom of stairs and at the ends of a wall where the grade drops. For a continuous, uniform glow, resist the temptation to over-light; more fixtures do not always look better, and an evenly spaced, restrained layout reads far more elegant than a wall lit up like a runway. Sketch your wall to scale, mark fixture positions, and count your fixtures before you buy so you size the transformer correctly.
Wiring and Installation Basics
The heart of the system is a low-voltage transformer that steps household 120-volt power down to 12 volts. Mount it near a GFCI-protected outdoor outlet, sizing it with headroom, add up the total wattage of all your fixtures and choose a transformer rated at least 20 to 30 percent above that so it is not maxed out. A timer or photocell lets the lights come on at dusk and shut off automatically, which most homeowners consider essential.
Run low-voltage landscape cable from the transformer along the wall, tucking it behind the caps, into pre-planned channels, or buried in a shallow trench along the base. Connect each fixture to the main cable with weatherproof connectors, and keep runs balanced so voltage does not drop off noticeably at the far fixtures, use a heavier gauge cable or a hub-style connection method for long runs. After wiring, power up at dusk and walk the yard, adjusting aim and spacing before you make everything permanent. Testing before final burial saves a lot of digging.
Maintenance and Troubleshooting
Low-voltage LED systems are close to maintenance-free, but a little seasonal attention keeps them looking their best. Wipe fixture lenses a few times a year to clear dirt, hard-water spots, and pollen that dim the output. Trim back plants that grow in front of fixtures and block the light. Check that connectors remain watertight, since a corroded connection is the most common cause of a single light going dark.
If a section stops working, start at the connections nearest the failure, as loose or moisture-infiltrated connectors account for most outages. If lights at the end of a long run look dim, you likely have voltage drop and should rebalance the run or upgrade the cable gauge. Because quality LED fixtures last so long, actual bulb failures are rare, and most problems trace back to wiring rather than the lights themselves. Installed thoughtfully, retaining wall lighting will make your hardscape safer and more beautiful for a decade or more with only minor upkeep.
Lighting Techniques That Change the Mood
Where you aim the light matters as much as the fixtures you choose, because direction determines the entire character of the finished wall. Down-lighting, the most common approach with under-cap hardscape lights, washes the wall face from above and pools softly on the ground or steps below, which is ideal for safety and a calm, even glow. Up-lighting from the base does the opposite, grazing the wall upward to dramatize texture and cast the stone or block in bold relief, a more theatrical effect suited to a feature wall you want to show off.
Grazing is a specialized version of this: placing a light very close to a textured surface and aiming it nearly parallel so every bump and joint throws a long shadow. On a rough stone or split-face block wall, grazing turns ordinary masonry into a dramatic, tactile surface after dark. You can also silhouette plantings against a lit wall, or combine gentle down-lighting for safety with a few accent up-lights for drama. The best installations rarely use just one technique; they layer a soft functional wash with a few focused accents so the wall has both usability and visual interest.
Solar vs. Wired Systems
Homeowners often wonder whether solar wall lights can replace a wired low-voltage system, and the honest answer is that each has its place. Solar hardscape and cap lights are genuinely appealing because they require no wiring, no transformer, and no trenching, you simply mount them and let the sun charge the built-in battery. For a quick, low-commitment accent on a sunny wall, they are a reasonable choice and a true weekend project with zero electrical work.
The trade-offs are real, though. Solar lights depend entirely on how much direct sun their panels receive, so a wall shaded by trees or the house itself will leave them dim or dark. Their output is generally lower and less consistent than wired LEDs, they may fade or shut off late at night as the battery drains, and the built-in batteries need replacing every couple of years. For a polished, reliable, and evenly matched look, especially where safety lighting on stairs is involved, a wired low-voltage system is the better investment. Reserve solar for supplemental accents or situations where running cable simply is not practical. Whichever route you choose, plan the layout first and test the effect at night before making anything permanent, because retaining wall lighting is one of those upgrades where a little forethought produces results that look professionally designed.