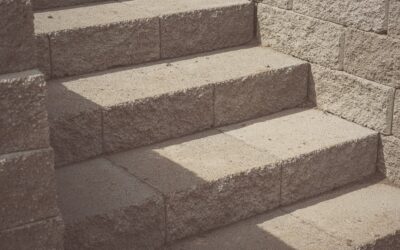
Cutting a set of steps into a sloped yard is one of the most satisfying hardscape projects a homeowner can tackle, but it is also one where small errors compound into big problems. Well-built retaining wall stairs tie a terraced landscape together, provide safe passage up a grade, and last decades when the foundation and drainage are done right. Skip the base prep or ignore code-appropriate step dimensions, and you get wobbly treads, frost heave, and a tripping hazard. This guide covers the planning, materials, and construction that separate stairs that settle from stairs that hold.
Part of our Stairs & Stair Flooring guide — explore the full guide →
Planning the Layout
Start by measuring the total vertical rise of your slope, the distance from the bottom to the top of where the stairs will run. This number drives everything, because it determines how many steps you need. Divide the total rise by your target step height to find the step count. Most exterior steps use a rise of 6 to 7 inches, which is comfortable and code-friendly for outdoor use.
Next, decide the run, the horizontal depth of each tread. Outdoor steps feel best with a deeper run than interior stairs, typically 12 to 18 inches, which slows the pace and matches the relaxed feel of a garden path. The classic rule of thumb is that twice the rise plus the run should total 24 to 26 inches, so a 6-inch rise pairs naturally with a 13-inch tread.
Choosing Your Materials
The material sets the look, the cost, and the labor level.
- Segmental concrete blocks: Interlocking retaining wall blocks stack into risers with cap stones as treads. Consistent, widely available, and DIY-friendly at $10 to $25 per square foot installed.
- Natural stone: Flagstone or quarried slabs give an organic, high-end look but cost more, $25 to $50 per square foot, and demand skill to fit irregular pieces.
- Poured concrete: Durable and seamless, ideal for formal designs, though it requires forming and finishing experience.
- Timber: Pressure-treated 6×6 landscape timbers spiked to the grade make rustic, economical steps, but they have a shorter lifespan of 15 to 20 years.
Match the stair material to your existing retaining wall so the steps read as part of the same structure rather than an afterthought.
Excavation and Base Preparation
The base is where most stairs succeed or fail. Excavate each step location down to solid, undisturbed soil, removing all topsoil and organic material that can decompose and settle. For the bottom step, dig a trench 8 to 12 inches deep to hold a compacted gravel base that anchors the whole run.
Fill the trench with 6 inches of crushed stone or road base, then compact it in 2-inch lifts with a plate compactor until it is firm and level. In cold climates, extend the base below the frost line where practical, or at minimum build a deep, well-drained gravel foundation so water cannot pool and heave the steps in winter. A level, compacted base is non-negotiable for stairs that stay put.
Building the Steps
Work from the bottom up, since each step rests partly on the one below it.
- Set the first riser course on the compacted gravel base, checking it dead level side to side and front to back with a 4-foot level.
- Backfill behind the riser with crushed stone and compact it to form the base for the next tread.
- Place the tread or cap stones, sloping them a slight 1/8 inch per foot toward the front so water sheds off rather than pooling.
- Set the next riser on the back of the tread below, maintaining your consistent rise and run.
- Repeat up the slope, checking level and alignment at every course, and adhere caps with a flexible concrete adhesive.
Consistency is critical for safety. Uneven riser heights are the leading cause of outdoor stair falls, so measure every step rather than eyeballing it. A variation of more than 3/8 inch between the tallest and shortest riser is a genuine trip hazard.
Drainage Is Everything
Water is the enemy of any retaining structure. Behind the risers, backfill with crushed stone rather than soil so water drains down and away instead of building hydrostatic pressure that pushes the steps forward. For taller stair-and-wall combinations, install a perforated drain pipe at the base of the gravel, sloped to daylight, so collected water has somewhere to exit.
On the treads, that slight forward pitch keeps rain and melting snow moving off the surface, which reduces ice buildup in winter and slows the freeze-thaw cycle that cracks masonry. Never let a tread slope backward toward the hill, where water would collect against the risers.
Safety, Railings, and Code
Check local building codes before you build, since many jurisdictions require a permit and a handrail once a stairway exceeds a certain number of risers, often four steps or a total rise above 30 inches. Handrails should sit 34 to 38 inches above the tread nosing and provide a graspable profile. For wide garden steps in a gentle grade, a railing may not be required, but adding one improves safety for children and older family members.
Lighting extends both safety and usability. Low-voltage step lights or a nearby path fixture make the stairs navigable after dark and highlight the hardscape at night.
Common Mistakes to Avoid
Rushing the base is the classic error; stairs built on loose soil or thin gravel will settle unevenly within a season. Inconsistent rise heights create hazards and look amateur. Forgetting to slope treads for drainage invites ice and staining. And skipping the crushed-stone backfill behind risers lets water pressure and frost slowly march the steps out of alignment.
Build retaining wall stairs on a deep, compacted gravel base, keep your rise and run consistent, backfill with drainage stone, and pitch the treads to shed water. Follow those principles with quality materials matched to your existing wall, and you will have safe, attractive steps that carry foot traffic up your slope for decades without settling or heaving.
Integrating Stairs into an Existing Wall
Building steps into a retaining wall you already have is a common project, and it takes planning to make the two structures work together. The cleanest approach is to design the stairs so they tie into the wall’s coursing, with the stair risers aligning to the wall block courses where they meet. This keeps the transition looking intentional rather than tacked on.
Where the stairs pass through or alongside the wall, you need to maintain the wall’s structural integrity and its drainage. Do not simply cut a gap in a load-bearing wall without accounting for the soil it was holding back; the stairs and their flanking wall sections must together retain that soil. Carry the gravel drainage zone and any drain pipe continuously behind both the wall and the stair structure so water still has a path out. For taller walls, consult an engineer before cutting into an existing structure, since the stairs change how loads are distributed.
Estimating Materials and Budget
Before ordering, calculate how many blocks or stones you need by multiplying your step count by the units per step, then add 10 percent for cuts and breakage. Do not forget the base materials: crushed stone for the foundation and drainage backfill usually costs more in total volume than people expect, often several cubic yards for a modest stair run.
For budgeting, a DIY segmental block stair project runs roughly $10 to $25 per square foot in materials, while hiring a landscaper to build natural stone steps can reach $25 to $50 per square foot installed. A short flight of four to six steps in block might cost $400 to $900 in materials for a capable DIYer, while a professionally built stone stairway can run several thousand dollars. Renting a plate compactor for a day, typically $60 to $100, is money well spent for a base that will not settle.
Frequently Asked Questions
What is the ideal step height for outdoor stairs?
Outdoor steps feel most comfortable with a rise of 6 to 7 inches and a deeper tread of 12 to 18 inches. The classic rule is that twice the rise plus the run should total 24 to 26 inches, so a 6-inch rise pairs well with a 13-inch tread.
Do retaining wall stairs need a permit?
Often yes. Many jurisdictions require a permit and a handrail once a stairway exceeds a certain rise or number of steps, commonly four risers or 30 inches of total rise. Check local codes before you build.
How deep should the base be for garden steps?
Excavate to solid, undisturbed soil and build a compacted crushed-stone base at least 6 inches deep, dug into a trench 8 to 12 inches deep at the bottom step. In cold climates, extend the base below the frost line where practical.
Why do outdoor steps settle unevenly?
Uneven settling almost always traces to a poor base, either loose soil left in place or a gravel bed that was too thin or not compacted. Building on a deep, well-compacted crushed-stone foundation prevents it.