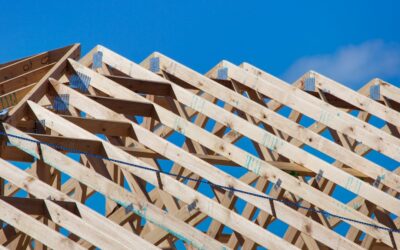
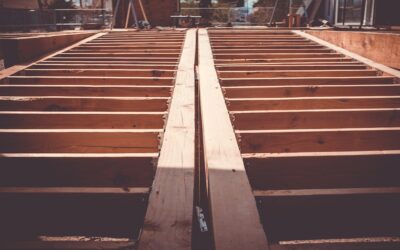
Undersize a rafter and the roof sags within a decade; oversize everything and you waste hundreds of dollars in lumber. A roof rafter span chart is how framers and inspectors settle the question in thirty seconds. The tables — published in the International Residential Code and by the American Wood Council — tell you the maximum horizontal distance a rafter of a given size, species, grade, and spacing can cover under a given snow load. Reading them correctly is the trick, because “span” doesn’t mean what most homeowners think it means, and the wrong load column can put you a full lumber size off.
Part of our Roofing guide — explore the full guide →
- What "Span" Means on a Rafter Chart
- The Four Variables That Set the Span
- Typical Maximum Spans (No. 2 Grade, 20 psf Live / 10 psf Dead)
- How to Read the IRC Tables Step by Step
- Rafter Ties, Ridge Beams, and Thrust
- Worked Example
- When a Chart Isn't Enough
- Practical Tips From the Framing Side
- Using a 2×6 Rafter Span Table for Sheds, Porches, and Older Roofs
What “Span” Means on a Rafter Chart
Rafter span is measured horizontally, not along the slope. It’s the horizontal projection from the inside face of the wall’s top plate to the ridge (or to a purlin or intermediate support if one exists). A rafter on a 12:12 roof that runs 17 feet along the slope only spans about 12 feet horizontally, and 12 feet is the number you take to the chart. Overhangs don’t count toward span either — a cantilevered eave up to about 2 feet rides free.
Charts also assume the rafter is supported at both ends and that ceiling joists or rafter ties resist the outward thrust at the plates. If you’re building a cathedral ceiling with no ties, you’re no longer in simple rafter-table territory — you need a structural ridge beam, and the ridge itself must then be sized as a beam carrying half the roof.
The Four Variables That Set the Span
- Lumber size: 2×6, 2×8, 2×10, 2×12. Depth is everything — stiffness rises with the cube of depth, which is why a 2×10 spans far more than two 2x6s would.
- Species and grade: Southern Yellow Pine, Douglas Fir-Larch, Hem-Fir, and Spruce-Pine-Fir (SPF) each have their own columns. Grade No. 2 is the common construction grade; Select Structural buys another foot or two of span at a price premium.
- Spacing: 12, 16, 19.2, or 24 inches on center. Tightening from 24 to 16 inches typically adds 15 to 20 percent to allowable span.
- Load: ground snow load (20, 30, 50, 70 psf columns in the IRC) plus dead load — 10 psf for light roofing, 20 psf for tile or slate. Heavier roofing or heavier snow means shorter spans.
Typical Maximum Spans (No. 2 Grade, 20 psf Live / 10 psf Dead)
These figures, drawn from IRC Table R802.4.1(2)-style data for Douglas Fir-Larch No. 2 with ceiling not attached to rafters, give you a realistic planning baseline:
- 2×6 at 16″ o.c.: about 14 ft 4 in; at 24″ o.c.: about 11 ft 9 in
- 2×8 at 16″ o.c.: about 18 ft 2 in; at 24″ o.c.: about 14 ft 10 in
- 2×10 at 16″ o.c.: about 22 ft 3 in; at 24″ o.c.: about 18 ft 2 in
- 2×12 at 16″ o.c.: about 25 ft 9 in; at 24″ o.c.: about 21 ft 0 in
Move to a 50 psf snow country column and those numbers drop hard — a 2×8 at 16 inches falls to roughly 13 to 14 feet, and SPF gives up another several inches versus Douglas Fir. Always pull the exact cell for your species, grade, spacing, and local snow load rather than borrowing a neighbor’s numbers; two towns 20 miles apart in the Rockies can differ by 30 psf of ground snow.
How to Read the IRC Tables Step by Step
- Get your ground snow load from the local building department (or ASCE 7 maps). Much of the lower Midwest and South designs at 20 psf; the northern tier runs 40 to 70-plus.
- Pick your dead load. Asphalt shingles on plywood: 10 psf. Concrete tile, double-layer, or heavy slate: 20 psf table.
- Choose the right table — the IRC splits rafter tables by whether the ceiling is attached to the rafters (which changes the deflection limit from L/180 to L/240).
- Find your species/grade row and spacing, read across to the span, and confirm it exceeds your measured horizontal span.
- Check the footnotes. Many cells carry a “rafter tie adjustment” — if your ties sit up the slope rather than at the plate, spans must be reduced by the HC/HR factor, up to a third for ties raised to the upper third of the rafter height.
Rafter Ties, Ridge Beams, and Thrust
A rafter chart quietly assumes the triangle is closed. Ceiling joists running parallel to the rafters, nailed to them at the plate, act as ties that stop the walls from spreading. Remove them — say, for a vaulted great room — and you have two options: a structural ridge beam sized by an engineer or beam-span software (often an LVL such as a 3.5×14 for a 16-foot ridge under moderate load), or raised rafter ties with the span penalty noted above plus a serious connection schedule, since tie forces at the heel can reach 1,000-plus pounds per rafter. Collar ties near the ridge, by contrast, resist uplift and do nothing for thrust; they are not a substitute.
Worked Example
Say you’re framing a 24-foot-wide gable garage in a 30 psf snow area, ridge down the middle, so each rafter spans 12 feet horizontally. Asphalt shingles, no attached ceiling. Checking a No. 2 SPF table at 30 psf: a 2×6 at 16 inches on center is good for roughly 12 ft 6 in — technically adequate but with no margin. A 2×8 at 16 inches spans about 15 ft 10 in, giving comfortable headroom for a future ceiling or solar array, for about $4 more per rafter at current lumber prices (a 12-foot 2×8 runs $12 to $16 versus $8 to $11 for a 2×6). Most experienced framers would take the 2×8 and never think about it again.
When a Chart Isn’t Enough
Span tables cover the simple, common case: uniform loads, straight gable or shed roofs, repetitive members. Call an engineer instead when you have concentrated loads (solar arrays over 4 psf in one zone, HVAC units, hot tubs under a roof deck), hips and valleys carrying tributary areas, spans beyond the 2×12 columns (that’s I-joist, LVL, or truss territory), unusual wind exposure, or an existing sagging roof you’re trying to sister. Engineering runs $300 to $700 for a simple residential roof and removes the guesswork. For everything else, the chart in the code book plus an honest measurement of your horizontal span will size your rafters correctly the first time — and the inspector will be checking the same table you did.
Practical Tips From the Framing Side
A few field habits make chart numbers translate into a straight, quiet roof. Crown every rafter before you cut: sight down the edge, mark the natural bow, and install crown-up so gravity and load flatten the member over time instead of accentuating a sag. Cull the worst pieces in the lift — span tables assume the grade stamp is honest, but a 2×10 with a large edge knot right at mid-span is weaker than the table thinks, and it costs nothing to use that stick for blocking instead. Keep birdsmouth cuts shallow: code limits the seat cut so that at least two-thirds of the rafter depth remains, because an over-notched rafter fails at the plate long before mid-span deflection ever matters.
Think about deflection as comfort, not just code. The L/180 limit for rafters without ceilings allows a 12-foot span to sag nearly 3/4 inch under full load — legal, but visible as a wavy ridge line on a low-slope roof. Upsizing one lumber dimension or tightening spacing to 16 inches typically costs $150 to $400 on a garage-size roof and buys a noticeably crisper plane, better nail-holding for sheathing, and margin for the solar panels you haven’t thought about yet. And if you’re matching an existing structure, measure what’s actually there before assuming: plenty of 1950s roofs run true 2-inch rough-sawn rafters that outperform their nominal modern equivalents, while plenty of 1980s tract roofs used the minimum cell in the table with zero margin. Fifteen minutes with a tape, a ladder, and the chart tells you which house you own.
Using a 2×6 Rafter Span Table for Sheds, Porches, and Older Roofs
The 2×6 is the smallest common rafter size, and it shows up constantly on garages, porch roofs, lean-to additions, and houses built before deeper framing became the norm. A 2×6 rafter span table works the same way as the larger charts, but the margins are thinner, so small choices around spacing, ceiling finish, and future loads matter more. Treat every figure here as a typical example for planning; the table your jurisdiction adopts and your local snow load govern.
How Spacing Changes a 2×6 Rafter
Spacing has a bigger proportional effect on a shallow rafter than on a deep one. For Douglas Fir-Larch No. 2 under a light 20 psf load with no attached ceiling, a 2×6 rafter often lands near 16 feet at 12 inches on center, around 14 feet at 16 inches, and roughly 13 feet at 19.2 inches. That spread can decide whether a small shed or porch works with 2×6 stock at all. When a 2×6 rafter span table shows your horizontal span right at the limit, tightening spacing is often cheaper than jumping a full lumber size, since the extra pieces are short and light.
Attached Ceilings Shorten the Span
If drywall or plaster will be fastened to the underside of the rafters, as in a finished porch ceiling or a small vaulted room, the chart switches to a stricter deflection limit to keep the ceiling from cracking. For a 2×6, that change typically trims the allowable span by around 10 percent. Look for the column labeled for a ceiling attached to rafters before deciding the existing framing is adequate.
The Insulation Depth Problem
Structural span is only half the story with 2×6 rafters in a heated space. A 2×6 offers about 5.5 inches of cavity depth, and a vented roof needs an air gap above the insulation, leaving even less room. In most climates that depth cannot reach current energy code insulation levels for a cathedral ceiling. The usual fixes are rigid foam over the roof deck, furring strips added below the rafters, or closed-cell spray foam installed by a qualified crew. Each one adds dead load, so recheck the chart with the heavier assembly.
Adding Weight to Existing 2×6 Rafters
Older 2×6 roofs were often framed with little reserve. Before adding any of the following, compare the new dead load with the chart column that matches it:
- A second layer of shingles, or a switch to heavier tile or slate-look products
- Solar panels and racking, especially when concentrated on one roof plane
- Rigid insulation or a new sheathing layer over the old deck
- Rooftop equipment such as vents, fans, or condensers
If the existing rafters already sit at the edge of the table, sistering new members alongside them or adding a supporting purlin may be needed, and a structural engineer should confirm the plan. Work at height on any roof calls for a stable ladder footed on firm ground, fall protection on steep slopes, and a professional crew for anything two stories or higher.