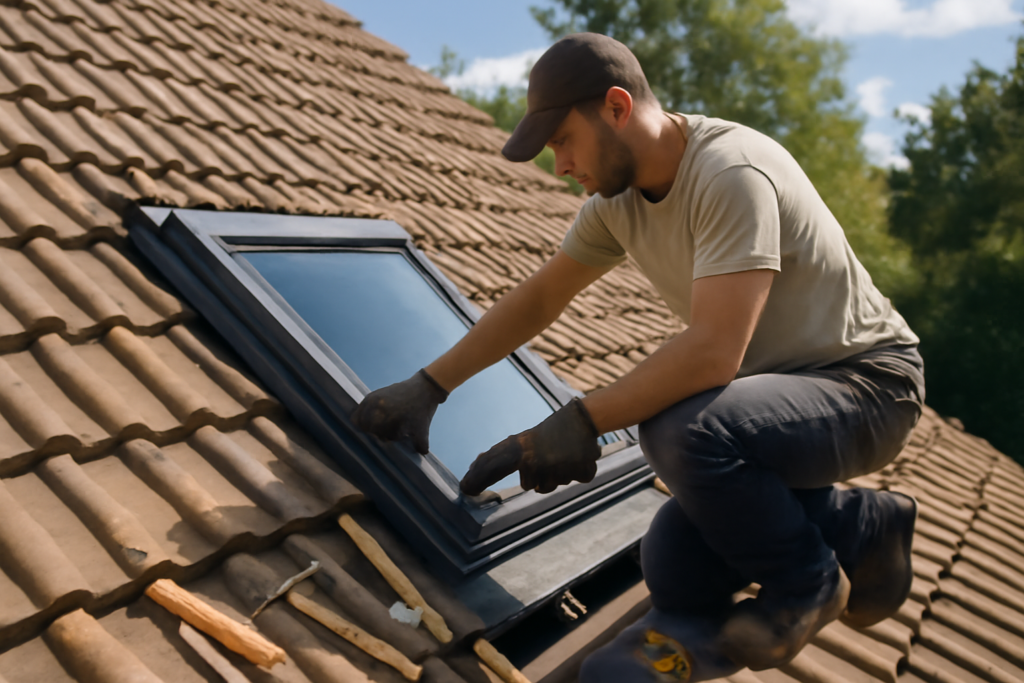
Most skylights that leak were not defective when they left the factory. They leak because the flashing was improvised, the curb was undersized, or the installer skipped the ice-and-water membrane. A well-planned roof skylight installation can bring daylight into a dark hallway, bathroom, or attic bedroom for 25 years without a single drip. A rushed one can rot your roof deck within three winters. This guide walks through the choices, costs, and sequence that separate the two outcomes.
Part of our Roofing guide — explore the full guide →
- What Roof Skylight Installation Actually Involves
- Choosing the Right Skylight Type
- Roof Skylight Installation Cost Breakdown
- Step-by-Step: How the Installation Is Done
- Flashing and Waterproofing: Where Leaks Start
- Building the Light Shaft and Finishing Inside
- DIY or Hire a Pro?
- Maintenance and Long-Term Performance
- Final Checklist Before You Start
What Roof Skylight Installation Actually Involves
Installing a skylight is part roofing job, part framing job, and part drywall job. You cut a hole through the roof deck, reframe the rafters around it, set the unit on a curb or directly on the deck, integrate flashing with the shingles, and then build a light shaft down through the attic to the ceiling below. On a vaulted ceiling with no attic, the job is shorter because the skylight opens straight into the room.
Plan on one to two days for a single unit on a vaulted ceiling and two to four days when a light shaft is required. Weather matters. Nobody should open a roof when rain is in the forecast within 48 hours, and asphalt shingles are brittle below about 40°F, which makes weaving flashing without cracking tabs difficult.
Before any cutting, confirm three things: the roof has at least five to seven years of life left, the pitch falls between 14 and 85 degrees (the range most manufacturers warrant), and there are no wiring runs, plumbing vents, or HVAC ducts in the rafter bays you plan to open.
Choosing the Right Skylight Type
Skylights fall into three broad families, and the right one depends on the room and your ventilation needs.
- Fixed deck-mounted skylights — The most common residential choice. They do not open, cost $200 to $700 for the unit, and seal well because there are no moving parts.
- Venting skylights — Manual crank or solar/electric models open to release heat and humidity. Ideal for bathrooms and kitchens. Units run $500 to $1,800, with solar-powered versions including rain sensors at the top of that range.
- Tubular skylights (sun tunnels) — A 10-inch or 14-inch reflective tube carries light from a roof dome to a ceiling diffuser. They cost $250 to $600, install in about four hours, and need no rafter cutting because they fit between framing members spaced 16 or 24 inches on center.
Glazing is the other big decision. Look for laminated low-E glass with an argon fill. Laminated inner panes hold together if broken, which matters when glass sits over a bed or a shower. A solar heat gain coefficient (SHGC) of 0.25 or lower keeps south- and west-facing units from turning a room into an oven in July. Acrylic domes are cheaper but yellow over time and transmit more heat and noise.
Sizing the Opening
A common rule is that skylight glass area should equal roughly 5 percent of the floor area in rooms with plenty of windows and up to 15 percent in rooms with few windows. For a 12-by-14-foot bedroom (168 sq ft), that means about 8 to 25 sq ft of glazing. Standard widths like 21.5 inches and 30.5 inches are designed to fit between rafters on 24-inch centers, which can save you from cutting structural members at all.
Roof Skylight Installation Cost Breakdown
Total installed prices vary with roof type, pitch, and whether a light shaft is needed. Expect these typical 2026 ranges:
| Project Type | Typical Installed Cost |
|---|---|
| Tubular skylight | $600 – $1,200 |
| Fixed skylight, vaulted ceiling | $1,200 – $2,800 |
| Venting skylight with light shaft | $2,500 – $4,500 |
| Solar venting skylight, steep or tile roof | $3,500 – $5,500+ |
Labor usually represents 50 to 65 percent of the bill. Tile, slate, and metal roofs add $500 to $1,500 because of specialty flashing kits and the care needed to remove and reset roofing material. Drywall finishing and painting of the shaft often adds $300 to $800 if the roofer subcontracts it. Some regions require a building permit ($75 to $300) whenever rafters are cut.
A federal tax credit has applied in past years to qualifying ENERGY STAR skylights; check current IRS guidance and keep the manufacturer’s certification statement with your records.
Step-by-Step: How the Installation Is Done
Whether you hire it out or tackle a deck-mounted unit yourself, the sequence looks like this.
- Locate the opening from inside. In the attic, drive a nail up through the roof deck at each corner of the planned opening, keeping the layout between rafters when possible. Check for obstructions first.
- Remove shingles. On the roof, strip shingles about 12 inches beyond the nail marks on all sides. Keep intact shingles for reuse around the flashing.
- Cut the deck. Snap chalk lines between nails and cut with a circular saw set to the sheathing depth, typically 1/2 or 5/8 inch.
- Reframe. If a rafter must be cut, install doubled headers top and bottom and doubled trimmer rafters on the sides, using the same lumber dimension as the existing framing. Use joist hangers rated for the load.
- Apply underlayment. Wrap self-adhered ice-and-water membrane up the sides of the curb or frame and at least 6 inches onto the deck on every side. On the uphill side extend it 12 to 18 inches.
- Set the skylight. Fasten the unit with the manufacturer’s brackets, check for square by measuring diagonals, and shim until the frame is level side to side.
- Install flashing. Start at the bottom with the sill flashing, then weave step flashing pieces up each side, interleaving one piece per shingle course. Finish with the head flashing and saddle at the top.
- Reshingle. Replace shingles so they overlap the step flashing correctly, leaving a 1/4- to 1/2-inch gap at the gutter channels on each side of the frame so debris can wash through.
Flashing and Waterproofing: Where Leaks Start
Use the manufacturer’s flashing kit designed for your roof profile. Kits for asphalt shingles use step flashing; kits for tile and metal roofs include pleated or high-profile aprons that conform to the roof surface. Mixing generic aluminum step flashing with a factory skylight often voids the leak warranty, which is typically 10 years on installation when the correct kit is used.
Avoid relying on roofing cement as your primary barrier. Sealants dry out and crack after a few years of UV exposure and freeze-thaw cycling. Water should be shed by overlapping layers of membrane, flashing, and shingles, each lapped so that gravity carries water outward and downward. Sealant is only a backup.
Snow country deserves extra attention. On the uphill side of a large skylight, snow dams can form and push meltwater under shingles. A cricket or diverter, extended membrane, and good attic insulation to keep the roof deck cold reduce ice-dam risk significantly.
Building the Light Shaft and Finishing Inside
Where the ceiling is flat and an attic sits above it, you need a shaft connecting the roof opening to the ceiling opening. A straight shaft is easiest, but flaring the shaft so the ceiling opening is larger than the roof opening spreads light across the room more evenly. A splayed shaft can increase the visible light footprint by 30 to 50 percent.
Frame the shaft with 2x4s, then insulate the exterior faces to the same R-value as the surrounding attic, typically R-38 to R-49 in cold climates. An uninsulated shaft acts like a chimney for heat loss and invites condensation on the glass. Add a vapor retarder on the warm side in climate zones 5 and higher.
Finish the interior with moisture-resistant drywall, especially in bathrooms. Paint the shaft a flat, bright white to bounce the most light. Budget one day of drying between mud coats if you are doing the drywall yourself.
DIY or Hire a Pro?
A tubular skylight is a reasonable weekend project for a confident DIYer with roof experience and fall protection. Framed skylights are a different story. Cutting rafters, integrating step flashing, and working on a 6/12 or steeper pitch put a job squarely in contractor territory for most homeowners.
Some manufacturers only honor their full installation warranty when a certified installer does the work. Before you buy, read the warranty terms; the savings from DIY labor, often $800 to $1,500, can evaporate after one leak that damages ceiling drywall and insulation.
When hiring, ask each contractor how many skylights they install per year, which flashing kit they plan to use, whether they apply ice-and-water membrane on all four sides, and who is responsible for drywall and paint. Get at least three written bids that list the specific model number.
Maintenance and Long-Term Performance
Once installed, skylights need little care. Clean the exterior glass twice a year with a soft brush and mild soap, and clear leaves from the gutter channels in fall. Inspect the flashing whenever you have the roof inspected, generally every three to five years. Watch the ceiling around the shaft for brown stains, which signal either a flashing leak or condensation from an under-insulated shaft.
Condensation on the inside of the glass during winter is usually a humidity problem, not a leak. Running bathroom exhaust fans for 20 minutes after showers and keeping indoor humidity between 30 and 45 percent in cold weather typically solves it.
If you plan to replace your roof within the next few years, coordinate the two projects. Installing a skylight during a reroof saves the cost of removing and replacing shingles twice, and the new flashing integrates cleanly with the new underlayment. Many homeowners find that timing a roof skylight installation with a reroof trims $400 to $900 off the total.
Final Checklist Before You Start
- Confirm roof age, pitch, and structural layout in the attic.
- Pick glazing with low-E coating and an SHGC suited to the orientation.
- Buy the manufacturer’s flashing kit for your roofing material.
- Pull a permit if rafters will be cut.
- Schedule a dry, mild-weather window of at least two days.
- Plan insulation and drywall for the light shaft before the roof is opened.
Handled with the right flashing, framing, and insulation, a skylight is one of the most satisfying upgrades you can make. It changes how a room feels at every hour of the day and costs nothing to run once the daylight starts pouring in.