
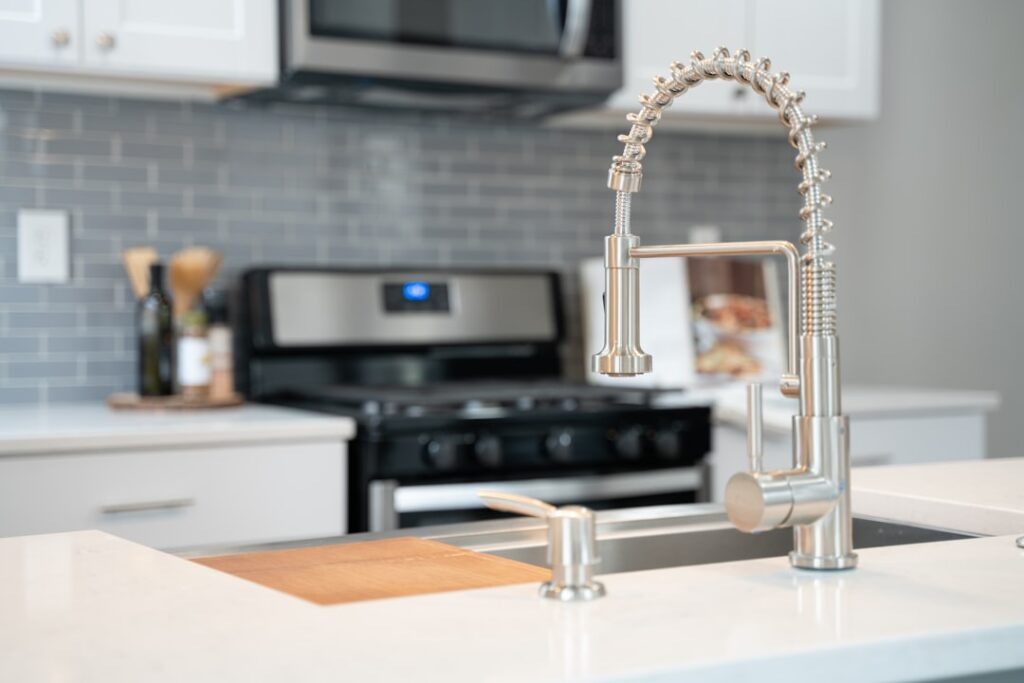
The factory rv kitchen faucet in most rigs is a plastic-bodied unit chosen to save weight and about eleven dollars of the manufacturer’s money. It wobbles by year two, the finish peels by year four, and the spray head splits the first winter you forget to winterize. Replacing it is one of the highest-satisfaction upgrades in RV ownership — and yes, in most rigs you can install a residential faucet if you know the three differences that matter: connection fittings, physical limits, and winterization behavior. This guide covers all three, plus RV-specific picks and the swap itself.
Part of our Kitchen Remodeling guide — explore the full guide →
RV vs. Residential Faucets: The Real Differences
1. Supply connections
This is the one that catches people. Residential faucets terminate in 3/8-inch compression connectors (or integrated hoses ending in 3/8-inch female compression). RV plumbing runs PEX with one of these at the faucet:
- 1/2-inch NPSM straight-thread nuts on the faucet tailpieces — the classic RV standard.
- Push-to-connect or barbed PEX fittings directly to the faucet tubes on newer rigs.
The fix is a $6–$12 pair of adapters: 1/2-inch female NPSM (or your PEX termination) to 3/8-inch male compression. Hardware stores stock them; RV parts counters definitely do. Alternatively, replace the supply connectors entirely with 1/2-inch PEX-to-3/8-compression faucet connector hoses — often the cleanest path.
2. Mounting footprint
RV kitchen faucets are mostly two-hole, 4-inch centerset or single-hole formats. Measure before buying:
- Single hole: any single-hole residential faucet drops in.
- 4-inch centers: choose a residential centerset or a single-hole faucet with a deck plate covering the extra hole.
- 8-inch spread (some larger fifth wheels): standard residential widespread fits.
3. Weight, height, and motion
- Weight: a full-brass residential faucet weighs 4–6 pounds vs. 1–2 for the plastic RV unit. RV sinks are thin stainless or acrylic over lightweight counters — a heavy faucet needs the mounting area reinforced with a plywood backer block ($0, scrap) or it will flex and eventually crack sealant.
- Height: anything over the sink travels at 65 mph and lives under cabinets. Check clearance to the upper cabinet AND consider slide/galley cover interference. Faucets 12 inches and under suit most rigs; some owners want a folding or low-arc model to close a sink cover.
- Motion: road vibration loosens what houses never test. Use the faucet’s full mounting hardware, thread-lock the mounting nuts finger-tight-plus, and recheck seasonally.
Winterization: The Spec Nobody Prints
Any faucet that holds trapped water can split when it freezes. Pull-down spray heads and their hoses are the vulnerable point — residential or RV. Winterize the same way regardless of faucet: blow out the lines or run RV antifreeze until it flows from both hot and cold at the spout and through the sprayer. Metal-bodied faucets actually tolerate freeze mistakes better than the factory plastic ones, which crack at the swivel. There is no meaningful “RV-rated for freezing” faucet — there is only correct winterization.
Replacement Options by Type
| Option | Price | Weight | Best for |
|---|---|---|---|
| RV-brand plastic (Dura, Empire, Valterra) | $25–$60 | ~1.5 lb | Cheapest like-for-like swap, weight-critical rigs |
| RV-brand metal (Dura DF-PK330, Flow Max) | $60–$130 | 2–3 lb | Direct-fit upgrade, keeps RV threads |
| Residential budget pull-down (Kraus, WEWE, APPASO) | $50–$120 | 3–4 lb | Big function jump, adapters needed |
| Residential name-brand (Moen, Delta, Kohler bar/mid-size) | $130–$250 | 4–5 lb | Full-timers, lifetime warranties |
Two residential formats deserve special mention for rigs:
- Bar-size faucets. A bar faucet’s compact reach and height suit RV sink bowls (typically 13–15 inches) perfectly — the sizing logic in the bar sink faucet guide maps directly onto RV galleys.
- Compact pull-downs. A short pull-down like the Moen Align bar version or a mid-height Kohler faucet (the Sous is a popular RV swap where clearance allows) turns the tiny RV sink into a workable prep station — the sprayer reaches corners the bowl geometry otherwise wastes.
The Swap, Step by Step
- Depressurize. Turn off the pump and city-water connection; open the faucet to bleed pressure. Put a towel and a shallow pan under the sink — RV traps sit close.
- Disconnect supplies. Back off the 1/2-inch nuts or release the PEX push-fittings. Expect a cup of water.
- Remove mounting nuts. RV faucets usually mount with plastic wing nuts from below. Reach is tight; a basin wrench or a $12 faucet wrench earns its keep here.
- Clean the deck. Scrape old putty or butyl. RV decks are often thin — inspect for cracks and soft spots now.
- Add a backer if going metal. A 6×8-inch piece of 1/2-inch plywood under the deck, bedded in adhesive with holes matching the faucet, spreads the load.
- Set the new faucet on its gasket or a bead of non-silicone plumber’s sealant (easier future removal), and tighten from below.
- Adapt the connections. Install your NPSM-to-compression adapters or new PEX connector hoses. Use two wrenches — one to hold, one to turn — so you don’t twist PEX lines.
- Pressure test on city water first (steadier pressure), checking joints dry-fingered after 15 minutes, then again after the first drive.
Time: 45–90 minutes. Special tools: basin wrench, adapters. Difficulty: easier than a house faucet except for the crouching.
Pressure and Flow Notes
- RV pumps deliver 40–55 psi and 2.5–3.5 gpm — comfortably inside residential faucet operating range (20–80 psi). No compatibility issue.
- Keep a 40–50 psi regulator on the city-water inlet regardless; campground spigots occasionally exceed 100 psi, which kills faucets and lines alike.
- A 1.5 gpm aerator stretches boondocking tanks. Some owners fit a 1.0 gpm aerator and never notice at the galley sink.
- Pulsing flow on pump power is the pump’s accumulator question, not the faucet’s.
Mistakes to Avoid
- Buying before measuring hole spacing and cabinet clearance. The #1 return reason.
- Reusing crusty factory supply lines. New connectors cost $15; galley floods cost floors.
- Over-tightening plastic wing nuts or PEX fittings — snug, not gorilla.
- Mounting 5 pounds of brass to an unsupported thin deck.
- Forgetting the sprayer hose at winterization — the most common post-winter casualty.
- Silicone-gluing the base down. You will replace this faucet someday; use putty or the gasket.
Upgrades Worth Bundling Into the Swap
While the sink plumbing is open, four cheap additions multiply the payoff. First, quarter-turn shut-off valves on both supply lines ($8–$15 each): most rigs have none at the galley, and being able to isolate the faucet without depressurizing the whole coach turns future maintenance into a five-minute job. Second, a dedicated drinking-water tap: boondockers and full-timers increasingly plumb a small carbon-block filter to a third-hole drinking faucet, keeping the main faucet’s flow unrestricted while the filtered line handles coffee and bottles — the residential logic in the filtered-water setups applies identically at 12 volts of nothing, since these systems are pressure-driven. Third, a sprayer soap dispenser or counter-hole cover for whichever extra hole your two-hole deck leaves behind; color-matched covers cost $6. Fourth, a drip tray or a bead of clear silicone at the counter seam behind the faucet — RV counters are particleboard under laminate, and the swelling that starts at the faucet cutout is the most common galley rot. While you’re under there, photograph the finished connections: when something drips at a campground two years from now, knowing exactly which adapter and thread you used turns a parts-store scavenger hunt into a two-minute purchase. Total add-on cost for all four: under $60, less than one night at a resort park.
FAQ
Can I really use a residential faucet in an RV?
Yes — thousands of full-timers do. You need thread adapters (or new connector hoses), deck reinforcement for heavy models, and clearance measurements. Everything else is identical.
Why are RV faucets plastic?
Weight and cost. Every pound matters against cargo capacity, and manufacturers outfit galleys to a price. For one faucet, the 3-pound difference of going metal is negligible unless you’re at GVWR already.
Do residential warranties cover RV use?
Technically many warranties specify residential installation; RV use falls in a gray zone. In practice, Moen and Delta routinely ship replacement cartridges without asking where the faucet lives.
What about the bathroom faucet?
Same logic, smaller scale — RV lavatory faucets are 4-inch centersets, and any residential centerset fits with the same adapters.
Swap the wobbling plastic for metal, adapt the threads for $10, and the galley instantly feels like a kitchen instead of a camper. Of every upgrade under $200, few get used more times a day than the faucet.


