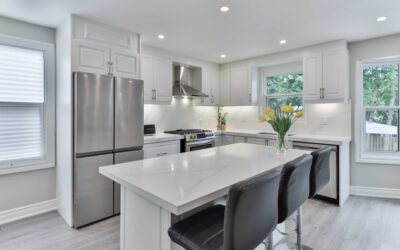
Sage green has quietly become one of the most requested backsplash colors in modern kitchen design, and for good reason. A sage green tile backsplash reads as calm and organic without the trend fatigue of pure white or the heaviness of dark navy. It borrows from nature, flatters both warm and cool cabinetry, and photographs beautifully in the soft, muted way that makes a kitchen feel finished rather than showroom-cold. If you are weighing this color for your own remodel, this guide covers tile shapes, finishes, grout choices, cabinet pairings, and what installation actually costs.
Part of our Kitchen Remodeling guide — explore the full guide →
- Why Sage Green Works So Well in Kitchens
- Choosing Your Tile Shape and Layout
- Glossy, Matte, or Handmade Finish
- The Best Grout Color for Sage Green Tile
- Pairing Sage With Cabinets and Countertops
- What a Sage Green Backsplash Costs
- Ceramic vs. Porcelain vs. Glass in Sage
- Installation Tips for a Clean Result
Why Sage Green Works So Well in Kitchens
Sage sits in the gray-green family, which is exactly what makes it so livable. It has enough gray to act almost like a neutral, so it doesn’t fight with countertops, appliances, or flooring the way a saturated emerald or lime would. At the same time it brings warmth and life that a plain white or beige backsplash lacks. Under warm LED lighting it leans earthy and cozy; under cooler daylight it turns crisp and a touch minty.
Because it is a muted mid-tone, sage hides everyday splatter and water spots better than glossy white, and it pairs with an unusually wide range of styles. Farmhouse, transitional, mid-century, and even modern kitchens all accommodate it. That flexibility is a big part of why designers keep reaching for it.
Choosing Your Tile Shape and Layout
The shape of the tile changes the personality of a sage backsplash more than most people expect. The same color reads traditional in one format and contemporary in another.
- Subway tile (3×6 or 2×8): The most popular choice. A classic running-bond layout feels timeless, while a vertical stack or herringbone reads more modern.
- Zellige tile: Handmade Moroccan-style tiles with irregular edges and a rippled glaze. Sage zellige is stunning because the color variation and light-catching surface add depth. Expect more expense and a more forgiving eye for imperfection.
- Hexagon and picket (arabesque): Great for adding geometric interest while keeping the calm color. Elongated hex feels current without being trendy.
- Square grid (4×4): A retro-leaning option that suits mid-century and cottage kitchens.
For a full backsplash behind a range, consider running the tile all the way to the underside of the upper cabinets or even to the ceiling behind an open shelf. A floor-to-counter sage field makes a small kitchen feel intentional rather than patchy.
Glossy, Matte, or Handmade Finish
Finish controls how much light the backsplash bounces and how the sage color actually appears. A glossy glaze reflects light, brightens the space, and wipes clean easily, which is ideal for a darker sage in a low-light kitchen. Matte tile mutes the color further and leans modern and understated, though it can show grease near a cooktop and may need a bit more scrubbing.
Handmade or zellige finishes fall in between, with a glossy but uneven surface that shifts as you move around the room. If you love the look of variation and slight color shift from tile to tile, handmade is worth the premium. If you want a clean, uniform wall, machine-made ceramic or porcelain will give you consistency.
The Best Grout Color for Sage Green Tile
Grout is the detail that makes or breaks the finished look, and it is where many DIYers go wrong. You have three broad directions:
- Warm greige or light gray grout: The safest, most versatile choice. It softens the grid lines and lets the sage color lead. This is what most designers specify.
- White grout: Creates crisp contrast and a fresh, cottage-y look, but it highlights every grout line and shows staining near a stove over time.
- Tone-on-tone sage or gray-green grout: Nearly hides the joints for a seamless, monolithic wall. Beautiful with zellige, but it demands precise installation because there is nowhere for sloppy lines to hide.
Whatever you choose, buy a urethane or high-quality epoxy grout for a kitchen backsplash. It resists staining far better than standard cementitious grout and rarely needs sealing.
Pairing Sage With Cabinets and Countertops
Sage is famously easygoing, but a few combinations sing. With white or off-white cabinets, sage adds just enough color to keep the kitchen from feeling sterile. With natural wood cabinetry, especially white oak or walnut, sage picks up the organic tone and creates a warm, grounded palette. Against black or deep charcoal lower cabinets, a lighter sage backsplash provides breathing room and keeps the room from feeling heavy.
For countertops, a white or lightly veined quartz keeps the focus on the tile. Warm-toned butcher block reinforces the natural theme. If you want drama, a honed soapstone or a green-veined marble can echo the backsplash while adding movement. Brass or unlacquered brass hardware and faucets are the classic metal pairing, though matte black and warm nickel both work.
What a Sage Green Backsplash Costs
Budget varies widely with tile choice. Standard ceramic subway tile in sage runs roughly $3 to $8 per square foot for materials. Porcelain and higher-end ceramic push $8 to $15. Handmade zellige is the splurge at $15 to $40 per square foot, and its irregularity means you should order 15 to 20 percent extra for cuts and breakage.
Professional installation typically adds $10 to $20 per square foot in labor, more for intricate patterns like herringbone or for zellige, which is slower to set. A typical kitchen backsplash of 30 square feet therefore lands somewhere between $600 for a simple DIY subway job and $2,500 or more for professionally installed handmade tile. If you are handy, a straightforward subway backsplash is a very achievable weekend DIY that saves the bulk of that labor cost.
Ceramic vs. Porcelain vs. Glass in Sage
The material behind the glaze matters as much as the color. Ceramic is the most common and affordable choice for a sage backsplash, easy to cut and plenty durable for a wall that never gets walked on. Porcelain is denser and more water-resistant, worth the small premium in a heavy-use kitchen or a bathroom shower surround, though the difference is minor on a vertical backsplash. Glass tile in sage brings a luminous, reflective quality that makes small kitchens feel brighter, and it wipes perfectly clean, but it shows adhesive behind it, so it must be installed over a white or matching thinset for the color to read true.
Natural stone in a sage-green tone, such as a green marble or a soft serpentine, offers organic veining that no manufactured tile can replicate. Stone demands sealing and gentle cleaners, and it costs more, but for a statement backsplash it delivers depth and one-of-a-kind character. For most homeowners, a quality glazed ceramic or porcelain in a well-chosen sage strikes the best balance of beauty, durability, and value, reserving zellige, glass, or stone for a splurge where the backsplash is the room’s focal point.
Installation Tips for a Clean Result
If you tackle the install yourself, a few habits separate a professional-looking wall from an amateur one. Start with a dead-level ledger line rather than trusting your countertop to be flat. Use tile spacers religiously, and if you chose handmade tile with irregular edges, embrace slightly wider joints so the variation looks deliberate. Dry-lay a section first to plan your cuts so you avoid a sliver of tile in the most visible corner.
Seal the wall behind a wet zone if you are tiling over drywall, use a quality thinset rated for your tile, and give the mortar full cure time before grouting. Wipe grout haze off glazed tile promptly, because a matte or handmade surface can hold a film if you let it dry too long. Done carefully, a sage green tile backsplash becomes the quiet anchor of the whole kitchen, a color that will still feel right ten years from now.
Prefer to explore on your own?
See how new flooring looks in your actual room in seconds — free, no signup.
Try the free Floor Studio →