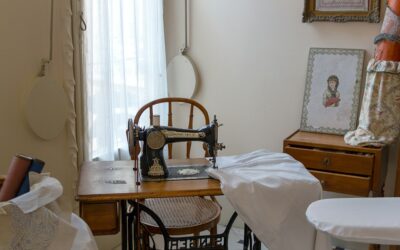
A wobbly card table turns every seam into a fight, and a pile of bins on the floor turns every project into a search. A good sewing table with storage fixes both: a stable, vibration-free surface at the right height, with drawers and shelves that keep thread, tools and fabric within reach. The trick is matching the table to your machine, your projects and your body, not just picking the one with the most drawers.
Here is the short answer. For most people, a sewing surface around 28 to 30 inches high works for standard sewing, and a lowered machine platform that puts the needle plate flush with the table is even better. Look for at least 20 to 24 inches of depth for garment sewing and 30 inches or more, plus side extensions, for quilting. Confirm the table’s weight rating covers your machine, check that it sits solid without rocking, and anchor any tall storage unit to the wall.
- What to Look for in a Sewing Table With Storage
- Ideal Sewing Table Height and Ergonomics
- Sizes and Depth for Garment Sewing vs Quilting
- Storage Layouts: Drawers, Shelves and Cabinets
- Stability and Vibration Control
- Anti-Tip Safety for Tall Units
- Embroidery Machine Fit
- Plugging In Safely
- Setup Steps
- Troubleshooting
- Cost Ranges
- Frequently Asked Questions
The rest of this buying guide covers sizes, heights, storage layouts, stability, embroidery machine fit, electrical safety, setup and cost ranges.
What to Look for in a Sewing Table With Storage
Before comparing finishes or colors, narrow the field with a few practical questions.
- Machine size and weight: A mechanical machine might weigh 12 to 20 pounds, while a combination sewing and embroidery machine or a heavy-duty model can be considerably heavier. The tabletop and any lift platform must handle that weight without sagging.
- Work you do most: Garment sewing, quilting, crafts and embroidery each need different surface sizes.
- Room footprint: Measure the wall or corner where it will go, including space for your chair to roll back and for drawers to open fully.
- Storage needs: Thread spools, bobbins, presser feet, rotary cutters, rulers, patterns and fabric all store differently.
- Height adjustability: Adjustable legs or a lift platform help if more than one person sews or you switch between sitting and standing tasks.
Ideal Sewing Table Height and Ergonomics
Height drives comfort more than any other feature. When you sew at a table that is too high, your shoulders creep up toward your ears. Too low, and you hunch over the needle.
A practical target is to sit with your feet flat, thighs roughly parallel to the floor, and forearms level or angled slightly down when your hands rest on the machine bed. For many adults, that puts the machine bed about 26 to 29 inches off the floor. Because a free-standing machine adds 3 to 4 inches above the tabletop, a standard 30 inch desk often places the bed too high.
That is why many sewing desks have a drop-in or lift platform. Lowering the machine so its bed sits flush with the tabletop gives you a large, flat surface for guiding fabric and keeps your wrists in a neutral position. If your table lacks one, a slightly lower table or an adjustable chair with a footrest can close the gap.
Other ergonomic details matter over a long sewing session:
- Place the needle roughly centered in front of your body, not off to one side.
- Leave room for the foot pedal so your knee bends at a comfortable angle.
- Use task lighting from the front and left (for right-handed sewers) to avoid shadows on the needle.
- Choose a cutting surface at standing height, often 36 to 40 inches, separate from your sewing height if you cut a lot of fabric.
Sizes and Depth for Garment Sewing vs Quilting
Garment sewing on a standard machine works well on a sewing machine desk around 40 to 48 inches wide and 20 to 24 inches deep. That leaves room for the machine plus a few inches on each side for fabric and a pincushion.
Quilting asks for much more. A queen-size quilt is heavy, and the table must support its bulk behind and to the left of the needle, or the weight drags the fabric and causes uneven stitches. A quilters table with storage typically offers:
- A depth of 30 inches or more behind the needle.
- Fold-out leaves or extension tables that add width on the left side.
- A flush-mount opening sized to your machine’s bed.
- Smooth laminate or melamine surfaces so fabric glides instead of snagging.
A sewing craft table with folding wings is a good compromise for smaller rooms. Leaves fold down when you are done, and the table works as a cutting or craft surface in between.
Storage Layouts: Drawers, Shelves and Cabinets
The best storage keeps your most-used items within arm’s reach and hides the rest. Think about what you reach for during a project versus what you store between projects.
Drawers
A sewing desk with drawers works best when the drawers are shallow, 2 to 4 inches deep, for small tools. Deep drawers become junk piles. Look for full-extension slides so you can see the back of the drawer, and dividers or inserts for bobbins, presser feet and needles.
Shelves and Cubbies
Open shelves suit fabric stacks, pattern binders and project bins. Adjustable shelves let you change layouts as your stash grows.
Cabinets and Doors
Closed cabinets hide clutter and keep dust off fabric. Some sewing cabinets close completely, hiding the machine inside a piece of furniture that looks like a sideboard when not in use.
Thread and Notion Storage
Wall-mounted spool racks, pegboards and magnetic strips free up drawer space. Keep thread out of direct sun, which fades color and weakens fibers.
A white sewing table or one with a light laminate top brightens a small room and makes dark thread easier to see, while wood tones hide scuffs better. Choose whatever finish wipes clean easily and resists scratches from pins and scissors.
Stability and Vibration Control
Sewing machines vibrate, especially at high speed, and a table that wobbles shakes your stitches and loosens screws over time. Before you buy, look for these signs of a stable design:
- Solid wood, plywood or thick engineered panels rather than thin particleboard.
- Cross-bracing, a back panel or a stretcher bar between legs.
- Adjustable leveling feet to correct uneven floors.
- A machine platform that locks firmly in place, with sturdy hinges and supports.
- Locking casters if the table rolls, so it stays put while you sew.
Place the table on a level floor and test it by pushing gently on a corner. If it racks side to side, tighten the hardware, add a back brace, or use furniture shims under the low leg.
Anti-Tip Safety for Tall Units
Many sewing setups include a hutch, a tall storage tower or a cabinet with a heavy machine on a top shelf. Tall, top-heavy furniture can tip forward if a child climbs it or if several loaded drawers are pulled out at once.
- Anchor tall units and hutches to wall studs with the anti-tip hardware provided, or with a furniture anchor kit.
- Store heavy items, like spare machines and boxes of fabric, on low shelves.
- Open one drawer at a time, and use drawer stops if the unit has them.
- Keep scissors, rotary cutters and pins in a closed or high drawer if small children are around.
Embroidery Machine Fit
An embroidery machine table needs a different shape from a standard sewing table. Embroidery units have a moving arm and hoop that travel well beyond the machine’s footprint, often extending to the left and toward the back. Check the maker’s dimensions for the machine with its embroidery unit and largest hoop attached, then add a few inches of clearance on all sides so the hoop never bumps a wall, lamp or stack of fabric.
Weight matters here too. Combination embroidery machines are heavier than standard models, and the arm’s movement shifts weight as it stitches. Choose a tabletop rated well above the machine’s weight, and avoid lift platforms that flex. A solid flat table often works better for embroidery than a drop-in platform.
Plugging In Safely
Sewing machines, irons and task lights add up, especially in a compact craft corner. Plug sewing machines directly into a wall outlet rather than a daisy-chained power strip or a light-duty extension cord. If you need extra outlets, use a single surge protector rated for the load, never chain one strip into another, and keep cords out of walkways and away from the iron. An iron draws a lot of current and should go into its own wall outlet. If your sewing room has too few outlets, have a licensed electrician add one rather than relying on extension cords. Unplug irons when you step away and keep the cord off the cutting area.
Setup Steps
- Measure your space and machine, including the embroidery unit and pedal.
- Assemble the table on a flat surface, tightening hardware in stages so panels stay square.
- Level the table with adjustable feet or shims.
- Install anti-tip anchors on any tall unit before loading shelves.
- Adjust the platform so the machine bed sits flush with the tabletop.
- Arrange storage: daily tools in top drawers, fabric and bins below.
- Route cords to the wall outlet so they do not cross your feet or the pedal.
Troubleshooting
- Table shakes at high speed: Tighten hardware, level the feet and add a back brace or heavier tabletop.
- Machine platform sags: Check weight rating and support brackets; add a shim or replace the platform hardware.
- Neck and shoulder pain: Lower the machine, raise your chair or add a footrest.
- Quilts drag off the edge: Add an extension table or position a second table behind the machine.
Cost Ranges
Simple folding sewing tables with a shelf or two generally cost about $80 to $200. Sewing desks with drawers and a lift platform typically run $200 to $600. Full sewing cabinets with built-in storage, quilting extensions and adjustable platforms can range from about $600 to $2,000 or more. Custom built-ins vary widely with materials and labor.
Pick the size and height first, then the storage, and your sewing table with storage will support every project rather than getting in the way.
Frequently Asked Questions
What is the best height for a sewing table?
Many sewers prefer the machine bed around 26 to 29 inches off the floor. A lowered platform that sets the machine flush with a 28 to 30 inch tabletop works well.
How deep should a quilting table be?
Look for 30 inches or more of depth behind the needle, plus a left-side extension, so the quilt’s weight stays supported instead of pulling on the fabric.
Can a regular desk work as a sewing table?
Yes, if it is sturdy and does not wobble. Most standard desks place the machine slightly high, so an adjustable chair or footrest helps.
Do sewing cabinets need to be anchored to the wall?
Tall units, hutches and towers should be anchored to wall studs, especially with children in the home or a heavy machine on an upper shelf.
Is it safe to plug a sewing machine into a power strip?
Plug it directly into a wall outlet when possible. If you must use a surge protector, use one rated for the load and never chain strips together.