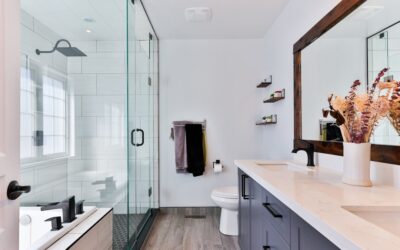
A handheld shower is far more useful when it can sit at any height, and that is exactly what a shower slide bar does. The bar mounts vertically on the shower wall, and a sliding bracket holds the handheld head anywhere along its length. Tall and short family members can each set their own spray height, kids can rinse without a fight, and anyone who needs to sit while showering gets a spray where they actually need it.
Part of our Bathroom Remodeling & Flooring guide — explore the full guide →
Most installations take an hour or two. The hard part is drilling through tile or a fiberglass surround without cracking the surface or creating a path for water to get behind the wall. With the right bit, careful layout and good sealing, the job is very manageable for a handy homeowner.
Start with choosing the right bar, since length, adjustability and finish affect both comfort and how the bar looks next to your existing valve trim.
Choosing a Shower Slide Bar
Slide bars typically come in lengths from about 24 to 30 inches, with some longer versions for accessible bathrooms. Measure the vertical space on your wall between the tub ledge or shower floor and a comfortable upper height, often about 72 to 78 inches above the floor for the top bracket. A longer bar gives a wider adjustment range but needs more wall space clear of niches, grab bars and valve trim.
Key Features to Compare
- Bracket style: push-button, twist-lock or friction slides. Push-button styles are easiest for people with limited grip strength.
- Tilt adjustment: a bracket that pivots lets you aim the spray without moving the bar.
- Adjustable mounting points: some bars let you slide the end brackets, which helps you land screws in grout joints or framing.
- Integrated soap dish or shelf: convenient, but adds width.
- Hose length: 60 to 72 inches is typical; 72 to 84 inches suits seated showering.
Finish Matching
Match the finish to your shower valve trim and head: polished chrome, brushed nickel, matte black, oil-rubbed bronze or brushed gold. Finishes vary between makers even when they share a name, so buy a kit that includes the bar, hose and handheld if you want an exact match. A shower slide bar with handheld shower head included is often the simplest route.
Many people search for a shower slider bar and find both terms used for the same product. A slide bar is not a grab bar unless the packaging says it is rated to support body weight. Some combination models exist that serve both purposes, but a standard bar will pull out of the wall if someone leans on it.
Tools and Materials
- Slide bar kit with mounting brackets, screws and anchors
- Drill with variable speed (not hammer mode)
- Diamond-tipped or carbide tile bit sized for the anchors
- Painter’s tape and a fine marker
- 4-foot or 2-foot level and tape measure
- Spray bottle of water for cooling the bit
- Stud finder or a small inspection magnet
- 100% silicone sealant rated for kitchen and bath
- Safety glasses and an N95 dust mask
- Screwdriver and a hex key if the brackets use set screws
Step by Step: Installing a Slide Bar on Tile
- Plan the location. Position the bar near the shower valve so the hose reaches the outlet without stretching. Keep it out of the main spray path so the bracket does not catch on the fixed head. Hold the bar in place and check the reach of the hose at the lowest and highest settings.
- Check for framing and plumbing. Use a stud finder to locate studs. Pipes typically run vertically from the valve to the shower arm, so avoid drilling directly above or below the valve body.
- Mark the holes. Put painter’s tape over each bracket location. Hold the bar plumb with a level and mark through the bracket holes onto the tape. If possible, shift the bar so screws land in grout joints or within the body of a tile, at least 1/2 inch from the tile edge, which reduces the risk of cracking.
- Drill through the tile. Start at a slow speed with light pressure and no hammer action. Mist the bit and tile with water to keep the bit cool and control dust. Drilling wet also keeps fine silica dust down; wear safety glasses and a dust mask. Once through the tile, stop and switch to a standard bit if the backer requires it.
- Drill the backer. Cement board and drywall behind tile need the right anchor. Hollow-wall anchors or toggle-style anchors are used where there is no stud; wood screws go straight into studs or blocking.
- Seal the holes. Squeeze a dab of silicone into each hole before inserting the anchor. This keeps water from wicking behind the tile through the screw path.
- Install anchors and brackets. Tap anchors in flush, then fasten the brackets. Snug the screws but do not overtighten, which can crack tile or strip anchors.
- Attach the bar and hose. Clip or set-screw the bar into the brackets, slide on the holder, and connect the hose to the handheld and the shower outlet or diverter. Use plumber’s tape on threaded connections if the instructions call for it.
- Test. Run the water and check every connection for drips. Slide the bracket through its full range and make sure it locks firmly at each height.
Mounting a Slide Bar on a Fiberglass or Acrylic Surround
Fiberglass and acrylic walls flex, crack and craze if you drill aggressively or clamp brackets too tight. Most surrounds have an air gap or foam behind the shell, so standard plastic anchors spin uselessly. Use these adjustments:
- Apply painter’s tape and drill with a sharp, standard twist bit at low speed. Let the bit cut; do not push.
- Drill a small pilot hole first, then step up to the final size to avoid chipping the gel coat.
- Use anchors made for hollow walls, such as expanding toggle anchors or anchors designed specifically for fiberglass surrounds.
- Where possible, locate the brackets over the wall studs and add a wood screw through the shell into framing, with a bead of silicone to seal.
- Tighten only until the bracket is snug. If you see the surface dimple, back off.
Some surrounds have a thick reinforced area designed for accessories. Check the manufacturer’s documentation before drilling, since a few warranties restrict drilling in certain zones.
Troubleshooting Common Problems
- Bracket slips down under the weight of the head: tighten the friction screw or set screw, or replace the holder. Heavy metal handhelds need a firm locking bracket.
- Bar wobbles: anchors are loose or spinning. Remove the bracket, upsize the anchor or switch to a toggle anchor, and reseal.
- Hairline crack around a hole: seal it with clear silicone to keep water out and plan to replace the tile if the crack grows.
- Leak at the hose connection: check that the rubber washer is seated and flat. Plumber’s tape alone will not stop a missing washer.
- Weak pressure from the handheld: clean mineral deposits from the nozzles and check for a flow restrictor that is clogged.
Costs and When to Call a Pro
Standalone slide bars are generally inexpensive to mid-range, while complete kits with a handheld head and hose cost more, and accessible or combination grab-bar models sit at the higher end. Expect to spend a little extra on a diamond bit and the right anchors.
A handyman or plumber typically charges an hour or two of labor for a slide bar installation. Hire a pro if you have natural stone tile, large-format porcelain that you are worried about cracking, a glass tile wall, or if you need a slide bar that also serves as a weight-rated grab bar, which must be anchored into framing or blocking to meet accessibility guidelines. If the project grows into adding a diverter or changing the shower valve, a licensed plumber should handle that work, and it may need a permit.
Frequently Asked Questions
How high should a shower slide bar be mounted?
Most people place the top bracket about 72 to 78 inches above the shower floor and the bottom bracket around 48 inches. Adjust for the tallest and shortest users and for seated use if needed.
Can I install a slide bar without drilling?
Some adhesive-mount slide bars exist, but they hold less weight and can loosen in a steamy shower. Drilled installations are more reliable, especially for heavier handheld heads.
Can a shower slide bar be used as a grab bar?
Only if it is specifically rated as a grab bar and anchored into framing or blocking. A standard slide bar is not designed to support body weight.
What drill bit do I use for porcelain tile?
Use a diamond-tipped bit at low speed with water cooling. Carbide bits work on softer ceramic but dull quickly on dense porcelain.
Where should the slide bar go relative to the shower valve?
Place it close enough that the hose reaches the outlet comfortably at both ends of the bar, and outside the main spray of any fixed shower head so the bracket does not get in the way.