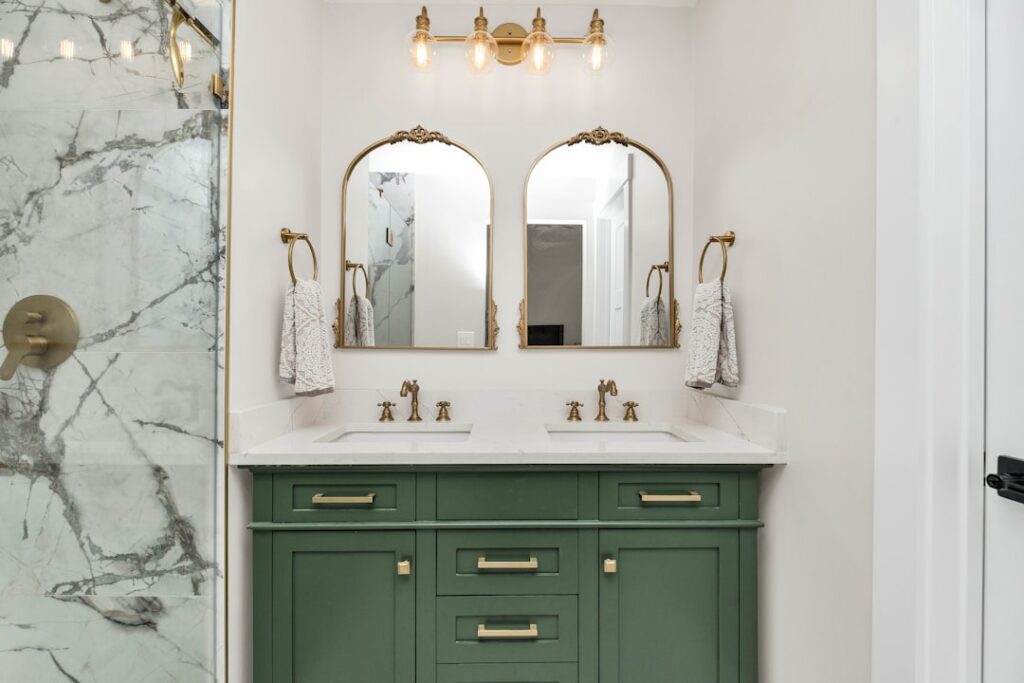
Homeowners obsess over the backsplash and forget the wall the vanity actually touches on the end. That’s a mistake I see cause real water damage, because the side of a countertop that butts a wall takes just as much splashing as the back does. A side splash for bathroom vanity is a short vertical piece of countertop material that runs up the wall on the end of the vanity, sealing the seam where the counter meets that side wall. It’s a small detail with an outsized job: keeping water out of the drywall and away from the wall base. Here’s when you need one and how to get it right.
Part of our Bathroom Remodeling & Flooring guide — explore the full guide →
What a Side Splash Actually Does
Think about how you use a sink. Water flicks off your hands, off a wet toothbrush, off a razor you rinse. When a vanity sits against a side wall, all that spray hits the wall at counter level, right at the vulnerable seam where the top meets the drywall.
A side splash caps that seam with the same waterproof material as your counter. It stops water from running down behind the countertop and wicking into the wall, where it feeds mold and rots the base of the drywall over time. Without one, you’re relying on a bead of caulk alone, and caulk fails. It cracks, it shrinks, and within a couple of years water finds the gap. The splash gives you a hard, sealed barrier that lasts as long as the countertop.
When You Need One and When You Don’t
The rule is simple: if an end of your vanity touches a wall, that end wants a side splash. If both ends float in open space, you don’t need one.
- Vanity in an alcove or between two walls: You need a side splash on both ends, plus the back splash.
- Vanity against one side wall: One side splash on the wall side.
- Freestanding vanity with open ends: No side splash needed; a back splash is optional.
- Vanity next to a tub deck or tall cabinet: A side splash still helps seal that seam against splashing.
The closer the sink sits to the wall, the more important the splash becomes. An offset sink pushed toward a side wall throws water directly at that wall, so a splash there isn’t optional in my book.
Standard Side Splash Height
Most side splashes match the backsplash height so the two read as one continuous piece. Standard heights run 4 inches for a short splash and 6 inches for a taller one, though a full-height splash that runs all the way to the mirror or upper cabinet is a modern, easy-to-clean option.
Four inches covers the typical splash zone and looks proportional on most vanities. Go to 6 inches if your sink sits close to the wall or your household is hard on the counter. A full-height splash in the same slab material eliminates the grout lines a tile wall would add and gives a seamless, spa-like look, though it costs more in material. Whatever height you choose, keep the side splash and back splash the same so the corner meets cleanly.
Matching the Material
A side splash is almost always cut from the same slab as the countertop so the color, veining, and edge profile match. That’s the whole point of the seamless look. Quartz, granite, marble, and solid surface all take a side splash easily because the fabricator can cut it from the leftover slab.
If your top is a solid surface like Corian, the side splash can be seamlessly bonded so there’s no visible joint at all, which is the cleanest result you can get. Stone splashes get set with a color-matched silicone at the wall and the counter seam. Tile is the other route: you can run a tile side splash up the wall instead of a slab piece, which lets you add a decorative accent, but it introduces grout that needs sealing and cleaning. For a low-maintenance bath, a slab side splash beats tile.
Installation Basics
Setting a side splash isn’t complicated, but the sequence and the seal matter. The wall must be reasonably flat, so check it with a level first; a bowed wall leaves a gap behind the splash that caulk struggles to fill.
- Dry-fit the splash against the wall and mark it. Scribe and grind the back edge if the wall isn’t perfectly plumb.
- Run a bead of clear or color-matched 100 percent silicone along the bottom edge where it meets the counter and along the back where it meets the wall.
- Press the splash into place, keeping the top of the side splash level with the back splash.
- Tape it in position and let the silicone cure fully, usually 24 hours, before wiping the counter down.
- Tool the caulk lines smooth so water sheds off rather than pooling in the joint.
Use silicone, not latex painter’s caulk. Latex caulk in a wet zone yellows, shrinks, and peels within a year. Silicone stays flexible and waterproof.
Common Mistakes to Avoid
The biggest error is skipping the splash to save $40 of material and then paying for drywall repair later. The second is caulking the joint with the wrong product. The third is a gap left because the wall wasn’t scribed, which lets water slip behind the splash and defeats the entire purpose.
Another subtle mistake: mismatched heights where the side splash and back splash don’t line up at the corner, leaving an awkward step. Have your fabricator template both at once so they meet flush. And don’t forget the seam between the side splash and the countertop itself, that horizontal joint needs its own silicone bead, since water sitting on the counter will find any unsealed line.
Cost of Adding a Side Splash
A side splash is one of the cheapest upgrades you can make at fabrication, which is part of why skipping it makes so little sense. When your fabricator is already cutting your countertop, adding a splash piece from the same slab costs very little in material.
Expect a stone or quartz side splash to add roughly $10 to $40 per linear foot to the fabrication, depending on the material and edge finish. On a typical vanity that’s a $20 to $60 line item. A solid-surface seamless splash may cost a bit more because of the bonding labor, and a full-height slab splash costs the most since it uses more material. Compare any of those numbers to the cost of tearing out and repairing water-damaged drywall, which easily runs into the hundreds once you factor in mold remediation and repainting, and the splash is obvious insurance. Order it as part of the original template rather than as an afterthought, because retrofitting a splash later means matching an old slab, which is harder and pricier.
Side Splash vs. Full Tile Wall
Some homeowners wonder whether to skip the slab splash and just tile the whole wall behind and beside the vanity. Both protect the wall, but they solve the problem differently and suit different looks.
A matching slab side splash gives a clean, seamless, low-maintenance result with no grout to seal, and it reads as a continuous piece with the counter. A full tile wall lets you add color, pattern, and a decorative accent, and it can extend well beyond the counter zone, but it introduces grout lines that need sealing and periodic cleaning in a splash-prone area. My general rule: if you want minimal upkeep and a modern, monolithic look, go with the slab splash. If the wall is a design feature you want to show off, tile it, but still make sure the tile is properly waterproofed behind and the bottom course is sealed to the counter. You can even combine the two, running a short slab splash at the counter and tiling above it.
Maintaining the Seal Over Time
A side splash isn’t quite install-and-forget, because the caulk joints that seal it will need attention over the years. The silicone bead where the splash meets the counter and the wall is the part that eventually wears.
Inspect those joints once or twice a year. If you see the silicone cracking, peeling, pulling away from the wall, or discoloring with mildew, cut it out and re-caulk. It’s a fifteen-minute job: scrape the old bead, clean and dry the joint, and run a fresh line of 100 percent silicone. Keeping that seal intact is what makes the splash do its job for the life of the vanity. A splash with failed caulk is barely better than no splash at all, since water slips right behind it, so a quick annual check protects the wall you installed it to defend.
The Bottom Line
A side splash for bathroom vanity is cheap insurance against an expensive problem. Any time your countertop dies into a wall, cap that seam with matching material and seal it with silicone. It costs a little extra at fabrication and takes an hour to install, but it protects your walls for the life of the vanity. Skip it only when both ends of the vanity stand free in open air, otherwise, spec the splash and sleep easy about your drywall.