Most homeowners are surprised to learn that the actual rooftop work is the shortest part of going solar. The solar panel installation process for a typical house takes two to four months from signed contract to a working system, yet the crew is usually on your roof for only one to three days. Everything else is design, paperwork, inspections and waiting on the utility.
In short, a residential solar installation moves through seven stages: a site survey, system design and engineering, permitting, the physical install (racking, flashing, panels and wiring), inverter and meter work, a municipal inspection, and finally utility interconnection ending in permission to operate, often called PTO. You cannot legally turn the system on until that last approval arrives, even if the panels look finished.
- The Solar Panel Installation Process at a Glance
- Step 1: The Site Survey
- Step 2: Design and Engineering
- Step 3: Permits and the Interconnection Application
- Step 4: Installation Day on the Roof
- Step 5: Inverter, Disconnect and Meter Work
- Step 6: Inspection
- Step 7: Interconnection and Permission to Operate
- Safety and What Homeowners Should Not DIY
- Troubleshooting Common Delays
- Cost and Timeline Expectations
- Frequently Asked Questions
Knowing what happens at each step helps you ask better questions, spot delays early and understand why your installer schedules things the way they do. It also helps you judge whether your roof, electrical panel and budget are ready before you start getting solar panels quoted.
The Solar Panel Installation Process at a Glance
Here is the realistic order of events for a rooftop solar system installation on a single-family home, along with typical time ranges. Timelines vary widely by city workload and utility backlog.
- Site survey (1 visit, 1-3 hours): roof, attic, electrical panel and shading assessment.
- Design and engineering (1-3 weeks): panel layout, string sizing, structural review and single-line electrical diagram.
- Permits and utility application (2-8 weeks): building and electrical permits, plus an interconnection request to the utility.
- Installation day(s) (1-3 days): mounts, flashing, rails, panels, conduit and wiring.
- Inverter, disconnect and meter work (often the same days): equipment mounted near the service panel.
- Inspection (1-3 weeks to schedule): the local building department checks the work.
- Interconnection and PTO (1-6 weeks): the utility swaps or reprograms the meter and grants permission to operate.
The solar panel installation process is mostly sequential. A delay at permitting pushes everything back, which is why a good installer submits the utility application and permit package in parallel whenever local rules allow.
Step 1: The Site Survey
A site surveyor visits to confirm what satellite images and sales software estimated. Expect them to measure roof planes, photograph rafters from the attic, check rafter size and spacing, note roof age and condition, and open the cover of your main electrical panel to read its bus rating and main breaker size.
Shading gets measured too, usually with a handheld tool or drone imagery that maps trees, chimneys and neighboring buildings across the seasons. A roof that loses sun for several hours each afternoon can change the design from a string inverter to microinverters or power optimizers.
Two findings commonly change the plan. First, a roof with less than about 10 years of life left should usually be replaced before solar goes on, because removing and reinstalling panels later costs a meaningful fraction of the original labor. Second, an older 100-amp service panel may not have room to back-feed a solar breaker, so a panel upgrade or a supply-side connection gets added to the scope.
Step 2: Design and Engineering
Using survey data, the designer builds a layout that respects fire-access setbacks along ridges and edges, avoids vents and skylights, and keeps panels in the sunniest zones. They size strings so voltage stays within the inverter’s operating window on the coldest morning and the hottest afternoon of the year.
An engineer then reviews the roof structure. On most modern homes with 2×6 rafters or engineered trusses, the added weight of roughly 3 to 4 pounds per square foot is fine. Older homes with undersized or damaged rafters may need sistering or blocking before the install.
The deliverable is a plan set: a site plan, attachment details, equipment spec sheets, a structural letter and a single-line electrical diagram. Ask to review it. It tells you exactly where the inverter, disconnect and conduit runs will go, so you can raise objections before permits are pulled.
Step 3: Permits and the Interconnection Application
Nearly every jurisdiction requires a building permit and an electrical permit for a residential solar power installation. Some cities use instant online solar permitting; others take weeks of back-and-forth. If you have a homeowners association, its architectural approval may also be needed, though many states limit how far an HOA can restrict rooftop solar.
At the same time, your installer files an interconnection application with the utility. This tells the utility how large the system is, what inverter it uses and how it will connect. Larger systems or crowded neighborhood transformers can trigger an engineering review that adds time. This is also when you enroll in net metering or whatever export-credit program your utility offers.
Step 4: Installation Day on the Roof
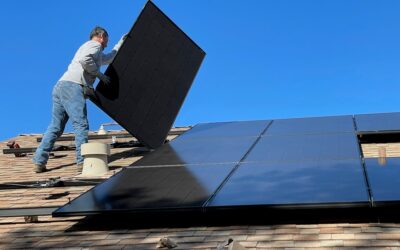
This is the part everyone pictures. A typical crew of three to five people handles a 6-10 kW rooftop solar installation in one or two days. The sequence usually looks like this:
- Layout and attachments. The crew snaps chalk lines, locates rafters and drills pilot holes for lag bolts into framing, not just the roof deck.
- Flashing. Each attachment point gets a flashed mount slid under the shingle course above it and sealed. Proper flashing is the single biggest factor in whether your roof leaks later.
- Rails or rail-less mounts. Aluminum rails bolt to the mounts, or panels clamp directly to rail-less feet.
- Grounding and wire management. Equipment grounding and bonding are installed, and wires are clipped off the roof surface so they do not sag or chafe.
- Panels. Modules are lifted, set and clamped. Microinverters or optimizers mount under each panel if the design uses them.
- Conduit. Wiring runs through conduit from the array, across the roof or through the attic, down to the equipment location.
Expect some noise and foot traffic in the attic. Move cars from the driveway and keep kids and pets clear of the work zone, since tools and materials can fall from the roof edge.
Step 5: Inverter, Disconnect and Meter Work
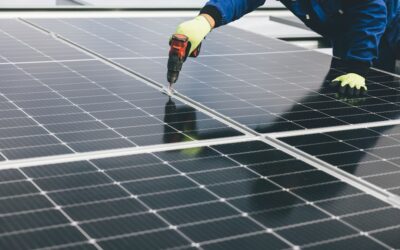
Down at ground level, an electrician mounts the inverter (or a combiner box for microinverter systems), a rapid-shutdown device if required, an AC disconnect and sometimes a production meter. The system then ties into your main panel through a back-fed breaker or a supply-side tap.
This step involves line-voltage work inside the service panel. The main breaker is turned off and the electrician confirms power is off with a non-contact voltage tester before working, and service-side connections may require the utility to pull the meter. Expect a short power outage of an hour or two on this day. If a battery is part of the solar energy setup, a critical-loads subpanel may be added now as well.
After wiring, the installer commissions the system: verifying connections with power off, then running startup checks according to the manufacturer’s procedure and enrolling the monitoring app. Even if everything tests correctly, the system stays off until inspection and PTO.
Step 6: Inspection
The local building department sends an inspector to check attachments, flashing, grounding, labeling, conduit, disconnects and the panel connection against the approved plans. Some jurisdictions inspect the roof with drone photos or require the installer to submit pictures of flashing taken during the install.
If the inspector finds a problem, the installer corrects it and schedules a reinspection, which can add a week or more. Common correction items include missing warning labels, conduit support spacing and working clearance in front of equipment.
Step 7: Interconnection and Permission to Operate
Once the permit is signed off, the installer sends the final paperwork to the utility. The utility may swap your meter for a bidirectional one or reprogram the existing smart meter, then issues a PTO letter or email. Only then should you turn the system on, usually by switching the AC disconnect and solar breaker in the order your installer specifies.
Turning on early can void your interconnection agreement and, in some areas, results in fines or unbilled exports. Be patient here. Utilities with heavy solar demand can take a month or more.
Safety and What Homeowners Should Not DIY
Adding solar panels to a house combines roof work and high-voltage DC and AC wiring, so most of the job is not a homeowner project. If you go on the roof yourself to watch or inspect, use a properly angled extension ladder secured at the top, maintain three points of contact, and wear a fall-arrest harness on steep pitches. Anything on a two-story roof is a job for a crew with fall protection.
Panels produce voltage whenever light hits them, even when the inverter is off, so never disconnect array connectors or open combiner boxes yourself. For any maintenance near the service panel, turn off the breaker and confirm power is off with a non-contact voltage tester, and leave repairs to the installer.
When to Call a Licensed Professional
Use a licensed electrician or a licensed solar contractor for the design, permit, electrical connection and interconnection work. Your permit application will generally require a license number anyway. Call a licensed roofer before install if the survey flags roof problems, and a structural engineer if rafters need reinforcement. Pulling permits protects your insurance coverage, home sale and warranties.
Troubleshooting Common Delays
- Permit rejected for missing details: usually a structural letter or updated diagram; ask your installer for the correction list.
- Utility requires an upgrade: a transformer or service upgrade can add weeks. Ask whether a smaller system avoids the review.
- Panel upgrade needed: adds a separate utility disconnect appointment and typically a few thousand dollars.
- Monitoring shows zero production after PTO: a tripped breaker, an off disconnect or a Wi-Fi issue is the usual cause; call the installer before touching equipment.
Cost and Timeline Expectations
Installed prices for residential solar panel systems generally fall between about $2.50 and $4.00 per watt before incentives, so a 7 kW system commonly lands in the $17,500 to $28,000 range. Permitting and interconnection fees are usually included in a turnkey quote, but reroofing, panel upgrades, trenching for ground mounts and batteries are often extra. Federal and state incentives can cut the net cost meaningfully, so confirm current eligibility with a tax professional.
Plan on 6 to 16 weeks overall. Ask any installer for their average days to PTO in your town; experienced local companies know which offices move fast and which need extra lead time.
Frequently Asked Questions
How long does the solar panel installation process take from start to finish?
Most home solar projects take about 6 to 16 weeks from contract to permission to operate. The roof work itself usually takes one to three days; permitting, inspection and utility approval take the rest.
Do I need to replace my roof before installing solar?
If your roof has less than about 10 years of life left, replacing it first is usually cheaper than removing and reinstalling the panels later. Ask the surveyor to assess shingle condition and decking.
Will my power be off during a residential solar installation?
Usually only briefly, for an hour or two while the electrician connects to your main panel or the utility pulls the meter. The rest of the install happens with your power on.
Can I turn my solar system on before the utility approves it?
No. Wait for the permission to operate letter. Turning it on early can violate your interconnection agreement and may lead to penalties or unbilled exports.
Can I install solar panels myself?
Some experienced DIYers handle the racking under a permit, but the electrical tie-in, inspection and interconnection generally require a licensed electrician. Most homeowners are better served by a turnkey licensed installer.