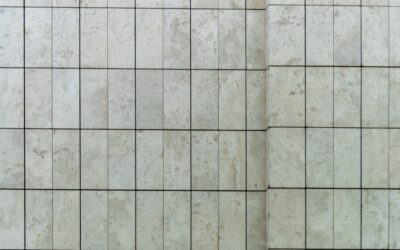
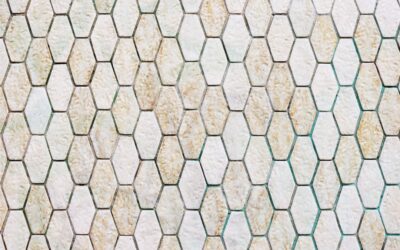
You can update the wall behind your stove in an afternoon without a single bag of thinset. A sticky backsplash, also called peel-and-stick tile, uses an adhesive backing to bond directly to your existing wall, skipping mortar, grout, and the mess that comes with them. Renters use it to transform kitchens they cannot permanently alter, and homeowners reach for it when they want a fresh look on a tight budget. It is not right for every situation, but when it fits, few upgrades deliver more visual payoff per dollar.
- What a Sticky Backsplash Actually Is
- Real Costs and What You Save
- Where a Sticky Backsplash Works and Where It Fails
- How to Install Peel-and-Stick Tile
- Durability and What to Expect Over Time
- Cleaning and Maintenance
- Removing It Later
- Design Options and Popular Looks
- Peel-and-Stick vs. Real Tile
- Is a Sticky Backsplash Worth It?
What a Sticky Backsplash Actually Is
Peel-and-stick backsplash comes in flat sheets or individual tiles with a factory-applied pressure-sensitive adhesive on the back. You remove a paper liner and press the piece onto the wall. The materials range widely, and the material you pick determines how convincing and how durable the result looks.
- Vinyl and PVC: The most affordable and flexible option, printed to mimic subway tile, marble, or mosaic. Thin and lightweight, best in low-splash zones.
- Gel or 3D epoxy tiles: A raised, glossy resin coating over a printed design that gives real depth and a ceramic-like feel from a few feet away.
- Metal (aluminum) tiles: Thin brushed or polished aluminum sheets that resist heat better and suit modern kitchens.
- Stone and glass composite: Real stone or glass chips bonded to a mesh backing with adhesive, the priciest and most realistic category.
Real Costs and What You Save
Most peel-and-stick products run $5 to $15 per square foot, though gel and composite lines climb to $18 to $25. A typical 30-square-foot kitchen backsplash therefore costs roughly $150 to $450 in materials, with no separate charge for thinset, grout, spacers, or sealer. Because installation needs no special skills, you avoid the $8 to $15 per square foot a tile setter would charge, which often saves $300 or more on a standard kitchen. The trade-off is lifespan, which we cover below.
Where a Sticky Backsplash Works and Where It Fails
Adhesive tile bonds best to smooth, clean, non-porous surfaces. It performs well over painted drywall, existing ceramic tile, glass, and laminate. It struggles on textured walls, raw or freshly painted surfaces, and anywhere heat or standing water is constant.
Keep peel-and-stick at least a few inches away from the flame area of a gas range and directly behind a cooktop, since sustained high heat can loosen adhesive and warp thin vinyl. Around a sink, seal the edges with clear silicone caulk so water cannot creep behind the sheets. In a full bathroom shower surround, skip sticky tile entirely; it is not built for constant moisture.
How to Install Peel-and-Stick Tile
The appeal here is speed, but a clean surface and careful first row make the difference between a job that lasts and one that peels in a month.
- Wash the wall with a degreaser or a mix of warm water and dish soap, then wipe with rubbing alcohol and let it dry completely. Grease is the number one cause of failure.
- Find your starting point. Measure and snap a level line rather than trusting the countertop, which is rarely perfectly level.
- Cut tiles to fit with sharp scissors, a utility knife, or tin snips for metal. Dry-fit around outlets before peeling the backing.
- Peel a corner, align the sheet to your line, and press from the center outward to push out air bubbles. Use a plastic smoothing tool or a credit card.
- Overlap or butt seams according to the product instructions, and finish exposed edges with a color-matched caulk or trim strip.
Turn off power and remove outlet covers first; reinstall them over the new tile with slightly longer screws and outlet spacers so the receptacle sits flush.
Durability and What to Expect Over Time
A well-installed sticky backsplash on a smooth, grease-free wall commonly lasts 5 to 10 years. Cheaper vinyl in a heavy-cooking kitchen may show curling edges or discoloration in 2 to 3 years, while gel and composite tiles hold up longer. Heat, humidity, and grease are the enemies. Because the adhesive is permanent-minded but not truly permanent, quality varies a lot by brand, so read reviews and buy a sample sheet to test on your own wall for a week before committing to a full kitchen.
Cleaning and Maintenance
One advantage of a sticky backsplash is how little it asks of you. Wipe it with a damp microfiber cloth and a mild dish soap solution. Avoid abrasive scrubbers and harsh solvents, which can dull the printed finish or attack the adhesive at the seams. For gel tiles, skip anything with acetone. If an edge starts lifting, a dab of clear construction adhesive or double-sided mounting tape usually re-secures it without a full replacement.
Removing It Later
Renters especially want to know about removal. Warm the adhesive first with a hair dryer or heat gun on low, held a few inches away, then peel slowly from a corner at a shallow angle. Warming keeps the adhesive pliable so it releases the wall instead of tearing off paint. Residual glue comes off with an adhesive remover like Goo Gone or a little rubbing alcohol. On painted drywall, expect to spot-prime and touch up paint afterward; peel-and-stick is not always as damage-free as marketing suggests, especially over flat or low-quality paint.
Design Options and Popular Looks
The design range has expanded dramatically in the last few years, and you are no longer stuck with obvious fake tile. White subway peel-and-stick remains the most popular pattern because it suits nearly any kitchen and hides seams well. Marble-look sheets with soft gray veining mimic a Carrara backsplash at a fraction of the cost, and hexagon and penny-round mosaics deliver a trendy geometric look without setting a single tile by hand.
For a warmer kitchen, wood-plank and terracotta prints add texture, while metallic and mirrored finishes suit a modern, high-contrast space. Match the scale of the pattern to your kitchen: small mosaics can feel busy across a large wall, whereas a simple subway or slab pattern reads calmer and more expensive. Order a sample of any product before buying in bulk, because printed colors often look brighter or grayer in person than they do on a screen.
Peel-and-Stick vs. Real Tile
Be honest with yourself about the goal. Real ceramic or stone tile is a permanent, waterproof, heat-tolerant surface that adds resale value and lasts decades, but it costs more, takes days, and demands skill or a contractor. A sticky backsplash is a fast, cheap, low-commitment cosmetic upgrade that anyone can install in an afternoon. If you own the home and want a forever backsplash behind a serious cooktop, invest in real tile. If you rent, plan to sell soon, or simply want an inexpensive style change you can redo in a few years, peel-and-stick is the smarter, lower-risk play.
Is a Sticky Backsplash Worth It?
For a fast, affordable, renter-friendly refresh, a sticky backsplash is one of the best-value projects in a kitchen. You get a designer look for a fraction of the cost of real tile, no wet saw, and a same-day result. Just set expectations honestly: it is a semi-permanent finish, not a lifetime installation. Choose a quality gel or composite line for the most realistic look, prep the wall properly, keep it clear of direct high heat, and you will enjoy a backsplash that looks far more expensive than it was. When you eventually want a permanent tile job, the peel-and-stick can come down and buy you years of style in the meantime.