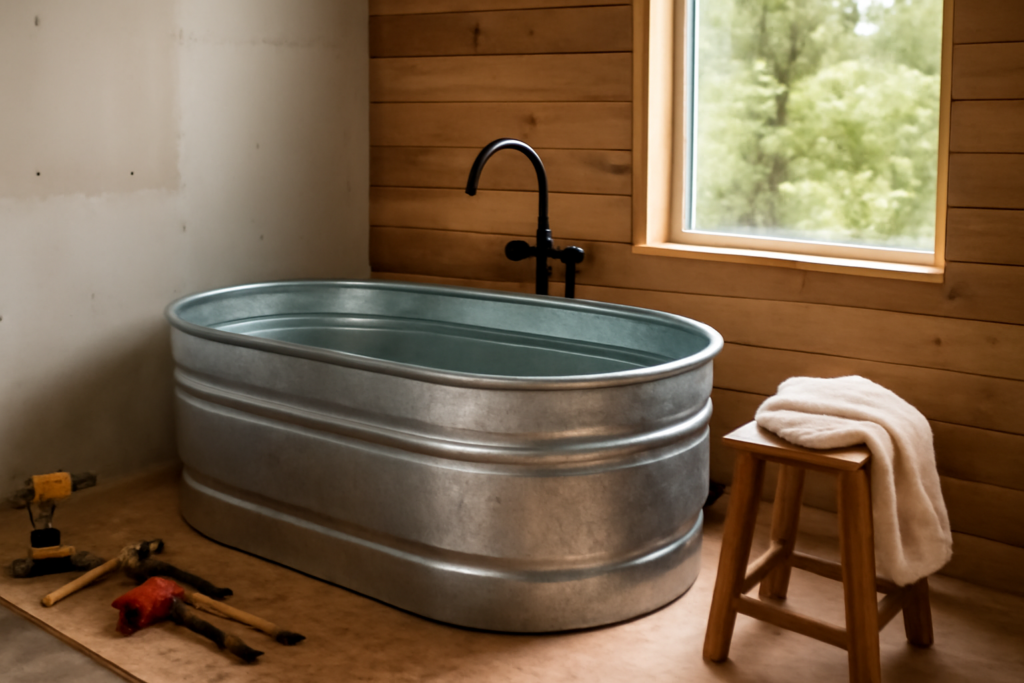
A galvanized livestock trough costs a fraction of a designer soaking tub and delivers a deep, rustic soak that suits farmhouse bathrooms and backyard setups alike. A stock tank bathtub is simple in concept: a metal tank, a drain fitting, a level base and a way to get hot water into it. The details decide whether it stays leak-free, comfortable and safe for years.
Part of our Bathroom Remodeling & Flooring guide — explore the full guide →
There are two very different versions of this project. An outdoor tub filled by hose and drained into the yard is a straightforward DIY build. A permanent indoor install connected to household plumbing is a real bathroom fixture, which means a licensed plumber, permits where required, and a structural check of the floor under it. Both are covered here so you can decide which fits your home.
- Planning a Stock Tank Bathtub
- Tools and Materials
- Step-by-Step Outdoor Build
- Filling and Heating the Water Safely
- Indoor Stock Tank Bathtub Installs
- Liners, Coatings and Comfort
- Designing the Space Around the Tub
- Winterizing and Maintenance
- Cost Ranges
- Troubleshooting
- When to Call a Licensed Professional
- Frequently Asked Questions
Planning a Stock Tank Bathtub
Start with size and location. Round and oval galvanized tanks are the most common choices for a horse trough bathtub:
- 2 ft by 2 ft by 4 ft oval: about 100 gallons, a snug single-person soak.
- 2 ft by 3 ft by 6 ft oval: around 150 to 170 gallons, room to stretch out.
- 4 ft round: close to 150 gallons, good for sitting upright.
Water weighs about 8.3 pounds per gallon. A 150-gallon tank filled most of the way holds over 1,000 pounds of water, plus the tank and bather. That load is fine on a compacted gravel pad or a concrete slab, but it is far beyond what many upper-floor bathroom floors are designed to carry without reinforcement.
Tools and Materials
- Galvanized stock tank sized to your space
- Tub drain fitting or bulkhead fitting sized to the tank’s drain hole
- Plumber’s putty or a sealant rated for potable water and metal
- Pavers, gravel or a concrete pad for outdoor bases
- Level, tape measure, adjustable wrench
- Rubber mat or composite decking boards for a non-slip entry
- Optional: tank liner or food-safe coating for the interior
Many galvanized tanks come with a threaded drain plug near the bottom. That existing opening is often the easiest place to attach a drain fitting, so check the tank before buying extra parts.
Step-by-Step Outdoor Build
- Choose the spot. Pick level ground away from overhead lines and with drainage that will not flood a foundation. Call 811 before digging for a base.
- Build a level base. Excavate a few inches, add compacted gravel, then set pavers or pour a small slab. The tank must sit fully supported and level so water depth is even and seams are not stressed.
- Prep the tank. Rinse out manufacturing oils with mild soap and water. Inspect the seams and bottom for dents or pinholes.
- Install the drain. Clean the drain opening, apply sealant or putty, and thread in the drain fitting. Tighten firmly but do not crush the gasket.
- Route the drain water. Attach a hose or short pipe to carry water to a garden bed or dry well, well away from the house. Check local rules about discharging bathwater.
- Leak test. Fill a few inches, wait 24 hours, and check for drips at seams and the drain.
- Add a step and mat. Place a sturdy step or small deck platform so entering and exiting is safe, and add a non-slip mat.
Filling and Heating the Water Safely
Outdoor tubs are usually filled with a garden hose from an outdoor faucet. For warm water, some owners run a hose from a laundry sink mixing valve or use a propane outdoor water heater designed for this purpose. Follow a few safety rules:
- Check temperature before getting in. Aim for 100 to 104 degrees F at most. Water above that can scald, especially children and older adults.
- Never use household electric heaters or immersion heaters in a metal tub. Electrical equipment near water must be listed for the purpose and plugged into a GFCI-protected outlet installed by a licensed electrician.
- Wood-fired or propane heaters should be used per the maker’s instructions, outdoors only, with clearances from structures.
- Keep children supervised. A filled stock tank is a drowning risk. Cover it or drain it when not in use.
Galvanized metal in direct sun gets hot quickly. Test the rim and walls before touching them on summer afternoons.
Indoor Stock Tank Bathtub Installs
An indoor stock tank bathtub can look striking in a rustic bathroom, but treat it like any other tub installation:
- Licensed plumber: connecting the drain to a trap and the household drain line, adding an overflow and installing a tub filler with an anti-scald valve are plumbing jobs that usually need permits and inspection.
- Structural check: have a contractor or structural engineer confirm the floor framing can carry the filled weight before the tank goes in, especially above ground level.
- Waterproof floor: set the tank on a waterproofed, tiled floor or a properly flashed platform.
- Overflow protection: stock tanks lack a built-in overflow. A plumber can add one or recommend an alternative to prevent flooding.
- Water heater capacity: a large tank may require more hot water than a standard heater supplies.
Liners, Coatings and Comfort
Galvanized zinc coatings hold up well, but some owners prefer a liner or coating for a smoother surface and to slow corrosion. Food-safe or potable-water-rated epoxy coatings are one option, and flexible pond-style liners are another for outdoor tubs. Follow product ventilation rules when applying coatings, wear gloves and eye protection, and allow full cure time before filling.
For comfort, add a cushioned bath pillow and a wooden or composite step. A simple wood cover keeps debris out outdoors and holds some heat.
Designing the Space Around the Tub
A trough tub looks best when the surroundings are finished with care. Outdoors, a small deck platform or a ring of flagstone gives you a clean, dry place to stand and keeps mud out of the water. Leave at least 2 feet of walking space on the entry side. A privacy screen made from cedar slats or a row of tall grasses turns an open yard into a sheltered soaking spot, and a hook or bench for towels saves trips back to the house.
Keep the tub clear of low tree limbs that drop leaves and sap, and away from downspouts and roof edges that shed water or ice. If you want evening soaks, use outdoor-rated, low-voltage landscape lighting kept well away from the water, with any plug-in transformer on a GFCI-protected outlet.
Indoors, the tank reads as a rustic statement piece. Pair it with wood-look porcelain tile, shiplap walls or a simple concrete-look floor. A wall-mounted or floor-mounted filler in black or aged brass suits the farmhouse style. Plan for plenty of ventilation, since a large tank of hot water adds a lot of humidity, and make sure the bath fan is sized to the room and vented to the exterior to keep mold from forming.
Winterizing and Maintenance
- Drain completely before freezing weather. Ice expansion can split seams.
- Disconnect hoses and drain outdoor faucets.
- Clean the interior with mild soap, rinse and dry.
- Store upside down or covered to keep water and debris out.
- Inspect seams and the drain fitting each spring before refilling.
Between uses, drain and refill often. Without filtration or sanitizing, standing water grows algae and bacteria quickly, so a stock tank bathtub is meant for fresh fills rather than holding water for days.
Cost Ranges
- Galvanized stock tank: roughly 150 to 600 dollars depending on size.
- Drain fitting, sealant and hoses: typically 30 to 100 dollars.
- Paver or gravel base: roughly 50 to 300 dollars in materials.
- Outdoor water heating: can range from a hose setup to several hundred dollars for a dedicated heater.
- Indoor professional install: plumbing, permits and floor prep can add 1,000 to 4,000 dollars or more.
Troubleshooting
- Leak at the drain: remove the fitting, clean, reapply sealant and retighten.
- Seam weeping: drain, dry and apply a metal-compatible sealant, or contact the tank seller.
- Uneven water level: the base is out of level. Drain and reset the base.
- White residue on zinc: mineral or zinc oxide buildup. Clean gently and rinse well.
- Rust spots: the galvanizing is damaged. Treat promptly or add a liner.
When to Call a Licensed Professional
Call a licensed plumber for any indoor install, overflow setup or connection to household drain and supply lines. A contractor or structural engineer should review floor capacity before placing a filled tub indoors or on a deck. Any electrical outlet or heater near the tub should be installed by a licensed electrician with GFCI protection. With those pieces in place, a stock tank bathtub is a budget-friendly way to enjoy a deep soak.
Frequently Asked Questions
How much does a stock tank bathtub weigh when full?
A 100-gallon tank holds about 830 pounds of water, and a 150-gallon tank holds over 1,200 pounds. Add the tank and bather to find the total load.
Can I use a horse trough bathtub indoors?
Yes, with a licensed plumber handling the drain, overflow and tub filler, and a structural check confirming the floor can carry the filled weight.
Is galvanized steel safe for bathing?
Galvanized tanks are widely used for this purpose. Rinse the tank before first use, and consider a potable-water-rated coating or liner if you want a smoother surface.
How do I heat water for an outdoor stock tank tub?
Many owners fill from a warm hose connection or use an outdoor-rated propane or wood-fired heater designed for tubs. Keep water at 104 degrees F or below and check it before getting in.
How do I winterize a stock tank tub?
Drain it completely, disconnect hoses, dry the interior, and store it covered or upside down so water cannot freeze inside.