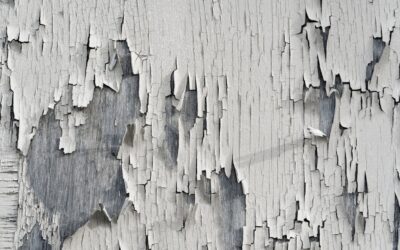
Most refinished tubs do not fail because the coating was cheap. They fail because the surface underneath was never properly cleaned, etched, and dried, and painted bathtub peeling is simply the moment that hidden mistake becomes visible. A well-applied refinish can last 10 to 15 years, while a rushed one can start lifting at the drain within months.
Part of our Bathroom Remodeling & Flooring guide — explore the full guide →
The short answer: if the peeling is limited to a small chip or a patch the size of a coin, a careful spot repair can buy you years. If the coating is bubbling in several places, lifting in sheets, or peeling around the drain and along the waterline, the bond has failed across a large area, and the only lasting fix is to strip the old coating and recoat the tub from bare, properly prepared porcelain or enamel.
- Why Painted Bathtub Peeling Happens
- Safety First: Chemicals, Dust, and Lead
- Spot Touch-Up or Full Strip and Recoat?
- Tools and Materials for Bathtub Coating Repair
- How to Fix a Small Peeling Area Step by Step
- What a Full Strip and Recoat Involves
- Troubleshooting Common Coating Problems
- Typical Cost Ranges
- How to Prevent Repeat Peeling
- When to Call a Pro
- Frequently Asked Questions
Before you pick up sandpaper or a touch-up kit, figure out why the coating let go. The cause determines whether a repair will hold or whether you are just adding another layer to a failing system.
Why Painted Bathtub Peeling Happens
Tub coatings are thin films, usually epoxy or urethane-based, that rely entirely on mechanical and chemical bonding to a glossy, non-porous surface. Anything that interferes with that bond will eventually show up as blisters or flaking.
Poor etching or surface prep
Porcelain and glazed enamel are glass-hard. Without an acid etch or thorough abrasion, the coating has nothing to grip. Soap scum, body oils, and silicone residue from old caulk are the other big culprits. Even a thin film of bath oil can leave a spot where the new finish never truly bonds, and those spots are usually where peeling starts.
Moisture trapped during application
Refinishing a tub that has not fully dried, or doing the job on a humid day with no ventilation, traps water vapor under the film. You will often see this as small round bubbles that later break open. Water wicking up from around a leaky drain or overflow gasket causes the same problem over time.
Harsh cleaners and abrasive pads
Refinished surfaces are softer than original porcelain. Abrasive powders, scouring pads, bleach-heavy sprays, and drain cleaners that splash onto the tub will dull the finish, open micro-scratches, and let water get under the edges. Bath mats with suction cups can also pull coating away, especially if left in place for weeks.
Rushing the cure
Most coatings need a full cure period, commonly 24 to 72 hours depending on the product and temperature, before the first shower. Water on a soft, partially cured film is one of the most common reasons a brand-new refinish starts lifting at the drain first.
Safety First: Chemicals, Dust, and Lead
Tub refinishing involves strong chemicals, and repair work creates dust. Treat this as a real safety project, not a quick paint job.
- Ventilation and respiratory protection: Run an exhaust fan and add a window fan blowing out. Use a respirator with organic vapor cartridges rated for the product you are using. Bathrooms are small spaces, and fumes concentrate quickly.
- Isocyanates: Many professional two-part tub coatings contain isocyanates, which can cause serious respiratory sensitization. Full recoats with these products are best left to professionals with supplied-air equipment.
- Gloves and eye protection: Wear chemical-resistant gloves and splash goggles when handling etchers, strippers, and coatings.
- Never mix chemicals: Do not combine cleaners, etchers, or strippers, and never follow a bleach cleaner with an acid product without rinsing thoroughly. Follow every label for strippers, dwell times, and disposal.
- Lead testing: If the tub was painted or refinished before 1978, test the old coating for lead before sanding or scraping. Many older enamel glazes also contain lead. An inexpensive test kit or a lab test will tell you whether you need lead-safe work practices.
Spot Touch-Up or Full Strip and Recoat?
This is the key decision, and it comes down to how much of the coating has lost adhesion. Use a plastic putty knife or your fingernail to probe the edges of any peeling area. If the coating around the damage is tight and will not lift, a spot repair can work. If it keeps flaking back as you probe, the failure is spreading.
A spot repair usually makes sense when
- The damage is a single chip or a few small chips, each smaller than about a quarter.
- The cause is obvious impact damage, such as a dropped bottle, rather than bond failure.
- The surrounding coating is firmly attached and not bubbling.
- The tub is a rental or short-term fix and cosmetic perfection is not critical.
A full strip and recoat is the better choice when
- Peeling appears in several areas or lifts in sheets.
- Blisters are scattered across the floor of the tub.
- The finish is peeling at the drain, around the overflow, or along the waterline.
- The tub has been recoated more than once, creating a thick, brittle stack of layers.
Stacking a new coating over a failing one almost never holds. The new film is only as strong as the weakest layer beneath it.
Tools and Materials for Bathtub Coating Repair
For a small bathtub coating repair, gather these before you start:
- Plastic putty knife and a single-edge razor scraper
- 400- and 600-grit wet/dry sandpaper
- Degreasing cleaner and a non-abrasive scrub sponge
- Denatured alcohol or the solvent specified by your coating
- A tub and tile touch-up kit or a two-part epoxy repair compound matched to your tub color
- Painter’s tape, lint-free cloths, and a small artist’s brush
- Respirator, nitrile or chemical-resistant gloves, and goggles
- Lead test kit if the tub predates 1978
How to Fix a Small Peeling Area Step by Step
- Stop using the tub and let it dry. Give it at least 24 hours with the fan running so no moisture is trapped under the old film.
- Remove loose coating. Lift every flake that will come away with the plastic knife. Keep going until you reach edges that are firmly bonded.
- Feather the edges. Wet-sand the edge of the chip with 400-grit, then 600-grit, so there is no hard ridge between the coating and the exposed base. Keep the paper wet to control dust.
- Deep clean. Scrub with a degreaser, rinse well, then wipe with denatured alcohol or the specified solvent. Any soap film left behind will cause the repair to fail.
- Mask the area. Tape a tight border to keep the repair small and neat.
- Apply thin coats. Mix the touch-up product exactly per the label and build it up in two or three thin layers rather than one thick blob, allowing the recommended time between coats.
- Level and cure. Once cured, you can lightly wet-sand with very fine paper and polish to blend the sheen. Respect the full cure time before the tub gets wet.
A good tub and tile touch up will be visible up close, especially on colored or older tubs where the original has yellowed, but it will stop water from getting under the coating and keep the peel from spreading.
What a Full Strip and Recoat Involves
When the coating has failed broadly, the old film must come off. Professionals typically use a chemical stripper formulated for tub coatings, followed by scraping, sanding, and a thorough rinse. The tub is then cleaned, etched or abraded, repaired where chipped, primed with a bonding primer, and sprayed with multiple coats of a two-part finish in a ventilated, masked room.
Homeowners can do the stripping and prep with patience, but the spraying stage is where the isocyanate concern and the need for professional ventilation come in. DIY roll-on kits exist, and they can work on a well-prepped tub, but they rarely match the durability or smoothness of a professional sprayed finish. If you go the DIY route, prep is 80 percent of the result: never skip the etch, never rush the drying time, and remove every trace of old caulk.
Troubleshooting Common Coating Problems
- Small bubbles right after refinishing: Usually trapped moisture or solvent. Minor pinholes can be touched up after cure; widespread bubbling means a redo.
- Peeling that starts at the drain: Check the drain flange and gasket for leaks, and confirm the tub was fully cured before use. Reseal the drain before any repair.
- Chalky or dull finish: Typically caused by abrasive cleaners. Switch to mild, non-abrasive products; heavy dulling may need a recoat.
- Touch-up that will not stick: Almost always a cleaning issue. Strip the patch, clean more aggressively with degreaser and solvent, and try again.
- Yellowing: Some coatings yellow with UV exposure or certain cleaners. This is cosmetic, but it will make patches stand out.
Typical Cost Ranges
A DIY touch-up kit generally costs less than a nice dinner out, and a full DIY refinishing kit usually runs in the low hundreds of dollars once you add a respirator and supplies. A professional small chip repair is often a modest service call. A complete professional strip and recoat typically falls in the mid-hundreds, depending on your region, tub size, how many layers must be removed, and whether surrounding tile is included. Replacing the tub entirely costs several times more once plumbing and tile work are counted, which is why getting the recoat right matters.
How to Prevent Repeat Peeling
- Clean with mild dish soap or non-abrasive bathroom cleaners and a soft cloth.
- Avoid bleach-heavy sprays, powdered cleansers, and scouring pads.
- Skip suction-cup mats; use a textured mat that sits loosely or apply non-slip treads made for refinished tubs.
- Fix dripping faucets and leaking drains quickly so water does not sit against edges.
- Run the exhaust fan during and after bathing to reduce constant humidity.
- Touch up any new chip immediately before water gets underneath.
When to Call a Pro
Call a professional refinisher if more than a few small areas are peeling, if the tub has multiple old layers, if lead is detected, or if you do not have the ventilation and respiratory equipment to handle two-part coatings safely. Ask how they strip and etch, what product they spray, what cure time they require, and whether they offer an adhesion warranty. A reputable refinisher will focus as much on prep as on the final coat, and that is exactly what stops painted bathtub peeling from coming back.
Frequently Asked Questions
Can I paint over a peeling bathtub coating?
Not reliably. A new coating bonds only as well as the layer beneath it, so painting over loose or blistered finish usually peels again quickly. Remove all loose material first, and if the failure is widespread, strip the tub and recoat from a properly etched base.
How long should a refinished tub last before peeling?
A professionally prepped and sprayed coating commonly lasts 10 to 15 years with gentle cleaning. Peeling within the first year usually points to poor prep, moisture during application, or using the tub before the coating fully cured.
Is painted bathtub peeling dangerous?
The peeling itself is mostly a cosmetic and water-intrusion problem, but older coatings may contain lead. If the tub was coated before 1978, test the flakes before sanding or scraping, and keep children and pets away from debris until you know.
What cleaner is safe for a refinished tub?
Mild dish soap, warm water, and non-abrasive bathroom cleaners are the safest choice. Avoid powdered cleansers, scouring pads, strong acids, and bleach-heavy sprays, which dull and soften refinished surfaces over time.
Why is my tub coating peeling near the drain?
The drain area sees the most standing water, so it is the first place weak adhesion shows. A leaking drain gasket, water used before full cure, or incomplete cleaning around the flange are the usual causes.