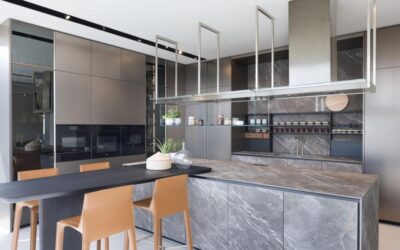
Cooking outdoors keeps heat, smoke, and grease out of your house during the hottest months — and a well-designed summer kitchen does far more than a standalone grill on the patio. From a simple built-in grill station with counter space to a fully equipped outdoor kitchen with a refrigerator, sink, and pizza oven, the options scale to fit almost any yard and budget. Here is what it takes to plan, build, and enjoy one.
Part of our Kitchen Remodeling guide — explore the full guide →
Summer Kitchen Layout Options
Linear (Single Wall)
Everything lines up along one wall or countertop run — grill, counter space, storage cabinets, and optional sink. This layout fits narrow patios and covered porches as small as 6 feet wide. Total length typically runs 8-14 feet. Cost range: $3,000-$10,000.
L-Shaped
Two perpendicular counter runs create a natural work triangle and add bar seating along one leg. Requires a corner footprint of at least 8 x 8 feet. The extra counter space makes it practical for serious cooking with multiple burners and prep stations. Cost range: $8,000-$20,000.
U-Shaped
Three counter runs wrap around the cook, providing maximum workspace and storage. Best for large patios or dedicated outdoor kitchen pavilions with at least 12 x 10 feet of usable space. This layout accommodates a full appliance suite including grill, smoker, side burner, refrigerator, and sink. Cost range: $15,000-$35,000+.
Island Style
A freestanding island placed in an open patio or yard. Guests can gather on all sides, making it a social hub. Islands work well as a first phase — start with a grill island now and add an L-shaped extension later. Cost range: $2,000-$8,000 for a pre-built or custom island.
Essential Components
Not every summer kitchen needs every appliance. Prioritize based on how you actually cook outdoors.
- Built-in grill: The centerpiece. Budget models from Nexgrill and Char-Broil start at $400-$800. Mid-range options from Weber and Napoleon run $1,500-$3,000. Premium brands like Lynx and DCS range from $3,000 to $7,000+.
- Counter space: At least 24 inches of clear counter on each side of the grill for prep and plating. Granite, concrete, and porcelain tile are the most durable outdoor countertop materials.
- Outdoor-rated refrigerator: A compact under-counter fridge (5-6 cubic feet) keeps drinks and ingredients within arm’s reach. Expect to pay $500-$1,500 for a UL-rated outdoor unit.
- Sink with running water: Incredibly convenient for handwashing, rinsing produce, and cleanup. Requires a water supply line and drain — plan for $500-$1,500 in plumbing work if the lines do not already run to the patio area.
- Storage cabinets: Marine-grade stainless steel cabinets resist rust and weather. Budget $200-$600 per cabinet module.
Best Materials for Outdoor Kitchens
Everything in a summer kitchen faces rain, UV exposure, temperature swings, and humidity. Material choices matter more here than in any indoor project.
- Countertops: Granite and concrete are the most popular. Granite is naturally heat and UV resistant. Concrete can be poured in any shape and stained to match your design, but it needs resealing annually. Avoid marble — it stains and etches too easily outdoors.
- Base structure: Steel studs with cement board sheathing (Durock or Hardiebacker) topped with stone veneer is the industry standard. It is fireproof, waterproof, and far more durable than wood framing. Alternatively, stacked concrete block with a stucco finish is affordable and rock-solid.
- Flooring: Concrete pavers, natural stone, or stamped concrete. Avoid wood decking directly under a grill — grease drips and ember sparks are a fire hazard.
Covering and Shelter
A roof or pergola over your summer kitchen protects appliances, extends cooking into rainy weather, and blocks direct sun during hot afternoons. Options range from a simple 10 x 12 foot pergola kit ($1,500-$4,000) to a fully framed patio cover with a shingled or standing-seam metal roof ($5,000-$15,000 contractor-built).
At minimum, install a grill-rated ventilation hood if the cooking station sits under a solid roof. Grease-laden smoke trapped under a low ceiling damages finishes and creates a fire risk. A 36-inch outdoor vent hood rated for 1,200+ CFM handles most built-in grills.
Utilities You Will Need
- Gas line: Natural gas is the most economical fuel for a built-in grill. Running a new gas line from the house to the patio costs $300-$800 for most installations. Always hire a licensed plumber or gas fitter.
- Electrical: At least one dedicated 20-amp GFCI outlet for the refrigerator and another for lighting, blenders, or an electric smoker. Budget $400-$1,000 for electrical work.
- Water supply and drain: Necessary if you include a sink. A hot-and-cold water line plus a proper drain connection runs $500-$1,500 depending on distance from existing plumbing.
- Lighting: Under-counter LED strips ($30-$80) illuminate prep areas. Overhead pendant or recessed lights add ambiance. Low-voltage landscape lighting around the perimeter completes the evening atmosphere.
Permits and Code Considerations
Most municipalities require a building permit for a permanent outdoor kitchen, especially if it involves gas lines, electrical work, or a roofed structure. Check your local code for setback requirements — many jurisdictions require the grill to be at least 10 feet from the house and 3 feet from any combustible material. HOA rules may also dictate placement, height, and materials.
Is a Summer Kitchen Worth the Investment?
A well-built outdoor kitchen recoups roughly 55-75% of its cost at resale, according to remodeling industry estimates. But the real return is in lifestyle — fewer hot nights in a sweltering indoor kitchen, more evenings entertaining outside, and a cooking experience that feels more like recreation than a chore. Start simple with a built-in grill island and counter, use it for a season to learn what you really need, then expand from there. That phased approach saves money and ensures you invest in features you will actually use.