A tile sponge looks like a humble piece of foam, yet it is one of the most important tools in any tiling project. The difference between hazy, uneven grout lines and a crisp, professional finish often comes down to how you handle this single tool. If you are planning to tile a backsplash, a bathroom floor, or a shower wall, understanding the right sponge and the right technique will save you hours of frustration and prevent mistakes that are difficult to undo once grout sets.
This guide walks you through what a tile sponge is, the different types available, how to use one for both grouting and cleanup, and how to care for it so it lasts through your whole job. Whether you are a first-time tiler or simply want sharper results, the right approach to this tool makes everything else easier.
What Is a Tile Sponge?
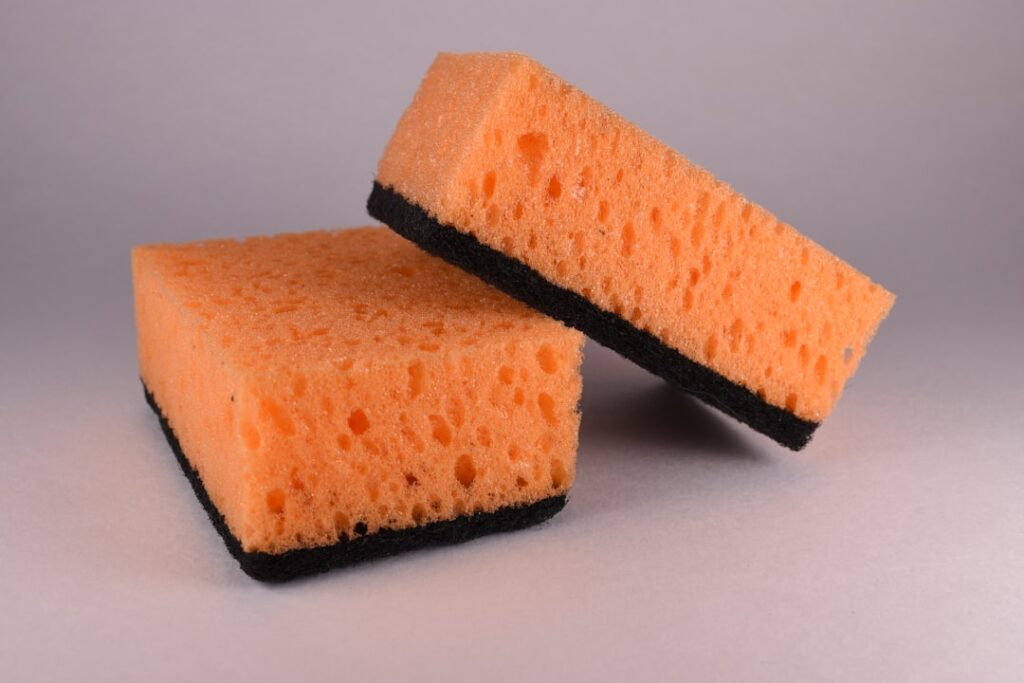
Unlike a regular kitchen sponge, a tile sponge is engineered for the demands of wet, gritty work. It is typically large, dense, and made with rounded or beveled edges so it will not dig into and gouge fresh grout lines. The material is designed to absorb a generous amount of water while still releasing it evenly when you wring it out, which is exactly what you need when wiping a grout haze off a freshly tiled surface.
Most tile sponges are made from hydrophilic foam, a material that soaks up water quickly and resists falling apart under repeated rinsing. The size matters too. A larger surface lets you cover more area per pass, reducing the number of strokes that can pull grout out of the joints before it cures.
Types of Tile Sponges
Not every sponge suits every task. Knowing the options helps you match the tool to the job.
- Hydrophilic grout sponges: The standard choice for cleaning grout haze. They are soft, highly absorbent, and gentle on curing joints.
- Rounded-edge sponges: Built with beveled corners so the edges cannot carve grooves into soft grout lines as you wipe.
- Scrubbing or abrasive sponges: Used carefully for stubborn dried haze, never on fresh grout. The abrasive side can scratch some glazed and natural stone tiles.
- Microfiber-backed sponges: Helpful for the final polishing pass to buff away the last of the haze.
- Tile float sponges: Some sponges double as soft floats for applying grout in tight or delicate areas.
How to Use a Tile Sponge for Grout Cleanup
Timing is everything when cleaning grout. Wipe too soon and you pull grout out of the joints; wait too long and the haze hardens into a film that is a chore to remove. Aim to start your first pass once the grout has firmed up but is still workable, usually around 15 to 30 minutes after application, though you should always follow the grout manufacturer’s instructions.
- Fill a clean bucket with cool water and soak your sponge fully.
- Wring it out until it is damp, not dripping. Excess water weakens grout.
- Wipe diagonally across the tile joints in a gentle, curved motion so you do not drag grout out of the lines.
- Rinse the sponge often and change the water as it clouds.
- Do a second, lighter pass to even out the joints and remove most of the haze.
- Let the surface dry, then buff off any remaining haze with a dry cloth or clean sponge.
Common Mistakes to Avoid
Using too much water is the single most common error. A soaking sponge floods the joints, dilutes the grout, and leaves you with weak, pitted lines that crack and stain. Wring thoroughly every time.
Scrubbing aggressively is another pitfall. Hard pressure or straight strokes along a joint will scoop out grout and create uneven lines. Keep your motion light and diagonal. Rushing the timing causes problems as well, since wiping before the grout has begun to set undoes your work. Patience here pays off in sharper lines and a stronger finish.
Choosing the Right Sponge for Your Project
For most homeowner projects, a large hydrophilic grout sponge with rounded edges is the best all-around pick. These cost only a few dollars each, typically ranging from $3 to $10 depending on size and quality, so it is worth buying two or three for a single job. You will burn through them faster than you expect as they pick up grit and start to break down.
If you are working with natural stone, polished marble, or delicate glass mosaic, choose the softest sponge you can find and avoid anything abrasive. For large floor jobs, a bigger sponge speeds the work considerably. Keeping a spare on hand means you never have to stop mid-cleanup when one wears out.
Caring for and Storing Your Tile Sponge
A tile sponge lasts longer with a little care. Rinse it thoroughly under running water the moment you finish, working out every trace of grout, thinset, and grit before they can harden inside the foam. Even a small amount of cured material left behind turns the sponge into a scratching hazard on your next project.
Squeeze it out completely and let it air dry in a well-ventilated spot rather than balled up in a bucket, where it can grow mildew. Store dried sponges loosely so they keep their shape. While these tools are inexpensive, treating them well means a single sponge can serve across several small jobs before it finally falls apart.
When a Sponge Is Not Enough
Sometimes grout haze hardens beyond what water and a sponge can remove, especially with certain cement and epoxy grouts. In those cases you may need a dedicated grout haze remover, which is a mild acidic or specialty cleaner formulated to dissolve the film. Always test any chemical cleaner on a hidden tile first and follow the directions closely, since some products can etch natural stone or damage certain finishes.
For large or complex installations, particularly with expensive stone or intricate patterns, hiring a professional tile setter can be worth the cost. A pro brings experience in timing and technique that protects your investment. For everyday projects, though, a good tile sponge, clean water, and a patient hand will get you crisp lines and a finish you will be proud of for years.
Prefer to explore on your own?
See how new flooring looks in your actual room in seconds — free, no signup.
Try the free Floor Studio →