If you typed tinset para tile into a search bar, you were almost certainly looking for thinset mortar, the cement-based adhesive that bonds tile to floors, walls, and countertops. The phrase mixes a common misspelling of “thinset” with the Spanish word “para” (for), so what you really want is straightforward English guidance on thinset for tile. This guide explains what thinset is, how the modified and unmodified versions differ, how to mix and trowel it, and how long it needs to cure before you grout or walk on it.
Part of our Tile & Grout guide — explore the full guide →
Getting the mortar right matters more than almost any other step in a tile project. A beautiful tile installed over the wrong adhesive will crack, loosen, or sound hollow within a year. Take a few minutes to understand the basics here and you will avoid the most expensive mistakes.
What Thinset Mortar Actually Is
Thinset is a blend of Portland cement, fine sand, and a water-retention agent. When you add water, the cement hydrates and cures into a hard, durable bond between the tile and the substrate. It is called “thin” set because it is meant to be applied in a relatively thin layer, typically 3/32 to 1/4 inch after the tile is pressed in, rather than the thick mud beds used in old-school installations.
Do not confuse thinset with mastic, premixed adhesive in a tub. Mastic is an organic glue that works for small wall tile in dry areas but should never go on floors, in showers, or under large-format tile. For nearly every modern tile job, a cement-based thinset is the correct choice. It handles moisture, supports weight, and grips porcelain and natural stone far better than premixed pastes.
Modified vs. Unmodified Thinset
There are two broad categories, and choosing the wrong one is the single most common DIY error.
- Unmodified thinset is the basic cement, sand, and water-retention formula. It cures by holding moisture and is the right pick under certain uncoupling membranes and over substrates where the manufacturer specifically calls for it.
- Modified thinset adds polymers or latex that improve adhesion, flexibility, and bond strength. It grips dense porcelain and glass better and tolerates minor substrate movement. Most floor tile, large-format tile, and tile over plywood or cement board uses a modified mortar.
The catch: many membrane systems require unmodified thinset because modified mortar trapped between two non-porous layers cannot dry properly and may never fully cure. Always read the instructions for both your membrane and your tile before buying. When in doubt, follow the membrane manufacturer’s spec, because that is where warranties are won or lost.
Matching Thinset to Your Tile and Substrate
Large-format tile (any side 15 inches or longer) needs a mortar rated as LFT, or large-format and heavy tile, sometimes labeled medium-bed. These formulas resist slumping and hold the tile flat so corners do not lippage. Glass tile and translucent stone usually need a white thinset so the adhesive color does not show through. Standard ceramic and porcelain floor tile on cement board does well with a quality modified thinset rated for floors.
For natural stone such as marble or travertine, use a rapid-setting or white mortar that the manufacturer approves for stone, since some stones are moisture-sensitive and can stain or warp. The product bag and data sheet will list approved applications. If a tile or substrate is not listed, do not assume it is fine.
How to Mix Thinset Correctly
Mixing is where consistency makes or breaks the bond. Aim for a peanut-butter texture that holds ridges when you trowel it.
- Pour the recommended amount of clean, cool water into the bucket first, then add the powder. This reduces clumping and dust.
- Mix with a paddle on a low-speed drill, around 300 RPM, to avoid whipping in air bubbles that weaken the bond.
- Mix until smooth, then let it “slake” (rest) for 5 to 10 minutes as directed.
- Remix briefly without adding more water. The mortar should hold a ridge from a notched trowel without slumping.
Mix only what you can use within the pot life, often 30 to 60 minutes. Never add water to revive mortar that has started to stiffen, because doing so destroys the cement bond even if the texture looks workable again.
Notched-Trowel Application Step by Step
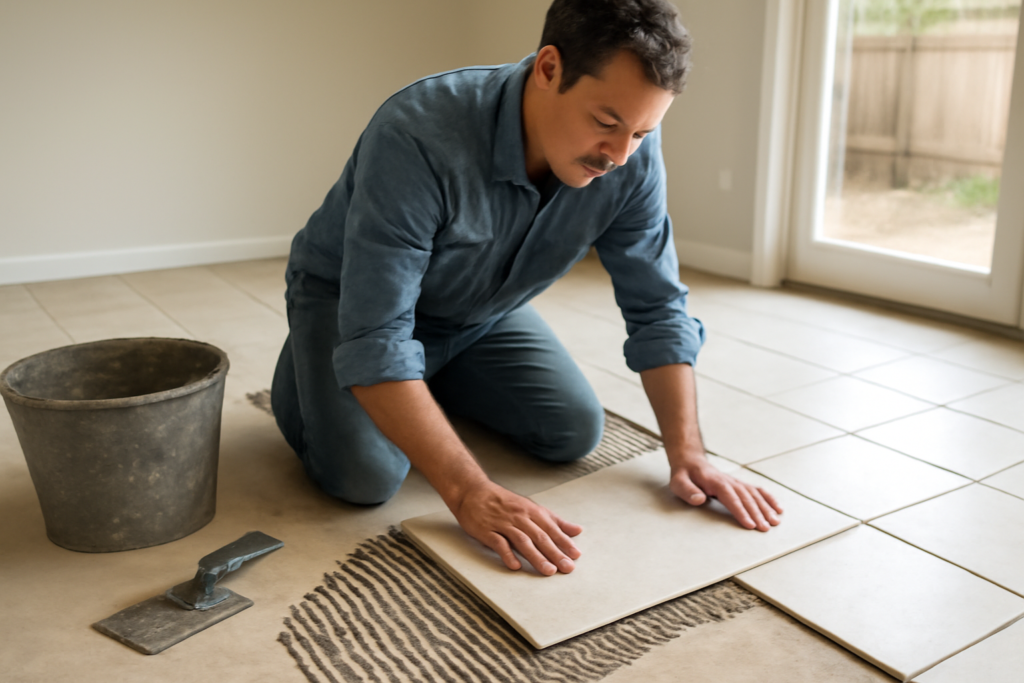
The notched trowel controls how much mortar you lay down and ensures full contact under the tile. Use the notch size the tile manufacturer recommends, generally larger notches for larger tiles.
- Spread a thin “key coat” by pressing mortar into the substrate with the flat side of the trowel.
- Comb on more mortar with the notched edge held at a consistent 45-degree angle, creating straight, parallel ridges all running the same direction.
- Press the tile in with a slight back-and-forth motion across the ridges to collapse them and eliminate air pockets.
- Periodically pull a tile up to check coverage. You want at least 80 percent contact for dry areas and 95 percent for showers and floors.
Clean excess mortar out of the joints before it hardens. Dried thinset in a grout joint is far harder to remove than fresh mortar wiped with a damp sponge.
Cure Time and Safety Precautions
Most standard thinset needs about 24 to 48 hours before you grout, and rapid-set formulas can be ready in a few hours. Full strength typically develops over 14 to 28 days. Keep traffic off a freshly tiled floor and avoid wetting a shower until the mortar and grout have cured per the labels.
Thinset is alkaline and dusty, so protect yourself. Wear a NIOSH-approved silica dust mask when handling dry powder, since cement contains crystalline silica that is hazardous to breathe. Use waterproof gloves to prevent cement burns on your skin, and wear eye protection while mixing and troweling. Work in a ventilated space and follow every instruction on the manufacturer’s bag. When a job involves a complicated shower pan, a steam room, or expensive stone, hiring a certified tile installer is money well spent.
Common Mistakes to Avoid
Watch out for these pitfalls that show up again and again in failed tile jobs. Using mastic where thinset is required leads to loose tile in wet areas. Skipping the back-butter step on large-format tile leaves voids that crack underfoot. Mixing too wet weakens the bond and causes lippage. Ignoring the membrane manufacturer’s modified-versus-unmodified spec can void a warranty and trap moisture. Finally, rushing to grout before the mortar cures can shift tiles out of alignment. Slow down, read the labels, and your tile will stay tight for decades.
Prefer to explore on your own?
See how new flooring looks in your actual room in seconds — free, no signup.
Try the free Floor Studio →