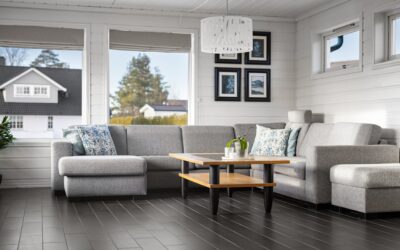
Vinyl is the lowest-maintenance flooring you can install, but lowest does not mean zero. Vinyl flooring maintenance done wrong shortens a 25-year wear layer to under 8 years, and the damage from overly aggressive cleaning is rarely covered by warranty. Get the routine right and a quality luxury vinyl plank floor outlasts the homeowner, easily handling kids, pets, and heavy furniture for two decades or more.
Understanding the Vinyl Wear Layer
Every modern vinyl floor (LVP, LVT, sheet vinyl, SPC, WPC) has a clear urethane wear layer on top of the printed decorative film. That wear layer ranges from 6 mil on rental-grade products to 40 mil on commercial-rated luxury vinyl. Once the wear layer scratches through to the print film, the damage is permanent and visible.
The right maintenance routine protects the wear layer from abrasion, chemical attack, and UV exposure. The wrong routine accelerates wear by embedding grit, dissolving the urethane coating, or trapping moisture beneath the plank.
The Weekly Cleaning Routine
For most households, weekly maintenance takes about 15 minutes per 500 sq ft.
- Sweep, dry-mop, or vacuum without the beater bar engaged. The beater bar leaves micro-scratches on softer wear layers.
- Mix 1 gallon warm water with 1 cup white vinegar in a bucket, or use a manufacturer-approved vinyl cleaner like Bona for LVT ($9), Shaw R2X, or Armstrong Once ‘n Done.
- Mop with a microfiber flat mop, wringing nearly dry before each pass.
- Spot-dry any standing water near transitions, vents, or seams.
Skip the swing of a string mop full of cleaner. Vinyl tolerates damp but not wet, and pooled water seeps into seams within minutes.
Products to Avoid on Vinyl
Several common cleaning products damage vinyl despite working fine on tile, hardwood, or laminate.
- Oil-based soaps like Murphy Oil Soap leave a residue that attracts dirt and dulls the finish
- Wax and polish products build up into a yellow film that strips only with harsh chemicals
- Bleach and bleach-containing cleaners discolor the print film over time
- Steam mops drive moisture between planks and soften the wear layer
- Acetone, paint thinner, and nail polish remover dissolve urethane on contact
- Abrasive scrubbing pads (Scotch-Brite green, steel wool) cut through the wear layer
If a spill requires more than mild dish soap and water, test the cleaner in a closet corner first. Two minutes of testing saves the cost of replacing an entire room.
Preventing Damage Before It Happens
Most vinyl damage comes from preventable causes. A few small habits dramatically extend floor life.
Place a heavy-duty doormat at every exterior door and a smaller secondary mat 3 ft inside. Together these capture 80% of tracked-in grit before it reaches the floor. Vacuum or shake mats weekly so they keep working.
Attach felt pads to every piece of furniture leg that contacts the floor. The 1 in self-stick pads from Home Depot run about $5 per pack of 80 and stop most chair-drag scratches. Replace pads every 12 to 18 months, since they collect grit and become scratch tools themselves.
Lift heavy furniture rather than dragging it. Even SPC rigid-core vinyl can dent under a fully loaded china cabinet pushed across a room. Use furniture sliders for unavoidable moves.
Handling Stains and Spills
Vinyl is highly stain-resistant but not stain-proof. Treat spills within minutes for best results.
- Food and beverage spills: Blot with paper towel, then wipe with a damp microfiber cloth and mild dish soap
- Grease: Sprinkle baking soda on the spot, let it sit 15 minutes, then wipe with a microfiber and warm water
- Wine, coffee, juice: A 1:4 vinegar-water solution lifts most pigment-based stains within minutes
- Crayon, scuff marks: Rub gently with a damp Mr Clean Magic Eraser, but spot-test first since heavy use dulls the wear layer
- Nail polish: Blot immediately with rubbing alcohol. Acetone-based remover damages the wear layer permanently.
- Pet urine: Wipe immediately, then clean with an enzyme product like Nature’s Miracle to neutralize odor
Repairing Damaged Vinyl Planks
One advantage of click-lock LVP over sheet vinyl is the ability to replace individual planks. The trick is having matched replacement boards on hand from the original installation. Always order 10% extra and store the leftover boxes in a climate-controlled space.
For floating floors, unclick boards from the nearest wall back to the damaged plank, swap it out, and reclick the run. For glue-down vinyl, the repair requires cutting out the damaged board with a sharp utility knife and replacing it with a piece sized to fit the gap. Both repairs take 30 to 90 minutes for someone with basic DIY skills.
UV Protection and Sun Exposure
Direct sunlight fades vinyl flooring print over years of exposure. Window film with a UV blocking rating of 99% (sold by 3M, Gila, and BDF) cuts fading to nearly nothing for about $30 per window. Sheer curtains, blinds, or area rugs in sun-exposed zones also help.
If existing fading has already begun, move rugs and furniture every six months so the entire floor ages at the same rate. A faded edge under a coffee table that gets pulled forward becomes a permanent rectangle within a few years.
Annual Deep Cleaning
Once a year, plan a deeper clean. Pull furniture, vacuum corners and edges thoroughly, mop with a stronger dilution of vinyl cleaner, and rinse with clear water using a fresh microfiber pad. Walk every square foot looking for scratches, lifted seams, or peaking edges. Catch small issues early and the floor delivers the full lifespan its warranty promises.
Prefer to explore on your own?
See how new flooring looks in your actual room in seconds — free, no signup.
Try the free Floor Studio →