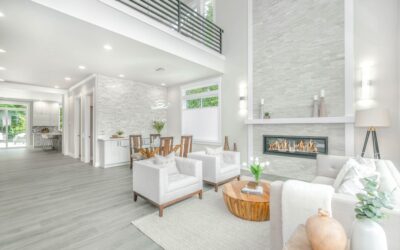
The difference between a ceiling that feels custom and one that feels builder-grade often comes down to the recessed lights — how small they are, how they blend into the drywall, and how flattering their glow is. Visual Comfort recessed lighting has become the go-to specification for designers who want downlights that quietly disappear rather than dot the ceiling like a checkerboard. This guide breaks down what sets the brand apart, how to choose the right trims and apertures, and how to lay out fixtures so the light — not the can — is what you notice.
- What Makes Visual Comfort Different
- Understanding Aperture Size
- Trim Styles That Change the Look
- Color Temperature and CRI
- How Much Light Do You Need?
- Laying Out Your Downlights
- New Construction vs Remodel Housings
- Dimming Compatibility
- What It Costs
- Is It Worth It?
- Layering Recessed Light With Other Fixtures
- Working With a Lighting Designer or Showroom
- The Bottom Line
What Makes Visual Comfort Different
Visual Comfort is a premium architectural lighting brand, and its recessed line reflects that pedigree. Rather than the wide, bright-white plastic trims common in big-box packs, its downlights emphasize small apertures, deep regression to hide the light source, and warm, high-CRI output that renders skin tones and finishes accurately. The result is engineered glare control: you feel the light without staring into a bright dot overhead. That refinement is why the line shows up in high-end kitchens, galleries, and hospitality projects.
Understanding Aperture Size
Aperture — the diameter of the visible opening — is the single biggest driver of how “designer” recessed lighting looks. Traditional cans use 5-inch or 6-inch apertures. Visual Comfort and the broader premium market lean toward smaller openings:
- 2-inch aperture: The most discreet, nearly invisible from across a room. Ideal for accent light and clean, minimalist ceilings.
- 3-inch to 3.5-inch aperture: The sweet spot for general-purpose downlighting that stays subtle while delivering ample light.
- 4-inch and up: Higher output for tall ceilings or workspaces, still tidier than a legacy 6-inch can.
Smaller apertures cost more and may need more fixtures for the same light level, but the payoff is a ceiling that reads clean and intentional.
Trim Styles That Change the Look
The trim is the finishing ring you actually see, and Visual Comfort offers several that dramatically alter the effect:
Flanged vs Flangeless (Trimless)
A flanged trim has a small visible ring that sits on the ceiling surface — easier to install and forgiving of drywall imperfections. A flangeless or trimless version is mudded directly into the drywall so the light appears as a pure opening with no ring at all. Trimless is the ultimate clean look but demands careful coordination with your drywall crew and costs more in labor.
Fixed, Adjustable, and Wall-Wash
Fixed downlights aim straight down for general illumination. Adjustable (gimbal) trims tilt to spotlight art or architecture. Wall-wash trims throw an even sheet of light down a wall to graze stone or highlight a gallery. Mixing types in one room — fixed for ambient, adjustable for accents — is how designers build depth.
Color Temperature and CRI
Two specs make or break how a room feels. Color temperature, measured in Kelvin, sets the warmth: 2700K is warm and residential, 3000K is a crisp warm-white popular in kitchens, and 3500K and up starts feeling commercial. For living spaces, stick with 2700K to 3000K. CRI, or Color Rendering Index, measures how accurately the light shows color; premium fixtures deliver 90+ CRI, and some hit 95+, so your walnut cabinets and stone counters look rich rather than washed out. Cheap recessed lights often sit at 80 CRI, which is where colors go flat.
How Much Light Do You Need?
Lumens, not watts, tell you brightness. A single small-aperture LED downlight typically produces 600 to 1,000 lumens. As a rough planning guide, a kitchen wants about 30 to 40 lumens per square foot of task area, while a living room is comfortable at 10 to 20. Rather than blasting a room with maximum output, designers layer dimmable downlights with lamps and sconces, keeping the recessed lights on a dimmer so they can drop to a soft glow in the evening.
Laying Out Your Downlights
Placement separates a thoughtful ceiling from a random one. A few field-tested rules:
- Space general downlights roughly 4 to 6 feet apart, or take your ceiling height and divide by two for a starting spacing in feet.
- Keep fixtures 18 to 30 inches off the wall so they wash the wall rather than skim the ceiling edge awkwardly.
- Over an island or sink, center fixtures on the counter, not on the room’s grid.
- Avoid the “runway” effect of a single straight line down the room’s center — plan lights around how the space is used.
Always lay out fixtures around furniture and work zones, not just symmetrically on the ceiling.
New Construction vs Remodel Housings
Visual Comfort and its installation systems offer housings for both scenarios. New-construction housings mount to joists before drywall goes up and allow precise placement. Remodel (or “old work”) housings clip into a hole cut in existing drywall using spring clips, letting you add recessed lights without opening the ceiling. Confirm your ceiling has the depth and clearance the housing requires, and check whether it must be IC-rated for direct contact with insulation — most modern LED units are.
Dimming Compatibility
Premium LED downlights are worth pairing with a quality dimmer, but not every dimmer plays nicely with every driver. Match the fixture’s stated dimming protocol — usually forward-phase, reverse-phase (ELV), or 0-10V — to a compatible dimmer to avoid flicker, buzz, or a hard cutoff at the low end. Brands like Lutron publish compatibility charts, and following them prevents the maddening flicker that cheap pairings produce. Smooth dimming down to 1 percent is a hallmark of a well-matched high-end system.
What It Costs
Designer recessed lighting is an investment. Individual Visual Comfort downlight fixtures and their housings commonly run $100 to $300+ each depending on aperture, trim, and adjustability — well above the $15 to $40 of a big-box can. Add professional installation and trimless drywall detailing and a whole-room package climbs quickly. The justification is longevity, glare-free comfort, and a finished ceiling that reads custom rather than contractor-default.
Is It Worth It?
For a primary living space, kitchen, or a room where finishes and art deserve accurate, flattering light, the upgrade genuinely shows. In a utility closet or garage, standard cans are the sensible choice. The smart approach is to spend where people gather and eyes linger, using small apertures, 90+ CRI, warm color temperature, and good dimming — and to keep the budget lean in secondary spaces.
Layering Recessed Light With Other Fixtures
The biggest mistake homeowners make with premium downlights is asking them to do everything. Even the finest recessed system looks flat when it is the only light in a room. Designers treat downlights as the ambient base layer and build on top of it — decorative pendants over an island, sconces flanking a fireplace or bed, table and floor lamps at seating height, and picture lights or LED tape to graze texture. This layering is what creates depth and warmth, letting you shift a space from bright and functional at dinner prep to soft and intimate after dark. When every layer sits on its own dimmer, one room delivers a dozen different moods, and the recessed lights quietly disappear into their supporting role.
A useful planning exercise is to walk the room and list the tasks and focal points: where you read, where you cook, which art or architecture deserves a spotlight. Assign the right tool to each — recessed for general fill, adjustable trims for the art, decorative fixtures where the eye should land — rather than blanketing the ceiling with identical cans and hoping for the best.
Working With a Lighting Designer or Showroom
Because premium recessed systems involve so many choices — aperture, trim, beam angle, color temperature, driver and dimmer compatibility — many homeowners benefit from a showroom consultation or a lighting designer, especially on a whole-house project. A good designer builds a lighting plan that coordinates fixtures, specifies exact quantities and placements, and flags dimming compatibility before anything is wired, preventing the expensive flicker-and-return cycle. Showrooms that carry the line can also let you see fixtures lit in person, which reveals glare control and color quality that a spec sheet never captures. On a single accent wall the DIY route is fine, but for a kitchen or great room where the investment is significant, professional guidance usually pays for itself in avoided mistakes.
The Bottom Line
Visual Comfort recessed lighting delivers the disappearing, glare-controlled downlight that makes a ceiling feel architect-designed. Choose the smallest aperture that meets your light needs, decide between flanged and trimless, insist on 2700K–3000K at 90+ CRI, and lay out fixtures around how you actually live in the room. Spec it thoughtfully and the lights vanish while the space simply glows — which is exactly the point.