Plenty of homeowners buy a filter first and find out later that it does nothing for the problem they actually have. A carbon pitcher will not soften hard water, and a water softener will not remove lead. Successful water filtration installation starts with a water test, then matches the system to the result, and only then moves to plumbing. Get that order right and you avoid wasted money, unnecessary cartridges, and fixtures that still scale up.
The short answer: test your water, decide whether you need point-of-use treatment (one faucet, usually drinking and cooking water) or point-of-entry treatment (the whole house), then choose between a simple under-sink filter, a reverse osmosis system, a whole-house sediment and carbon filter, or a softener combined with filtration. Under-sink and faucet filters are realistic DIY projects. Whole-house systems involve cutting into the main water line and often require a permit, so many homeowners hire a licensed plumber for those.
- Step One of Water Filtration Installation: Test Your Water
- Point-of-Use vs Whole-House vs Softener Combo
- Tools and Materials
- What Each Install Involves
- Plumbing Code, Permits and Safety
- Troubleshooting After Installation
- Water Filtration Installation Costs
- When to Call a Licensed Professional
- Frequently Asked Questions
This guide works as a decision guide. It explains what each type of water filtration system installation involves, the tools and time required, typical cost ranges, and where the DIY line sits.
Step One of Water Filtration Installation: Test Your Water
Your water source changes everything. Municipal water is already treated and tested, and your utility publishes an annual water quality report (often called a Consumer Confidence Report) listing what was detected. Private well owners get no such report and are responsible for their own testing.
A drinking water test kit is an inexpensive starting point. Basic kits check hardness, chlorine, pH, iron, nitrates, and sometimes lead or bacteria. For a well, or if you suspect lead from older pipes or solder, send a sample to a state-certified laboratory, which gives more accurate results for a moderate fee. Look at the results for these common issues:
- Chlorine taste and odor: activated carbon handles it well.
- Sediment, sand, rust particles: a sediment prefilter.
- Hardness (scale on fixtures, spotty dishes): a water softener or scale-reduction system; filters alone do not soften.
- Lead, arsenic, nitrates, dissolved solids: reverse osmosis or a filter certified for that specific contaminant.
- Iron and sulfur (rotten-egg smell): specialty iron filters or oxidizing systems, common on wells.
- Bacteria: UV disinfection or professional well treatment, not a standard filter.
When comparing products, look for independent certification to the relevant NSF/ANSI standard for the contaminant you want removed, rather than relying on marketing claims.
Point-of-Use vs Whole-House vs Softener Combo
Point-of-Use Systems
These treat water at one tap. Options include faucet-mount filters, countertop units, under-sink carbon filters, and under-sink reverse osmosis (RO) systems with a dedicated faucet. They are the most economical way to get clean drinking and cooking water, and cartridges cost less because they filter only a small volume. RO systems produce some wastewater and need space under the sink for a storage tank on many models.
Whole-House (Point-of-Entry) Systems
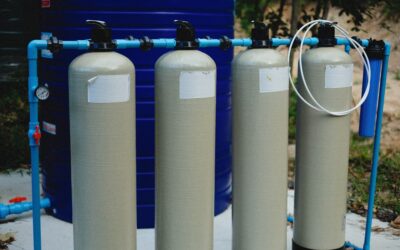
Installed where the main line enters the house, usually after the meter or pressure tank and before the water heater. A typical setup includes a sediment filter followed by a carbon filter in large housings. They improve water at every tap and shower, reduce chlorine exposure in bathing water, and protect appliances from sediment. They cost more, need more space, and require cutting into the main supply line.
Softener and Filter Combinations
Homes with hard water often pair a whole-house filter with a water softener. The filter goes first to protect the softener resin from sediment and chlorine. Softeners need a drain for backwash, an electrical outlet for the control head, and periodic salt refills. Many homeowners add an under-sink RO system at the kitchen sink for drinking water on top of that.
Quick Decision Guide
- Only want better-tasting drinking water on city supply: under-sink carbon filter
- Concerned about lead or dissolved solids: under-sink RO certified for those contaminants
- Sediment or chlorine throughout the house: whole-house sediment plus carbon
- Scale on fixtures and appliances: softener, ideally with a prefilter
- Private well with multiple issues: lab test first, then a multi-stage system designed around the results
Tools and Materials
- Filter system with housings, cartridges, and mounting bracket
- Adjustable wrenches and a housing wrench
- Tubing cutter or pipe cutter suited to your pipe material (copper, PEX, or CPVC)
- Push-to-connect fittings, compression fittings, or PEX crimp or expansion tools
- Thread seal tape
- Drill and step bit if adding an RO faucet to a sink or countertop
- Bucket and towels
- Bypass valves (strongly recommended for whole-house systems)
- Bonding jumper cable for metal pipes when a plastic housing interrupts the line
What Each Install Involves
Under-Sink Filter or RO System
- Shut off the cold-water supply valve under the sink and open the faucet to relieve pressure.
- Install the feed adapter or tee on the cold line.
- Mount the filter housings to the cabinet wall with the bracket, leaving room below for cartridge changes.
- For RO, drill the faucet hole if needed, install the dedicated faucet, and connect the drain saddle to the sink drain above the P-trap.
- Connect tubing, place the storage tank if used, and turn the water back on slowly.
- Check every fitting for leaks and flush the new cartridges per the instructions.
This kind of water filtration installation usually takes one to three hours and is within reach for a handy homeowner.
Whole-House System
- Choose a location near the main shutoff with room for housings, bypass valves, and cartridge access.
- Shut off the main water valve and drain the lines by opening a low faucet.
- Cut out a section of the main line and install shutoff or bypass valves on either side.
- Mount the housings on a wall bracket so the pipe does not carry their weight.
- Connect inlet and outlet, paying attention to flow direction arrows.
- Install a bonding jumper if your home’s electrical grounding relied on continuous metal pipe.
- Restore water slowly, bleed air from the housings, and check for leaks.
This takes a half day to a full day for an experienced DIYer, and it is where water treatment system installation shifts into plumber territory for many people.
Plumbing Code, Permits and Safety
Always shut off the water before cutting into any supply line and relieve pressure first. Local plumbing codes govern connections to the main line, drain connections for softeners and RO units (which often require an air gap), and backflow protection. Many jurisdictions require a permit for whole-house equipment. Check with your local building department, and if you are unsure about any of these requirements, hire a licensed plumber. Softener control heads plug into a standard outlet; if no outlet is nearby, adding one is work for a licensed electrician.
Troubleshooting After Installation
- Low water pressure: clogged sediment cartridge, undersized housings, or a partially closed valve. Whole-house housings should match your pipe size.
- Leaking housing: O-ring is dry, twisted, or missing. Lubricate it with food-grade silicone and reseat.
- Cloudy water after install: trapped air or carbon fines. Flush longer.
- RO system drips at the drain: normal during production; constant flow may indicate a failed shutoff valve.
- Taste returns quickly: cartridges are exhausted early because the water load is higher than expected. Retest and consider a sediment prefilter.
Water Filtration Installation Costs
Faucet and pitcher filters are the least expensive option. Under-sink carbon systems and basic RO units cost moderately more, and DIY water purifier installation keeps the total low. Whole-house filtration systems cost more for equipment, and professional installation adds several hundred dollars or more depending on access and pipe type. A softener plus filtration combo is typically the most expensive, often reaching into the low thousands installed. Budget for replacement cartridges and, for softeners, salt as ongoing costs. Getting two or three written quotes is the best way to pin down local pricing for professional water filter system installation.
When to Call a Licensed Professional
Hire a licensed plumber for whole-house systems, softener installs that need a new drain connection, any work on a private well pressure system, homes with galvanized pipe that may crumble when cut, or anywhere permits are required. A pro is also wise when the only practical location is tight, finished, or far from a drain. For a well with bacteria, arsenic, or other health-related contaminants, a water treatment specialist can design a system around your lab results.
Frequently Asked Questions
Should I test my water before installing a filter?
Yes. A test tells you which contaminants are present, so you buy a system certified to remove them instead of guessing.
Can I install a whole-house water filter myself?
Experienced DIYers can, but it requires cutting the main line, bypass valves, and sometimes a permit and bonding jumper. If you are unsure, hire a licensed plumber.
Does a water filter soften hard water?
No. Standard sediment and carbon filters do not remove hardness minerals. A water softener is needed for that.
How long does an under-sink filter installation take?
Most under-sink carbon filters take about an hour. Reverse osmosis systems with a separate faucet and drain line can take two to three hours.
Where does a whole-house filter go?
Near where the main line enters the house, after the meter or well pressure tank and before the water heater and any branch lines.