A tired, cracked, or plain-gray concrete patio does not have to be demolished to look and feel better. Waterproof outdoor flooring over concrete lets you lay a new surface directly over the existing slab, transforming a dull patio, balcony, or pool deck without the mess and expense of tearing out concrete. The trick is choosing a material that sheds water, survives your climate’s freeze-thaw cycles, and drains properly so puddles never form underneath.
Part of our Roofing guide — explore the full guide →
This guide compares the three most popular over-concrete systems, porcelain pavers, rubber tiles, and composite deck tiles, and covers the drainage and freeze-thaw details that separate a floor that lasts twenty years from one that heaves and fails in two. Get the base right and any of these surfaces can turn a slab into an inviting outdoor room.
- Why Install Over Existing Concrete
- Porcelain Pavers: The Premium Hardscape Option
- Rubber Tiles and Rolls: The Practical Performer
- Composite Deck Tiles: The Fast DIY Upgrade
- Drainage: The Detail That Makes or Breaks the Floor
- Surviving Freeze-Thaw Cycles
- Choosing the Right System for Your Patio
- Preparing the Concrete Before You Start
Why Install Over Existing Concrete
Concrete makes an ideal substrate precisely because it is already flat, structural, and stable. Rather than pouring a new slab or building a raised wood deck, you can float or interlock a finished surface right on top, saving the demolition cost and the disposal fees that come with removing old concrete. Most over-concrete systems add only three-quarters of an inch to two inches of height, which usually clears door thresholds without modification.
The key requirement is that the slab drains. Water must run off the concrete and away from the house, so any surface you install has to either follow the slab’s existing slope or lift the finished floor on pedestals or a mat that lets water pass beneath. A slab that ponds water is the enemy of every outdoor floor, so before choosing a material, hose down the patio and watch where the water goes.
Once your patio flooring is in place, think about how you’ll use the space. A gazebo adds shade and structure, while a good outdoor furniture set turns it into a spot you’ll actually want to hang out in. A deck box is also worth considering if you need somewhere to stash cushions and outdoor gear.
We may earn a commission when you purchase through our links.
Porcelain Pavers: The Premium Hardscape Option
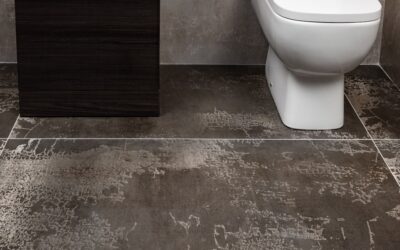
Outdoor porcelain pavers are dense, 20mm-thick tiles, roughly three-quarters of an inch, engineered specifically for exterior use. They come in large formats like 24 by 24 inches and mimic stone, wood, or concrete with remarkable realism. Because porcelain absorbs almost no water, under 0.5 percent, it is inherently waterproof and shrugs off freeze-thaw cycles that crack natural stone and standard tile.
Over an existing slab, 20mm pavers are most often set on a bed of polymeric-sand-jointed screenings or dry-set on adjustable pedestals that create a ventilated, draining cavity beneath. Installed cost runs roughly $15 to $30 per square foot including labor, making porcelain the most expensive of the three options, but also the most durable and the closest in appearance to a high-end natural stone patio. The surface stays cool underfoot compared with dark composite and never needs sealing.
Rubber Tiles and Rolls: The Practical Performer
Rubber outdoor flooring, made largely from recycled tires, is the workhorse choice for pool surrounds, playgrounds, rooftop decks, and gym patios. It arrives as interlocking tiles, usually half an inch to two inches thick, or as rolled sheet, and its open or porous structure lets water drain straight through to the concrete below and off the slab. That built-in drainage is a major advantage over a sealed surface.
Rubber’s headline benefit is cushioning and slip resistance; it is soft underfoot, non-slip when wet, and forgiving if someone falls, which is why it dominates around pools and play areas. Installed cost is modest at $4 to $12 per square foot, and thicker tiles simply interlock and lay loose over clean concrete with no adhesive needed. The tradeoffs are appearance, since rubber reads as functional rather than luxurious, and heat, because dark rubber gets hot in direct summer sun. It also handles freeze-thaw well thanks to its flexibility.
Composite Deck Tiles: The Fast DIY Upgrade
Composite deck tiles are the easiest weekend transformation for a small patio or balcony. Each tile is a wood-plastic composite or PVC surface bonded to a plastic grid base with snap-together clips, typically one foot square and about an inch thick. They lock together like puzzle pieces and float loose over the concrete, and the raised plastic base grid lifts the walking surface so water drains freely beneath and runs off the slab.
Because they install without tools, adhesive, or fasteners, composite tiles are a genuine DIY project, and a small balcony can be covered in an afternoon. Cost lands around $6 to $15 per square foot for the tiles themselves. The composite surface is waterproof and resists rot, but it is not as long-lived as porcelain; expect ten to fifteen years, and be aware that lower-grade wood-composite tiles can fade, warp, or grow slick with algae in shady, damp spots. Choose a capped-composite or PVC tile for the best longevity outdoors.
Drainage: The Detail That Makes or Breaks the Floor
No matter which material you pick, drainage is the single most important factor for waterproof outdoor flooring over concrete. The finished floor must never trap water against the slab, because standing moisture breeds mold, freezes and expands in winter, and eventually lifts the surface. Pedestal-set porcelain, open-back rubber, and grid-based composite tiles all solve this by letting water pass to the concrete and flow off along the slab’s slope.
If your existing slab is dead flat or slopes toward the house, address that before installing anything. Adjustable pedestals under porcelain can build a slight pitch to create fall, or you can apply a thin self-leveling drainage mat. For rubber and composite, confirm the slab already sheds water to the correct edge. A drainage mat or dimpled membrane between the slab and a tighter-fitting surface creates an air gap that channels water out and keeps the underside dry.
Surviving Freeze-Thaw Cycles
In cold climates, water that seeps into cracks or pools on a surface expands as it freezes, prying materials apart cycle after cycle. This is why absorbency matters so much. Porcelain’s near-zero water absorption makes it essentially freeze-proof, which is why 20mm outdoor pavers are rated for harsh northern winters where standard indoor tile would spall and crack within a season or two.
Rubber’s flexibility lets it expand and contract without cracking, so it also handles freeze-thaw gracefully, though interlocking seams should be checked each spring. Composite tiles resist freeze damage as long as their drainage grid keeps water from pooling, but trapped moisture under a poorly draining composite floor can still cause heaving. Whatever you choose, allow a small expansion gap at walls and fixed edges, roughly a quarter inch, so the floor can move with temperature swings without buckling.
Choosing the Right System for Your Patio
Match the material to how you use the space and what you are willing to spend. For a showcase patio or pool deck where looks and longevity justify the cost, 20mm porcelain pavers on pedestals are the premium, freeze-proof answer that will outlast every other option. For a pool surround, play area, or rooftop where safety and drainage rule, rubber tiles deliver cushioning and slip resistance at a moderate price.
For a renter, a small balcony, or a homeowner who wants a quick, tool-free upgrade, snap-together composite deck tiles offer the best balance of easy installation and warm, wood-like looks. Whichever you choose, verify that your concrete drains, add an expansion gap, and select a product genuinely rated for exterior use. Get those fundamentals right and waterproof outdoor flooring over concrete will turn a plain slab into a durable, weather-ready outdoor living space for years to come.
Preparing the Concrete Before You Start
A little prep protects whatever surface you lay down. Begin by cleaning the slab thoroughly, pressure-washing away dirt, algae, and any flaking old paint, then letting it dry completely before installation. Fill significant cracks with a flexible exterior concrete patch and grind down any high spots or trowel ridges that would rock a paver or telegraph through a thinner tile.
If your slab has active cracks or serious spalling, address the underlying cause first, because a moving crack will eventually work its way up through a loose-laid floor. For a pedestal-set porcelain system, minor surface imperfections do not matter since the pavers float above the slab, which is one reason pedestals are so popular over rough or uneven concrete. For interlocking rubber or composite, a reasonably flat, clean, dry slab is all you need to snap the tiles together and start enjoying the patio the same day.