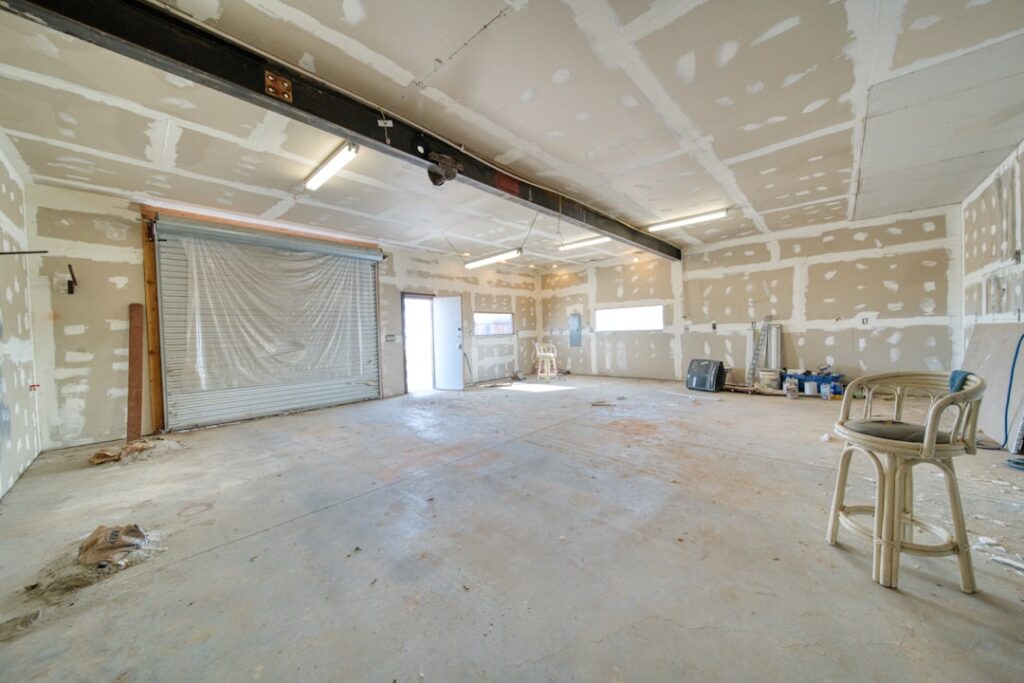
If you’ve ever wondered what is drywall and why nearly every wall in your home is made of it, the short answer is a panel of gypsum plaster sandwiched between two heavy paper faces. Also called gypsum board, wallboard, or by the brand name Sheetrock, drywall replaced the slow, labor-intensive plaster-and-lath construction of older homes with a fast, affordable, and consistent way to build interior walls and ceilings. It’s the unglamorous material behind almost every painted surface you see indoors.
Part of our Paint & Walls guide — explore the full guide →
This guide explains what drywall is made of, the different types and thicknesses, how it gets installed and finished, and what it costs, so you can talk to a contractor knowledgeably or tackle a repair yourself.
What Drywall Is Made Of
At its core, drywall is a panel of gypsum, a soft mineral of calcium sulfate, pressed into a flat sheet and wrapped in paper. The gypsum core is naturally fire-resistant because it contains chemically bound water that turns to steam when heated, slowing the spread of fire. That fire resistance is a big reason drywall became the standard for interior construction and is required by building codes in many applications.
The paper facing gives the panel strength and provides a smooth surface ready for finishing. The front paper is smooth for painting or texturing, while the back paper provides structural backing. Standard panels are gray or off-white, but the color of the paper often indicates the type, green for moisture resistance, purple for enhanced moisture and mold resistance, and other colors for specialty products. Understanding this simple gypsum-and-paper construction explains why drywall is easy to cut and install but also why it crumbles when it gets wet.
How Gypsum Board Is Manufactured
Gypsum is calcium sulfate dihydrate, meaning water is locked inside its crystals, roughly 20 percent by weight. Manufacturers start with mined gypsum rock or synthetic gypsum recovered from power plant emission scrubbers, grind it, and heat it to drive off most of that water. The resulting powder is mixed with water and additives into a slurry, spread between two continuous sheets of paper, allowed to harden, then cut to length and kiln dried. In a fire, heat has to drive water back out of the core before the wall can get much hotter than the boiling point of water, which is where every panel’s built-in fire resistance comes from.
The name comes from the installation method. Traditional plaster walls were troweled on wet in several coats that needed days to cure, while gypsum panels go up dry and are ready to finish right away. Besides gypsum board and wallboard, you may hear it called plasterboard or simply “rock” on a job site.
Standard Panel Sizes and Thicknesses
Drywall comes in standard sheet sizes, most commonly 4 feet wide by 8 feet long, which is manageable for one or two people to carry and hang. Longer sheets, 10 and 12 feet, are available to reduce the number of seams on large walls and ceilings, though they’re heavier and harder to handle. The 4-foot width is designed to span standard framing spaced 16 or 24 inches on center.
Thickness is the other key spec, and it varies by application:
- 1/4 inch: flexible, used for curved walls and skim-coating over existing surfaces
- 3/8 inch: for repairs and re-covering old walls
- 1/2 inch: the standard for interior walls in most homes
- 5/8 inch: thicker, stiffer, used for ceilings (resists sagging) and fire-rated assemblies
The 1/2-inch panel is what you’ll find on most walls, while 5/8-inch fire-rated board is common on ceilings, in garages, and between attached living spaces where code requires added fire protection.
Types of Drywall for Different Jobs
Not all drywall is the same, and choosing the right type for each location matters. Standard drywall handles the vast majority of interior walls and ceilings in dry rooms. Moisture-resistant drywall, often called green board for its green paper, resists humidity and suits bathrooms, laundry rooms, and kitchens, though it is not waterproof and should never sit behind tile in a shower without a separate waterproof membrane.
Mold-resistant drywall, typically purple, upgrades moisture and mold protection further and is worth the small premium in bathrooms and basements. Fire-resistant drywall, called Type X, uses a thicker 5/8-inch core with glass fibers to earn a one-hour fire rating, required in garages, near furnaces, and in shared walls. There’s also cement board, a distinct tile-backing product that goes behind tile in wet areas, and soundproofing drywall with a dense core that dampens noise between rooms. Match the type to the room’s conditions and code requirements.
Other Specialty Panels
- Lightweight board: up to about 25 percent lighter than standard panels, a real help on ceilings and for anyone working alone.
- Sag-resistant ceiling board: a 1/2-inch panel made to span joists 24 inches on center and carry heavy spray textures without drooping.
- Type C: an enhanced fire-rated board with extra additives, specified where an assembly needs more fire protection than Type X provides.
- Abuse-resistant board: a harder, reinforced face for hallways, garages, and playrooms where walls take hits.
- Paperless (glass-mat) board: fiberglass facings instead of paper remove mold’s food source, which makes it popular in basements.
Weight matters when planning the work. A standard 1/2-inch 4 by 8 sheet weighs roughly 50 to 57 pounds, and lightweight versions come in closer to 40. For ceilings, a rented panel lift turns a two-person struggle into a manageable one-person job.
How Drywall Gets Installed
Hanging drywall is a straightforward process that goes quickly with two people. Panels are cut to size by scoring the paper face with a utility knife, snapping the panel along the score, and cutting the back paper. The sheets are then fastened to the wood or metal studs and ceiling joists with drywall screws (or occasionally nails), driven so the head dimples just below the surface without breaking the paper.
Installers hang ceilings first, then walls, positioning panels to stagger the seams and minimize joints. Horizontal hanging on walls is common because it places the long seams at a convenient height and reduces the total seam length. Around outlets, windows, and fixtures, the drywall is measured and cut precisely so the panels fit snugly. Proper screw spacing, typically every 12 to 16 inches, keeps the panels tight against the framing and prevents future popping and cracking. Hanging is the fast part; finishing is where the real skill lies.
Layout and Fastening Details
Most pros hang panels perpendicular to the framing and use the longest sheets that fit the room, since every seam avoided is a seam that never needs taping. Stagger end joints between rows, and avoid lining up a seam with the corner of a door or window opening, where settling cracks tend to start. Leave about a 1/8-inch gap at butt joints instead of jamming panels tight, so the compound has room to key in.
Use 1-1/4 inch coarse-thread screws for 1/2-inch board on wood framing and fine-thread screws on metal studs; step up to roughly 1-5/8 inch screws for 5/8-inch panels. Set the screw gun’s clutch or depth guide so each head dimples the paper without tearing it, because a screw that breaks the face paper loses most of its holding power. A drywall T-square, utility knife, keyhole saw for electrical boxes, and an edge rasp cover nearly all the cutting.
Taping, Mudding, and Finishing
Raw hung drywall is full of visible seams and screw dimples, and turning it into a smooth, paint-ready surface is the art of drywall finishing. The process uses joint compound, called mud, and paper or fiberglass tape. First, tape is embedded in a layer of compound over every seam, and screw dimples are filled. After that dries, additional coats of mud are applied progressively wider, feathering the compound out so the seam blends invisibly into the flat panel.
A typical finish takes three coats of mud, with sanding between coats and a final sanding to a smooth surface. Finishers rate the result in levels, from Level 0 (no finish) to Level 5 (a skim coat over the entire surface for the smoothest possible result under critical lighting). Most homes are finished to Level 4. This taping and mudding process is time-consuming and messy, and doing it well takes practice, which is why many DIYers hang their own drywall but hire a pro to finish it. Poor finishing shows through paint as visible seams and bumps.
Finishing Tips That Show Under Paint
Finishers typically use progressively wider knives, around 6 inches for taping, 10 inches for the second coat, and 12 inches for the final coat, feathering each one a few inches past the last. Thin, wide coats hide joints; thick, narrow ones cast shadows under every lamp. Setting-type compound, sold as a powder with different working times, hardens chemically so you can recoat the same day, and it is the right partner for fiberglass mesh tape. Premixed all-purpose or lightweight compound is easier to sand for the final coats. Paper tape works with either.
The middle finish levels have their own uses: Level 1 (tape embedded only) for attics and spaces hidden from view, Level 2 (one coat over the tape) for garages and areas that will be tiled, and Level 3 (two coats) for walls that will get a heavy texture.
Sand with fine-grit paper, around 150 grit, on a pole sander and hold a bright work light at a low angle to reveal ridges. Then prime with a drywall primer before painting; bare compound and face paper absorb paint differently and will show every joint if primer is skipped. Spray textures such as orange peel or knockdown go on after taping and before primer, and they hide minor flaws better than a smooth finish.
Joint compound dust is very fine and can contain crystalline silica, so wear a well-fitted N95 or better respirator, seal off the room, and use a vacuum-attached sander or a damp sanding sponge where you can. In homes built before about 1980, joint compound and textured ceilings may contain asbestos, and painted walls may carry lead paint; test before sanding or demolishing old surfaces.
Repairing Common Drywall Damage
Drywall’s biggest advantage for homeowners is how easily it repairs, and knowing the basic fixes saves hundreds in service calls. Small holes from nails or screws fill with lightweight spackle applied with a putty knife, sanded smooth once dry, and painted over, a five-minute job. Medium holes up to a few inches, from a doorknob or a foot, get patched with a self-adhesive mesh patch covered in two or three thin coats of joint compound, feathered out and sanded flush.
Larger holes require cutting out a clean rectangle, backing it with wood or a patch panel, and screwing in a new piece of drywall before taping and mudding the seams. Nail pops, where a fastener works loose and pushes the surface out in a small bump, are fixed by driving a new screw an inch away, resetting the popped fastener, and filling both dimples. Water damage is the exception that usually demands replacement rather than repair, since wet gypsum loses its strength and can harbor mold. Cut out the soft, stained section entirely, address the leak that caused it, and patch in fresh board once everything is dry.
Drywall vs Plaster in Older Homes
Houses built before roughly 1950 often have three-coat plaster over wood or metal lath instead of drywall. Plaster is harder, denser, and better at blocking sound, so intact plaster is usually worth keeping rather than tearing out. It is also brittle and costly to repair in kind, which is why most plaster repairs today use drywall: a 3/8-inch or 1/2-inch panel is shimmed flush into a cut-out section, then taped and skim coated to blend. Badly cracked but solid plaster walls can also be covered with 1/4-inch panels.
A middle option is veneer plaster, a thin coat of plaster troweled over special absorbent gypsum panels often called blueboard. It delivers a hard, monolithic plaster surface with much of drywall’s speed, at a cost higher than a standard Level 4 drywall finish.
Strengths and Weak Spots
Drywall’s advantages are its low cost, quick installation, built-in fire resistance, smooth paintable surface, and easy repair. Its weak spots are sustained water contact, which softens the core and feeds mold on the paper; dents on outside corners, which metal or vinyl corner bead protects against; and limited sound blocking in a single standard layer. For quieter rooms, options include sound-damping panels, two layers of 5/8-inch board, or resilient channel that separates the wall surface from the framing. Showers and tub surrounds are one place standard drywall never belongs; they need cement board or foam tile backer, and cement board should be cut outdoors with dust control because its dust contains silica.
Costs and When to Hire a Pro
Drywall is inexpensive as a material. A standard 4 by 8 foot half-inch panel costs roughly $12 to $20, and installed drywall, including hanging, taping, and finishing, runs about $2 to $4 per square foot of wall area. A single room might cost $500 to $1,500 to drywall completely, while a whole house runs several thousand dollars depending on size and finish level. The material is cheap; the labor and skill of finishing drive most of the cost.
DIYers can reasonably handle small repairs, patching a hole, replacing a water-damaged section, or hanging drywall in a garage or basement where a flawless finish isn’t critical. Larger projects and any highly visible walls benefit from a professional, because achieving smooth, invisible seams over an entire room is genuinely difficult and slow for a novice. Now that you know what drywall is, how it’s built, and how it’s finished, you can decide which parts of a project to take on yourself and where hiring an experienced hanger and finisher will save you frustration and deliver a wall that looks flawless under paint.