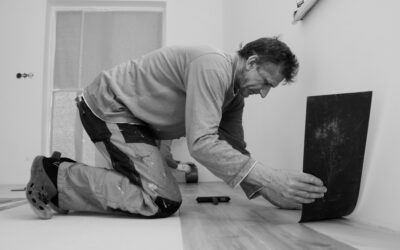
Deciding where to start laying laminate flooring in a room is the choice that quietly determines whether your finished floor looks professional or amateur. Start against the wrong wall or skip the layout math, and you can end up with a sliver of a plank at the far wall, a floor that runs visibly crooked, or planks fighting the light from your windows. Get the starting point right and everything after it falls into place. Here is exactly how to choose.
Pick the Longest, Straightest Wall
The general starting rule is to begin along the longest, straightest exterior or main wall in the room, working left to right, and progress across toward the opposite wall. A long straight wall gives you a reliable reference line so the whole floor tracks true. But do not trust the wall blindly — houses are rarely square. Measure out from the wall at both ends and in the middle; if it bows, you will need to scribe your first row to follow the wall’s true line rather than assuming it is straight.
Follow the Light
Appearance matters as much as geometry. The classic guideline is to run the planks parallel to the main source of natural light — usually the longest run of windows. When boards run the same direction as incoming light, the seams cast less shadow and nearly disappear, so the floor reads as a smooth, continuous surface. Running planks across the light rakes shadow lines and highlights every joint. When the longest wall and the light direction agree, the decision is easy; when they conflict, most people prioritize the light for a room they will look at every day.
Plan the Layout to Avoid Narrow End Rows
This is the step DIYers skip and later regret. Before laying a single plank, calculate how the rows will land at the far wall. Measure the room’s width, divide by the plank width, and look at the remainder:
- If the last row would come out as a thin sliver (say, under about 2 inches), you will have a fragile, ugly strip that is hard to click in and looks off-balance.
- To fix it, rip your first row narrower so the first and last rows are more even in width. Split the leftover between both sides.
- Do the same math for the plank lengths along the end walls so you do not finish a run with a tiny stub.
Spending fifteen minutes on this calculation is the single biggest difference between a floor that looks planned and one that looks like it ran out of room.
Stagger the End Joints
Laminate looks best and performs strongest when end joints are staggered, not lined up. Start successive rows with cut boards so the seams offset — a common rule is to stagger end joints by at least 8 to 12 inches (check your manufacturer’s minimum). Never let two end joints in adjacent rows land within a few inches of each other; it looks like an “H” pattern and weakens the floor. Using the offcut from the end of one row to start the next often produces a natural, efficient stagger.
Set the Expansion Gap Everywhere
Laminate is a floating floor that expands and contracts with temperature and humidity, so it must never touch a fixed object. Leave an expansion gap — typically around 1/4 to 3/8 inch, per your manufacturer — around the entire perimeter and against every wall, pipe, door frame, and cabinet. Use spacers along the starting wall to hold the first row off the wall while you work. This gap is hidden later by baseboards or quarter-round trim. Skip it and the floor will buckle and peak the first humid season.
Step-by-Step Starting Sequence
- Acclimate the planks in the room for the manufacturer’s stated time, and make sure the subfloor is clean, dry, and flat.
- Roll out underlayment (if not attached) across the starting area.
- Choose your wall based on length, straightness, and light direction.
- Do the width math and, if needed, rip the first row so end rows are balanced.
- Place spacers and lay the first row along the starting wall, tongue side toward the wall (trim the tongue if it faces out, per instructions).
- Work left to right, staggering joints, and progress row by row toward the far wall.
A Note on Doorways and Room Shape
In irregular or open rooms, think about how the floor flows through doorways into adjacent spaces — you generally want planks running the same direction throughout for a continuous look, which can influence your starting wall. If the main door is the first thing people see, orienting planks to run into the room from the entry often looks most natural.
Starting Point for Different Room Shapes
Not every room is a clean rectangle, and the starting logic shifts with the shape. In an L-shaped room, start along the longest continuous straight wall that lets the planks run through both legs of the L in the same direction. For a long, narrow hallway, run the boards down the length so the space reads longer and you avoid a wall of short cross-cuts. In rooms that open into several others, treat the whole connected area as one floor and pick a starting wall that keeps the plank direction consistent everywhere, since a direction change at a doorway looks abrupt. When a room is badly out of square, snap a straight chalk working line a plank-width plus expansion gap off the starting wall and build to that line, scribing the first row to the crooked wall.
Tools That Make the Start Easier
A good start is easier with the right gear on hand before you begin. Spacers hold the expansion gap consistently along the starting wall and around the perimeter. A tapping block and pull bar let you close joints tight without damaging the plank edges, including that tricky last board in each row. A speed square and a sharp pencil keep your layout marks accurate, and a quality saw — miter, jig, or a laminate cutter — handles the rip on your first row and the end cuts. Having these ready means you set the critical first row cleanly instead of improvising, and the first row is the one every other row depends on.
Bottom Line
Where to start laying laminate flooring in a room comes down to four decisions: begin against the longest, straightest wall; run the planks with the main light; do the width math so you never end on a narrow sliver; and hold a proper expansion gap all the way around. Nail the starting row and layout, and the rest of the floor is just clicking planks together toward a clean, professional finish.
Prefer to explore on your own?
See how new flooring looks in your actual room in seconds — free, no signup.
Try the free Floor Studio →