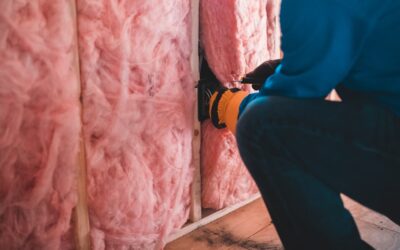
The gap between a window frame and the wall framing is one of the leakiest spots in a house, and it is usually hidden behind trim. Window insulation foam, specifically low-expansion polyurethane foam sold for windows and doors, is the standard way to seal that gap. Used correctly, it stops drafts, blocks air-driven moisture and adds real insulation where fiberglass stuffing never quite worked.
Part of our Windows & Doors guide — explore the full guide →
Used carelessly, it does damage. Regular high-expansion foam, or too much of the right foam, can push a vinyl or wood frame inward by a fraction of an inch. That is enough to make a double-hung sash stick, a slider bind, or a casement refuse to latch. The fix is choosing the right product, filling only part of the gap, and knowing when backer rod and caulk are the better tool.
- What Window Insulation Foam Is (and Why Expansion Rate Matters)
- Foam vs Backer Rod and Caulk: Which to Use
- Safety First: Working With Spray Foam
- Tools and Materials
- How to Seal Around Windows With Foam Step by Step
- How Much Foam Is Too Much?
- Troubleshooting
- Cost and When to Call a Pro
- Window Insulation Foam FAQ
This guide covers where foam belongs, where it does not, and a step-by-step method for insulation around windows that leaves the sashes operating smoothly.
What Window Insulation Foam Is (and Why Expansion Rate Matters)
Canned spray foam is a one-part polyurethane that reacts with moisture in the air, expands and cures into a semi-rigid cellular solid. Products are grouped by how aggressively they expand and how hard they push while curing.
- High-expansion (gap and crack) foam can grow to two or three times its bead size and cures rigid. It generates enough pressure to deflect thin frames. Keep it away from windows and doors.
- Low-expansion or minimal-expanding window and door foam grows much less, stays slightly flexible after curing, and exerts low pressure on the frame. Look for labels that say the product is formulated for windows and doors and will not bow frames.
That label claim matters, but it assumes you use the product as directed. Even window and door foam can distort a frame if you pack a wide gap full from front to back in one pass. The goal is a continuous air seal with some insulation value, not a solid block of foam.
Foam vs Backer Rod and Caulk: Which to Use
Expanding foam for windows and caulk are not interchangeable. Each fits a different gap size and job.
| Gap width | Best approach | Why |
|---|---|---|
| Under 1/4 inch | Sealant or caulk alone | Too narrow for a foam nozzle to fill without voids |
| 1/4 to 1/2 inch | Backer rod plus sealant, or a thin foam bead | Backer rod gives caulk the right depth and shape |
| 1/2 to about 1 1/2 inches | Low-expansion foam, partial fill | Foam fills irregular voids and adds insulation |
| Over 1 1/2 inches | Shim or fur out, then foam | Very wide gaps suggest a sizing or framing issue |
Backer rod is a round foam rope pushed into the joint so sealant only bonds to the two sides, which lets it stretch as the house moves. It is ideal on the exterior side and for narrow interior gaps. Window spray foam shines in the rough opening itself, where gaps vary from a quarter inch at one corner to over an inch at another and a rope cannot follow the contour.
Many installers combine the two: foam in the middle of the rough-opening gap for insulation, and a bead of sealant or backer rod plus caulk at the interior face for a clean air barrier.
Safety First: Working With Spray Foam
Uncured polyurethane foam contains isocyanates, which can irritate skin, eyes and lungs. It is also extremely sticky and nearly impossible to remove from skin, hair or fabric once cured. Treat it as a chemical product, not a craft supply.
- Ventilate the room well: open other windows and run a fan blowing air outdoors.
- Wear nitrile gloves and safety glasses. Wear a respirator if the label calls for one, and follow the can’s directions exactly.
- Wear long sleeves and old clothes, and cover floors and sills with drop cloths.
- Spray foam propellants and uncured foam are flammable. Keep cans and vapors away from pilot lights, space heaters, sparks and open flames, and do not smoke nearby.
- Never mix foam with other chemicals or solvents, and never heat a can to make it spray faster; store and use cans within the temperature range on the label.
- Keep acetone-based foam cleaner handy for uncured foam on tools and surfaces. Cured foam must be cut or abraded off.
People with asthma or chemical sensitivities should consider hiring the job out or at least staying out of the room until the foam cures.
Tools and Materials
- Low-expansion window and door foam (one can typically does several average windows)
- Spray foam applicator gun (optional but highly recommended)
- Foam gun cleaner
- Pry bar, putty knife and a small block of wood for removing trim
- Utility knife or serrated blade for trimming cured foam
- Backer rod in a diameter about 25 percent larger than the gap
- Paintable interior sealant and a caulk gun
- Spray bottle of water, gloves, safety glasses and drop cloths
A spray foam applicator gun is worth buying if you have more than a couple of windows. It meters the bead precisely, stops flow the moment you release the trigger, and keeps a partly used can usable for weeks if you leave it attached. Straw-nozzle cans are single-use once opened and tend to dump foam faster than you want.
How to Seal Around Windows With Foam Step by Step
- Remove interior casing. Score paint lines with a utility knife, then pry the trim off gently with a putty knife behind the pry bar to protect the wall. Number each piece on the back.
- Inspect the gap. Pull out any old fiberglass stuffing. Check that shims are in place near the corners and at lock and hinge points. Measure the gap width in several spots.
- Close and lock the window. A locked sash holds the frame square while the foam cures. Some installers also place temporary spacers between sash and frame on wide windows.
- Mist the gap lightly. Polyurethane foam cures with moisture. In dry climates or heated winter air, a light water mist helps the foam cure evenly. Do not soak it.
- Apply a partial bead. Starting at the bottom, insert the nozzle deep into the gap and run a bead that fills roughly one-third to one-half of the depth. Work up each side, then across the top.
- Let it expand before adding more. Wait several minutes. If gaps remain, add a second thin bead. Never fill flush with the drywall in one shot.
- Check operation. After about an hour, unlock and cycle the sash. If it drags, the frame is being pushed; carefully cut back foam at that spot while it is still soft.
- Trim after cure. Let the foam cure fully per the label, often several hours to overnight, then trim excess flush with a knife.
- Seal the interior face. Run a bead of sealant, or backer rod plus sealant for narrow sections, between frame and drywall edge to complete the air barrier.
- Reinstall trim. Nail the casing back, fill holes, caulk the trim joints and touch up paint.
How Much Foam Is Too Much?
A good rule: if foam is squeezing out of the gap on its own, you have used too much. Low-expansion window and door foam still grows by some amount, and in a confined space that growth turns into pressure. Signs you overdid it include a sash that needs noticeably more force to slide, a reveal between sash and frame that looks wider at the middle than the corners, and a lock that no longer lines up.
Wide, deep gaps are where people get in trouble. It is tempting to fill a two-inch void in one go. Instead, stuff a backer rod or shim in the back of the gap to reduce depth, then foam in stages.
Troubleshooting
Foam is soft and sticky days later. It was applied too cold or in very dry air. Cut it out and reapply in suitable conditions with a light mist.
Voids or hollow sections after trimming. The bead did not reach the back of the gap. Inject a small second bead into the void or finish the gap with backer rod and sealant.
Sash sticks after foaming. Cut foam back at the tight spot with a thin blade, working from the interior. In stubborn cases the frame may need to be re-shimmed.
Still drafty. Air may be coming through the sash weatherstripping rather than the rough opening. Check with a lit incense stick on a windy day around the sash and meeting rail.
Cost and When to Call a Pro
Doing the job yourself is inexpensive: a can or two of window and door foam, a reusable applicator gun, sealant and backer rod usually cost less than a single hour of contractor labor. Professional air sealing of a whole house, often bundled with an energy audit, costs more but includes blower-door testing to find the biggest leaks.
Call a window installer if the frame is visibly out of square, the sill is rotten, you find water staining inside the rough opening, or the window is on an upper floor you cannot reach safely from inside. Water damage in the wall usually means the exterior flashing has failed, and more foam will only hide the problem.
Window Insulation Foam FAQ
Can I use regular expanding foam around windows?
It is not recommended. High-expansion foam cures rigid and can push window frames inward, causing sashes to bind. Use foam labeled for windows and doors instead.
How long does window insulation foam take to cure?
Most low-expansion foams are tack-free in minutes and can be trimmed after several hours, but full cure can take up to a day depending on temperature and humidity.
Should I foam or caulk the gap around my window?
Foam fills wider, irregular rough-opening gaps and insulates. Caulk with backer rod suits narrow joints and the finished interior and exterior faces. Many installers use both.
Is window and door foam waterproof?
Cured foam resists water, but it is not a substitute for flashing tape and exterior sealant. It should not be the only thing keeping rain out of the wall.
Do I need to remove the trim to insulate around windows?
Yes, for a proper job. The gap is behind the interior casing, and spraying through tiny cracks usually leaves voids and makes a mess of the trim.