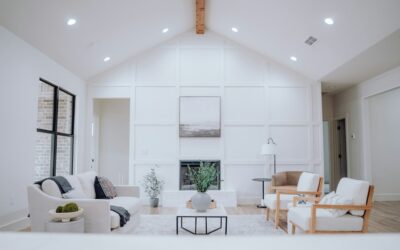
Suspended ceilings have a reputation for looking like a dentist’s waiting room, but that image comes from white mineral-fiber tiles, not the grid itself. A wood drop ceiling keeps everything useful about a suspended system, including easy access to pipes, wires, and ductwork, while replacing the office look with real veneer or solid wood panels. The result can pass for a custom coffered or plank ceiling at a fraction of the labor. Before you buy, though, you need to understand panel types, moisture limits, fire ratings, and the true installed cost.
- What Is a Wood Drop Ceiling?
- Wood Drop Ceiling Materials and Panel Options
- Where a Wood Drop Ceiling Makes Sense
- Headroom, Codes, and Fire Ratings
- How to Install a Wood Drop Ceiling
- Installed Cost Breakdown
- Lighting, Vents, and Electrical Safety
- Design Tips for a Finished Look
- Maintenance and Longevity
- Frequently Asked Questions
What Is a Wood Drop Ceiling?
A wood drop ceiling is a suspended ceiling system in which wood or wood-faced panels sit in, or clip onto, a metal grid hung from the structure above by wires. The grid is usually steel with a 15/16-inch or 9/16-inch face, painted to match the panels or finished in a wood-grain vinyl wrap. Because the panels are removable, you can reach a leaking drain line or add a junction box without cutting drywall.
There are three basic families of products:
- Lay-in wood tiles: 2×2 or 2×4 panels, often MDF or particleboard with a real wood veneer, that drop into an exposed grid like standard acoustic tiles.
- Linear plank systems: Long wood or veneered planks, typically 4 to 12 inches wide and up to 8 feet long, that clip to a concealed carrier so no grid shows. These look like a tongue-and-groove ceiling.
- Open-cell or baffle systems: Wood slats or baffles suspended in parallel rows, creating an open, architectural look with visible plenum above, usually painted black.
Wood Drop Ceiling Materials and Panel Options
Most residential products fall into one of these categories. Choose based on budget, look, and the room’s humidity.
| Panel Type | Material Cost | Best For |
|---|---|---|
| Wood-look vinyl or PVC tiles | $2-$5/sq ft | Humid basements, laundry rooms |
| Veneered MDF lay-in tiles | $5-$12/sq ft | Finished basements, dens |
| Solid wood planks on carrier | $10-$25/sq ft | Living rooms, home theaters |
| Commercial wood acoustic panels | $18-$40/sq ft | Media rooms, high-end remodels |
Veneered panels give you real grain at a manageable price. Species like white oak, maple, cherry, and walnut are common, finished with a factory UV-cured clear coat. Solid wood planks cost more, weigh more, and are more sensitive to seasonal movement, but they can be refinished. Perforated or slotted wood panels backed with acoustic fleece absorb sound and are worth considering if the room is echoey, though this guide focuses on the ceiling itself rather than dedicated acoustic treatment.
Where a Wood Drop Ceiling Makes Sense
Basements are the classic use. Joists crossed by drains, water supply lines, and HVAC trunks make drywall ceilings awkward, and a suspended system lets you hide everything while keeping access. Wood panels warm up a space that would otherwise feel clinical.
Home offices and dens benefit from the visual warmth and the ability to integrate lights, speakers, and vents neatly into panel openings. Kitchens and dining rooms in older homes with uneven plaster ceilings are another good fit, since the grid can be leveled independently of a sagging ceiling above.
Avoid wood panels in full bathrooms, unconditioned porches, and any basement that sees humidity above roughly 60% for long periods. Wood and MDF absorb moisture, cup, and can grow mold. In those spaces, wood-look PVC or aluminum panels with a printed grain are the smarter choice.
Headroom, Codes, and Fire Ratings
A drop ceiling needs space. Plan for at least 3 to 4 inches below the lowest obstruction to tilt panels into the grid, and 6 inches is more comfortable. The International Residential Code requires habitable rooms to have a minimum ceiling height of 7 feet, with some allowances in basements for beams, ducts, and pipes projecting down to 6 feet 4 inches. Measure before committing; in a basement with 7-foot-6-inch joists, a drop ceiling can push you uncomfortably close to the minimum.
Fire performance matters too. Interior finishes are rated by flame spread under ASTM E84. Most residential codes require ceiling finishes to have a flame spread index of 200 or less (Class C), and many wood veneer products are available with fire-retardant treatment achieving Class A (0-25). Check the product’s rating, especially if the ceiling is in a basement with a furnace, a garage-adjacent room, or a multi-family building. Never cover required sprinkler heads, and do not block the access or clearances around gas appliances, flues, or electrical panels.
How to Install a Wood Drop Ceiling
A basic lay-in system is a reasonable DIY project for a patient homeowner. Concealed plank systems are more demanding and often worth professional help.
- Plan the layout. Draw the room to scale and center the grid so border panels on opposite walls are equal and at least half a panel wide. Mark light, vent, and speaker locations.
- Snap a level line. Use a laser level to mark ceiling height around the perimeter. Allow for panel thickness and any lights that need to recess above the grid.
- Install wall angle. Fasten the L-shaped perimeter molding to studs every 16 to 24 inches with screws.
- Hang main tees. Attach 12-gauge hanger wire to joists every 4 feet with screw eyes or lag hooks, then hang main runners perpendicular to the joists, typically 4 feet apart. Twist wires at least three full turns.
- Add cross tees. Snap 4-foot cross tees into the mains to create 2×4 openings, and 2-foot tees for 2×2 layouts. Check for square with a 3-4-5 measurement.
- Acclimate and install panels. Let wood panels sit in the room for 48 to 72 hours at normal living conditions. Wear clean cotton gloves to avoid fingerprints on veneer, and install lights and vents before the final panels.
For concealed linear planks, the manufacturer’s carrier channel replaces the exposed tee grid. Planks clip on from one end of the room, and precise carrier leveling is critical because any dip shows as a visible wave along the long plank edges.
Installed Cost Breakdown
For a typical 400-square-foot finished basement, expect roughly:
- Grid, wall angle, and hanger wire: $1.50-$3.00 per sq ft ($600-$1,200)
- Veneered MDF lay-in panels: $5-$12 per sq ft ($2,000-$4,800)
- Professional labor: $2-$5 per sq ft for lay-in systems, $5-$10 for concealed plank systems
- Recessed or panel LED fixtures: $40-$150 each plus electrician time
A DIY lay-in wood ceiling in that basement might come in around $3,000 to $6,000. A professionally installed solid wood plank system can run $8,000 to $15,000 or more. By comparison, a standard white acoustic drop ceiling usually costs $2 to $6 per square foot installed, so wood carries a real premium for its appearance.
Lighting, Vents, and Electrical Safety
Integrated lighting is where many DIY ceilings go wrong. Use fixtures rated for suspended ceilings, and support them independently from the structure with their own hanger wires rather than resting their weight on the grid. Low-profile LED panels and canless wafer lights work well because they generate little heat and need minimal plenum depth.
When to call a licensed professional: Any new circuits, moved junction boxes, or added fixtures should be handled by a licensed electrician and permitted where your jurisdiction requires it. All junction boxes must remain accessible, which a drop ceiling helps with, but boxes must still be covered and secured. If you are enclosing ductwork, gas lines, or a furnace flue, confirm required clearances with an HVAC contractor before panels go in. Wood is combustible, and flue pipes need the manufacturer’s specified clearance, often 1 to 6 inches depending on the vent type.
Design Tips for a Finished Look
Grain direction changes how a room reads. Run linear planks parallel to the longest wall to stretch a narrow basement, or perpendicular to the main window to draw light deeper into the space. With lay-in tiles, rotating every other 2×2 panel 90 degrees creates a subtle parquet pattern that hides minor color variation between panels. Mixing species rarely works; a single warm tone such as natural white oak or light maple keeps low basement ceilings from feeling heavy.
Match or intentionally contrast the grid. A black or dark bronze grid under walnut panels gives a crisp, coffered effect, while a wood-grain grid disappears almost entirely. Finish the perimeter with a shadow-line wall molding or a small crown profile to avoid the commercial look of standard L-angle. Order 5% to 10% extra panels for cutting waste and future repairs, because veneer color shifts from lot to lot.
Maintenance and Longevity
Dust wood panels with a microfiber cloth or soft vacuum brush a few times a year. Avoid spray cleaners, which can leave streaks or raise the grain. If a pipe leaks, remove affected panels immediately and let them dry flat; veneered MDF that swells rarely recovers, so keep a few spare panels from the same production lot. Keep indoor humidity between 35% and 55% to minimize movement. With stable conditions, a quality suspended wood ceiling can look good for 20 years or more, and its removable panels make updates and repairs far simpler than drywall.
Frequently Asked Questions
Is a wood drop ceiling more expensive than drywall?
Usually yes. Drywall ceilings often cost $2 to $4 per square foot installed and finished, while wood drop ceilings range from roughly $6 to $25 or more depending on panel type.
Can I paint my existing drop ceiling grid to match wood panels?
Yes. Lightly scuff, prime with a bonding primer, and paint the grid in a dark bronze, black, or brown that complements the wood tone.
Will a wood drop ceiling reduce noise?
Solid wood panels reflect sound. Perforated wood panels with acoustic backing absorb some mid and high frequencies, but blocking noise between floors requires different, mass-based construction.
How much headroom do I lose with a drop ceiling?
Plan on 3 to 6 inches below the lowest joist, pipe, or duct. Check that the finished height still meets the 7-foot habitable room minimum.