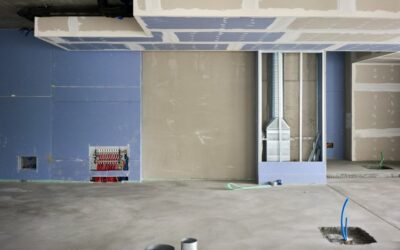
Most homeowners picture a suspended tile grid when they hear “drop ceiling,” but a drywall drop ceiling gives you the same ability to hide ducts, pipes, and wiring while finishing flat and seamless like the rest of your house. It is one of the most common ways to finish a basement, level out a sagging plaster ceiling, or create a crisp lowered zone over a kitchen island. Done well, nobody will ever know there is a framed cavity above them. Done poorly, you end up with cracked seams, a ceiling that feels too low, and no way to reach the shutoff valve you just buried.
Part of our Paint & Walls guide — explore the full guide →
- What a Drywall Drop Ceiling Actually Is
- Framing Options for a Lowered Drywall Ceiling
- How Much Height Can You Give Up?
- Drywall Drop Ceiling Materials and Sheet Choices
- Access Panels, Lighting, and What Must Stay Reachable
- Step-by-Step Overview of the Installation
- Drywall Drop Ceiling Costs
- Drywall vs. Suspended Tile: Which Makes Sense?
- When to Call a Licensed Professional
- Final Tips for a Clean, Long-Lasting Result
What a Drywall Drop Ceiling Actually Is
A drywall drop ceiling is a gypsum board ceiling hung below the existing joists or ceiling plane, supported by its own framing. That framing can be dimensional lumber, light-gauge steel studs and track, furring channel on hanger wire, or a purpose-built drywall suspension grid. The result is a solid, taped, and painted surface rather than removable tiles.
Homeowners usually choose this approach for one of four reasons:
- Concealing mechanicals: ductwork, drain lines, and beams that hang below the joists in basements.
- Correcting an uneven ceiling: old plaster or bowed joists can be bypassed with a new, laser-leveled plane.
- Design zoning: a lowered soffit or “floating” section over a bar, island, or bed wall defines space and hosts recessed lighting.
- Acoustics and fire performance: a second layer of gypsum with an air gap and insulation cuts sound transfer far better than a tile grid.
Compared with acoustic tile, you give up easy above-ceiling access, but you gain a finished look, better durability, and a surface that takes any paint sheen or texture you like.
Framing Options for a Lowered Drywall Ceiling
Your framing choice depends on how far you need to drop, how much span you have to cover, and whether you are working on a single soffit or an entire room.
Wood-framed drop
For drops of a few inches, you can sister 2x4s or 2x6s to the existing joists, or hang a ladder-style frame from them. Wood is familiar and forgiving, and it takes screws easily. The downside is that lumber twists and shrinks as it dries, which can telegraph through the finished drywall as nail pops or wavy seams. Choose straight, kiln-dried stock and let it acclimate indoors for several days.
Light-gauge steel framing
Steel track and studs stay perfectly straight, will not rot, and are light enough to carry overhead. Contractors often use 20- or 25-gauge members for non-structural ceilings. Steel is excellent for long soffits wrapping a trunk duct because you can build straight boxes that stay true for decades. Cutting requires aviation snips or a chop saw with a metal blade, and screws must be fine-thread drywall screws.
Drywall suspension grid systems
Several major ceiling manufacturers sell heavy-duty grid made specifically to carry gypsum board. Main runners hang from wire tied to the structure, usually at about 4-foot intervals, and cross tees snap in between. You screw drywall directly to the grid. These systems excel on large basement ceilings where joists run in awkward directions or where the drop varies across the room, and they level quickly with a laser.
Furring channel on hanger wire
Commercial crews often hang cold-rolled channel on wire, then clip hat-shaped furring channel perpendicular to it. It is fast for experienced installers, but most DIYers find the grid systems easier to level and inspect.
How Much Height Can You Give Up?
Before you lower anything, measure. The International Residential Code generally requires habitable rooms to have a ceiling height of at least 7 feet, with some allowances in basements where beams, ducts, and pipes may project lower, down to roughly 6 feet 4 inches in limited areas. Local codes vary, so confirm your jurisdiction’s number before framing.
A practical rule is to drop only where you must. Instead of lowering an entire basement ceiling to clear one trunk line, box the duct in a soffit and keep the rest of the ceiling at joist height. That preserves headroom, reduces material, and makes the room feel larger. Remember to account for the full assembly: framing depth, drywall thickness (usually 1/2 or 5/8 inch), and any recessed light housings that need clearance above the board.
Also think about what hangs below the ceiling later. Ceiling fans need at least 7 feet from blade to floor in most installations, and a lowered ceiling can rule one out entirely.
Drywall Drop Ceiling Materials and Sheet Choices
Standard 1/2-inch wall board is not ideal overhead. It can sag between framing members, especially under the weight of wet-sprayed texture. Look for these instead:
- 1/2-inch sag-resistant ceiling board: designed for framing at 24 inches on center and lighter than 5/8-inch.
- 5/8-inch Type X: required in many garage ceilings below living space and useful anywhere you want better fire resistance and sound control.
- Moisture- and mold-resistant board: a sensible upgrade for basements, laundry rooms, and bathrooms.
- Sound-damping panels or resilient channel: worth considering under a home theater or bedroom.
Plan fastener spacing per the drywall manufacturer, typically every 12 inches on ceilings. Use a drywall lift; a single 4×12 sheet of 5/8-inch board can weigh well over 100 pounds, and holding it overhead while driving screws is how people get hurt.
Access Panels, Lighting, and What Must Stay Reachable
The biggest trade-off with a drywall drop ceiling is permanence. Anything above it becomes hard to reach, so map every valve, cleanout, damper, and junction box before you close it up. Electrical codes require junction boxes to remain accessible, so you cannot simply bury a splice above solid drywall. Plumbing shutoffs, dryer vent connections, and HVAC dampers also need access.
Plan for flush access panels. Snap-in plastic panels cost roughly $15 to $40, while paintable metal or “invisible” drywall-inlay panels run $50 to $200 or more. Size them generously: a 12×12 opening is fine for a valve, but a furnace damper or a condensate trap may need 24×24.
Lighting also drives layout. Slim LED wafer lights need very little cavity depth and are rated for contact with insulation, which makes them popular in shallow drops. Traditional recessed cans need more height and specific IC ratings if insulation is present. Lay out lights on the framing plan so no fixture lands on a joist or grid runner.
Step-by-Step Overview of the Installation
- Check permits. Finishing a basement or altering a ceiling often requires a permit, especially when electrical work is involved.
- Snap a level line. Use a rotary or cross-line laser to mark the finished height on every wall, subtracting drywall thickness.
- Install perimeter supports. Fasten wall angle, steel track, or a wood ledger along the line.
- Hang the framing. Set hanger wires or blocking, then install main members and cross members at the spacing your drywall requires.
- Rough in services. Run wiring for lights, add insulation or sound batts, and frame openings for access panels.
- Inspect. Get rough-in inspections before covering anything.
- Hang drywall. Run sheets perpendicular to framing, stagger end joints, and keep screws about 3/8 inch from edges.
- Tape, mud, and finish. Plan on three coats of compound plus sanding, then prime before paint or texture.
Inside corners where a soffit meets the main ceiling crack easily. Use paper or composite corner tape and flexible compound there, and use metal or vinyl corner bead on outside soffit edges.
Drywall Drop Ceiling Costs
Costs swing widely with region, ceiling height, and complexity, but these ranges are typical for a professionally installed project:
| Scope | Typical Installed Cost |
|---|---|
| Drywall hang and finish only | $2 to $4 per sq ft |
| Framed drop ceiling, wood or steel | $5 to $12 per sq ft |
| Drywall grid system, full room | $6 to $14 per sq ft |
| Duct soffit, per linear foot | $25 to $75 |
A 400-square-foot basement ceiling might land anywhere between $2,500 and $5,500 before lighting and electrical. DIY material costs for grid, board, fasteners, and compound often run $2 to $4 per square foot. Level 5 finishes, curved soffits, and tray details push labor costs up.
Drywall vs. Suspended Tile: Which Makes Sense?
Suspended acoustic tile is still the better choice when you need frequent access, such as a basement full of shutoffs or a ceiling you expect to open often. Tiles are also easier for a beginner, cheaper to repair, and less messy. A drywall drop ceiling wins on looks, sound isolation, fire resistance, and resale appeal. Many finished basements blend both: drywall across living areas and tile grid over the mechanical room.
If you are torn, think about the next ten years. Will you add a bathroom, move a line, or run new cable? If so, generous access panels or a hybrid layout will save you from cutting holes in finished drywall later.
When to Call a Licensed Professional
Hanging a ceiling is heavy, overhead work. Bring in a licensed contractor, electrician, or structural pro if you need to cut, notch, or reinforce joists; relocate ductwork or gas lines; add new circuits; or build a fire-rated assembly such as a garage ceiling below a bedroom. Old plaster ceilings in pre-1980 homes may contain asbestos in texture or joint compound, and pre-1978 paint may contain lead, so test before demolition. If the existing ceiling is sagging or cracked from water, find and fix that cause first, because a new drop ceiling will only hide the problem until it gets worse.
Final Tips for a Clean, Long-Lasting Result
Let the house’s heat and humidity stabilize before taping, especially in basements. Run a dehumidifier during the finishing phase so joint compound cures evenly. Use a quality primer, since fresh compound and paper absorb paint differently and will “flash” under raking light. Finally, photograph the open framing and every service run before the board goes up. Those pictures become your map when you need to find a valve or add a fixture, and they turn a permanent ceiling into one you can still work with.