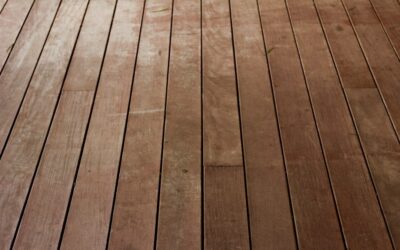
Worn, scratched, gray-edged hardwood can look tired, but the boards underneath are often perfectly sound. A wood floor renovation brings that hidden beauty back, and depending on the floor’s condition it might mean a full sand-and-refinish, a light screen-and-recoat, or, in some cases, replacement. The biggest money-saver here is knowing which one your floor actually needs. Sanding solid hardwood is one of the highest-return projects in a home, but doing it when a simpler recoat would suffice just burns away wood you can never get back.
Step One: Assess the Floor
Before you rent a sander, figure out what you’re dealing with. Run through these checks:
- Solid or engineered? Solid hardwood can be sanded several times over its life. Engineered floors have a thin veneer (sometimes only 2 to 4 mm) and can usually be refinished only once or twice, if at all. Sanding through the veneer ruins the board.
- How thick is the wear layer? On solid floors, look at a heat vent or threshold to gauge how much wood sits above the tongue and groove. The more there is, the more sanding life remains.
- Surface damage vs deep damage: Light scratches and dull finish are surface problems. Deep gouges, water staining (black or gray spots), cupping, and squeaks signal more work.
- Finish condition: If the finish is worn but the wood beneath is clean and unstained, you may only need a recoat, not a full sand.
The Quick Option: Screen and Recoat
If your floor’s finish is just dull and lightly scratched but the wood isn’t worn through to bare or stained, you can often skip full sanding. A screen-and-recoat (also called a buff-and-coat) lightly abrades the existing finish with a buffer and screen, then applies a fresh coat of polyurethane on top. It refreshes the floor in a day, costs a fraction of a full refinish, and preserves wood thickness. The catch: it only works if the finish is intact. If you’ve worn through to bare wood, have deep stains, or want to change the stain color, you need to sand.
The Full Refinish: Sanding
A complete refinish strips the floor down to raw wood and rebuilds the finish. It’s the right call for heavily worn, stained, or scratched floors, or when you want a new color.
- Prep the room. Remove furniture, pull base shoe molding, set protruding nails below the surface, and seal off the room from dust with plastic sheeting.
- Rough sand. Use a drum or orbital floor sander with a coarse grit (around 36 to 40) to remove the old finish and level the surface. Use an edger for perimeters the big sander can’t reach.
- Progressive grits. Work up through medium grits (60, then 80, then 100 or 120), vacuuming between passes. Each finer grit removes the scratches of the last.
- Keep moving. Never let a drum sander sit in one spot, or it gouges. Overlap passes and sand with the grain.
Repairs Before You Finish
With the floor bare, address damage. Fill small nail holes and minor gaps with a wood filler tinted to match, or fill seasonal gaps after the floor has acclimated. Replace badly damaged or rotted boards by carefully cutting them out and weaving in matching planks. Re-secure squeaky or loose boards by fastening into the joists. Tackle these repairs now, before staining and finishing, so they blend in once the finish goes on.
Staining (Optional)
Bare wood is your chance to change the color. Test stain on an inconspicuous area or a sanded board scrap first, because the same stain looks dramatically different on oak versus maple versus pine. Apply stain evenly with a rag or applicator, wipe off the excess within the working time, and let it dry fully per the product directions, often 24 hours or more. If you love the natural wood tone, you can skip stain and go straight to a clear finish. Some species, like maple, blotch with stain, so consider a conditioner or a natural finish for them.
Applying the Finish
The finish protects the wood and sets the sheen. The main choices:
- Oil-based polyurethane: Durable and warm-toned, with a longer dry time and stronger odor. Ambers over time.
- Water-based polyurethane: Dries fast, low odor, and stays clear, so it keeps lighter floors light. Often needs more coats.
- Hardwax oil: A natural, matte, easy-to-spot-repair option that penetrates the wood.
Apply thin, even coats with a quality applicator, following the grain. Most floors get two to three coats, with a light buff between coats for adhesion. Respect the recoat and cure windows: a floor may handle foot traffic in a day or two but take a couple of weeks to fully cure, so wait before replacing rugs and heavy furniture.
When to Replace Instead of Refinish
Refinishing isn’t always the answer. Replace the floor when the wood is too thin to sand again (common with old, repeatedly refinished floors or thin engineered veneer), when there’s widespread water damage, rot, or insect damage, or when boards are cupped, buckled, or unstable beyond repair. Sometimes the species, color, or layout is simply something you no longer want, and a new floor makes more sense than fighting the old one. A flooring professional can sound out whether your boards have enough life left for one more refinish.
DIY vs Hiring a Pro
Refinishing is doable as a DIY project, but go in with clear eyes. The sanding stage is the riskiest part: a drum sander is powerful, and a beginner can gouge or dish a floor in seconds by lingering or tilting it. Renting an orbital sander is more forgiving than a drum machine if you’re new to it. Hiring a professional costs more, but pros bring dustless sanding systems, the experience to feather edges and blend repairs, and the speed to finish a whole floor in a day or two. A reasonable middle path is to DIY a small, simple room to learn, and hire out large open areas, staircases, or floors where a mistake would be expensive. Whichever route you take, the prep and cleanup between grits matter as much as the sanding itself.
Caring for Your Newly Finished Floor
Protecting the work extends the time before the next refinish. Wait the full cure period before putting rugs down or moving heavy furniture back, since a green finish marks and dents easily. Add felt pads under furniture legs and use floor protectors under rolling chairs. Sweep or vacuum grit regularly, since fine particles are what scratch a finish over time, and clean with a product made for wood floors rather than water and harsh cleaners that can dull or damage the coating. Place mats at entries to catch grit and moisture, and keep indoor humidity reasonably stable to limit seasonal gapping and cupping. With this routine, a freshly refinished floor can go many years before it needs more than a simple recoat.
The Bottom Line
A successful wood floor renovation starts with honest assessment. If the finish is merely dull, a screen-and-recoat refreshes it cheaply and saves wood. If the wood is worn, stained, or you want a new color, a full sand-stain-finish brings it back to life. Repair damage while the boards are bare, choose a finish that fits your style and traffic, and let it cure properly. And when the wood is simply spent, replacing it is the smarter investment. Done thoughtfully, reviving real hardwood is one of the best-value upgrades a home can get.
Prefer to explore on your own?
See how new flooring looks in your actual room in seconds — free, no signup.
Try the free Floor Studio →