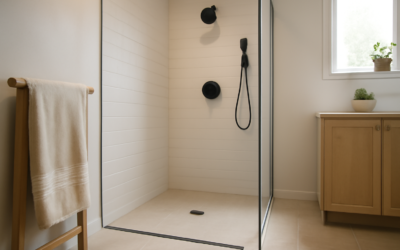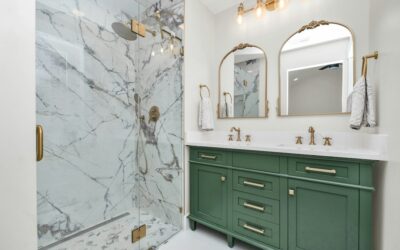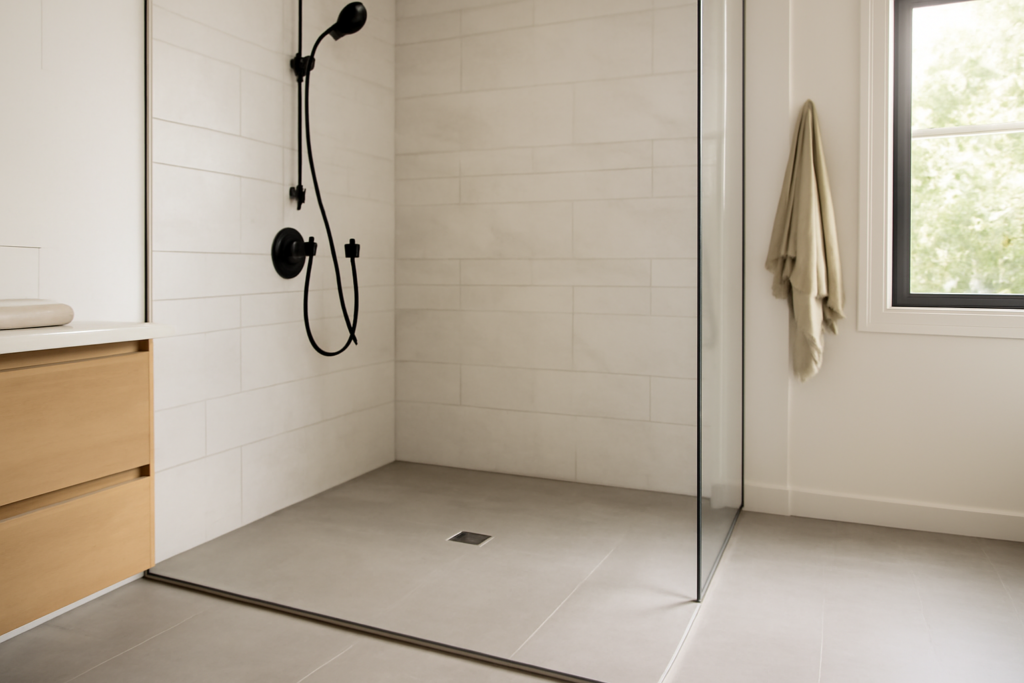
Roll-in accessibility, wide-open sightlines, nothing to trip over at 2 a.m. — a zero entry shower pan delivers all three, which is why curbless showers have jumped from hospital design to the most-requested feature in high-end bathroom remodels. But a zero entry shower pan is the one shower component where the pan itself is the easy part; the hard part is getting the floor structure, slope, and waterproofing to cooperate so water stays where it belongs without a curb to stop it. I’ve built these over wood framing, over slabs, and in gut renovations, and the projects that succeed are planned from the subfloor up. Here’s the complete playbook.
Part of our Bathroom Remodeling & Flooring guide — explore the full guide →
The Core Problem: Where Does the Slope Come From?
Every shower floor must slope to its drain — 1/4″ per foot under tile is the standard. A curbed pan simply sits on top of the floor and rises to a threshold. Remove the curb and that slope has to be sunk into the structure, which gives you exactly three options:
- Recess the subfloor (best result). Over wood framing, drop the shower area between joists: sister the joists, install a lowered subfloor 1.5–2.5″ below the surrounding floor, and let the pan or mud bed slope within that recess so the entry meets the bathroom floor flush. On a slab, the equivalent is chipping out a recess — noisy, dusty, $500–$1,500 of labor, but the gold standard.
- Build the bathroom floor up. Raise the entire bathroom 1–1.5″ with sleepers or a mortar bed so the shower slope hides in the difference. Works when the recess is impossible, but creates a transition at the bathroom door instead.
- Use a ramped or ultra-thin pan. Some foam systems and cast pans slope from a feathered entry edge without any recess, trading a subtle ramp inside the shower footprint for zero structural work.
Pan Systems That Do Curbless Well
- Schluter Kerdi-Shower-LTS/Line trays: sloped expanded-polystyrene foam trays, 48″x48″ up to 72″x72″, trimmable on site, designed for linear drains at the wall or entrance. Tray $200–$400; full kit with Kerdi membrane and drain $600–$1,000. The workhorse of tiled curbless builds.
- Wedi Fundo Ligno: the specialist — only 3/4″ thick at its perimeter, engineered to drop into a plywood recess so the tiled result lands dead flush. Sizes 3’x5′ and 4’x4′ class; $700–$1,100 with drain. My pick over wood framing.
- Tile Redi Redi Free: one-piece polyurethane curbless pans with integrated slope and drain, ready to tile straight over, 30″x60″ to 42″x72″. $700–$1,300. Fast and idiot-proofed, but the fixed footprint must fit your recess exactly.
- Traditional mud bed over a bonded membrane: infinitely customizable and cheapest in materials ($150–$300), but demands real screeding skill and adds the most height.
- Barrier-free solid-surface pans (Swanstone, Comfort Designs): cast pans with a 1/2″–3/4″ beveled entry that work with minimal or no recess for aging-in-place retrofits, $500–$1,000.
Drains: Linear Changes the Game
A center point drain forces four-way slope, which means the entry edge itself must tilt. A linear drain — a 24″–60″ trough placed at the back wall or across the entrance — lets the whole floor slope in a single plane toward it. Single-plane slope is why linear drains dominate curbless design: large-format 24″ tiles lay flat without diagonal cuts, the slope can start gently at the flush entry, and the look is clean. Quality linear drains (Schluter Kerdi-Line, Infinity Drain, LUXE) run $250–$700 depending on length and finish. Sizing note: a linear drain should span at least the width of the water path; in a 60″-wide shower, spec a 48″ or full-width channel. Point drains still make sense in small 36″x36″ curbless stalls where four-way slope over a short run is trivial.
Dimensions, Slope, and Code Numbers
- Minimum practical size: 36″x60″ keeps most spray inside without doors; 48″x72″ is comfortable. Under 36″ deep, plan on a glass panel.
- ADA roll-in reference: 30″x60″ minimum clear floor, entry threshold 1/2″ maximum (beveled), and a 36″-wide approach. Residential projects aren’t bound by ADA, but the numbers are excellent design guidance.
- Slope: 1/4″ per foot in the wet zone; the code floor is 1/8″ per foot minimum and 1/2″ maximum for accessible surfaces. Extend a subtle 1/8″–1/4″ per foot counter-slope or flat “dry zone” 24–36″ beyond the spray line.
- Water containment: waterproofing must extend past the shower footprint — I run membrane a minimum of 24″ beyond the wet area in every direction, and honestly prefer waterproofing the entire bathroom floor and 6″ up every wall. Cheap insurance on a floor with no curb.
Keeping Water In Without a Curb
Physics, not hope: aim fixed heads across the space rather than at the opening; favor rain heads and wall bars over high-pressure body sprays near the entry; add a 3/8″ glass panel on the open side ($400–$900 installed); and consider a collapsible silicone water dam ($25) or a trench drain at the entrance for belt-and-suspenders installs. Heated floor mats in the dry zone ($300–$600) speed evaporation and are the difference between a damp bathroom and a dry one in daily use. A curtain is the weakest option here — if the design relies on fabric, rethink the head placement first.
Realistic Budget
- Foam tray or curbless pan system: $400–$1,300
- Linear drain: $250–$700
- Structural recess work: $500–$1,500 (wood) / $800–$2,000 (slab)
- Waterproofing membrane and accessories: $200–$500
- Tile and setting materials: $600–$2,500
- Labor, full curbless conversion: $2,500–$6,000
All-in, expect $4,500–$12,000 for a professionally built curbless shower versus roughly $2,000–$5,000 for a comparable curbed remodel. The delta is almost entirely structure and waterproofing labor — which is exactly where you should not economize.
Build Sequence Overview
- Verify structure: joist direction, size, and span determine recess feasibility. Sister joists as needed; never notch beams for a drain line without engineering.
- Relocate the drain rough-in for the linear channel — typically a 2″ trap moved to the wall side.
- Frame and sheath the recess, dry-fit the tray, and confirm the finished tile plane meets the bathroom floor flush.
- Install tray and drain per system instructions — thin-set beds under foam trays, full mortar contact, no voids.
- Waterproof monolithically: banded seams, corners, drain flange integration, membrane out past the dry zone. Flood test 24 hours with the drain plugged before a single tile goes down.
- Tile with small-format or textured tile in the wet zone (DCOF 0.42+ for slip resistance), grout, silicone the plane changes.
Failure Modes and How Each One Is Prevented
Curbless showers fail in predictable ways, and every one traces to a skipped step rather than the concept itself. Water migrating into the adjacent room means the membrane stopped at the shower’s edge instead of running 24″+ into the dry zone — prevention is membrane coverage and that gentle counter-slope at the entry. Cracked tile at the recess perimeter means the lowered subfloor flexed where old framing met new — prevention is sistered joists, glued-and-screwed sheathing, and deflection under L/360 before any tray goes down. A drain that gurgles and drains slowly usually means the trap was relocated with too little fall or a flat vent run — prevention is doing the drain rough-in to code, not to “close enough.” And efflorescence or a musty smell at the entry line on slab installs means moisture is wicking under the tile from a recess that was chipped but never sealed — prevention is a liquid membrane coat across the raw concrete before the tray sets.
One inspection habit worth stealing from commercial work: photograph the waterproofing stage from every angle before tile covers it, and keep the 24-hour flood-test photo with the water line visible. If a leak claim ever surfaces — or you sell the house to a nervous buyer — that documentation is worth more than any warranty paper, and it takes ninety seconds to create.
The Verdict
A zero entry shower pan is a structural project wearing a plumbing costume. Get the recess and the waterproofing right and the result is the safest, best-looking shower configuration there is — one that serves a household from toddlers to wheelchairs without ever announcing itself as “accessible.” Shortcut the flood test or stop the membrane at the shower’s edge, and you’ll meet the failure mode that gives curbless a bad name. Build it once, build it sealed, and enjoy the flattest floor in the house.