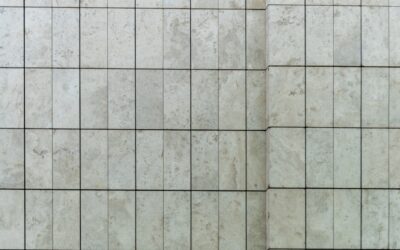
18×18 tile hits a sweet spot in flooring: large enough to give a clean, open, modern look with fewer grout lines, yet manageable enough to install without the specialized handling that truly oversized tiles demand. For many living rooms, kitchens, and bathrooms, this 18-by-18-inch format strikes the ideal balance of style, practicality, and value.
Part of our Tile & Grout guide — explore the full guide →
Bigger tiles have become the default for contemporary floors, and 18×18 remains one of the most popular sizes on the market. This guide covers where it works best, how to choose materials, layout options, and what to budget so you get a floor that looks expansive and stays beautiful.
Why Choose 18×18 Tile
The main appeal is the look. Fewer grout lines mean a cleaner, more seamless floor that makes a room feel larger and more open than the same space in small tiles. Less grout also means less grout to clean and seal, a genuine maintenance win over the life of the floor.
Compared with very large formats like 24×24 or larger slabs, the 18×18 size is easier to handle, cut, and set, which keeps installation more approachable and a little less costly. It is large enough to feel modern but forgiving enough for trickier rooms with cuts and obstacles.
Best Rooms and Uses
This size flatters medium to large spaces especially well. A few ideal applications include the following.
- Living rooms and great rooms: The open, low-grout look enhances spacious areas.
- Kitchens: Durable, easy to clean, and visually expansive.
- Entryways and hallways: A welcoming, polished first impression that handles traffic.
- Bathrooms: Great on floors; works on larger walls, though smaller tiles often suit shower floors better for slope and grip.
- Open-concept main floors: A continuous run of 18×18 unifies connected spaces.
In very small rooms, large tiles can mean lots of cut pieces, so weigh the look against the waste in tight spaces.
Material Choices
The 18×18 size comes in several materials, each with tradeoffs. Porcelain is the top recommendation for floors: dense, durable, water-resistant, and available in countless looks including wood, stone, and concrete reproductions. Ceramic costs a bit less and works well in lower-traffic areas.
Natural stone such as travertine, marble, or slate in an 18×18 cut delivers organic luxury but needs sealing and more care. Whatever the material, for floor use check the slip rating and durability (the PEI rating on ceramics and porcelains) to be sure the tile suits foot traffic.
Layout Patterns
Layout shapes the finished feel as much as the tile itself. A straight grid is clean, modern, and the simplest to install. A diagonal layout, setting the tiles at 45 degrees, adds movement and can make a room feel wider, though it creates more cut waste.
An offset or brick-style layout staggers the joints for a more dynamic look, but be cautious: with large rectified tiles, industry guidance generally recommends keeping any offset to no more than about one-third of the tile length to avoid lippage, because slight bows in large tiles make a 50% offset uneven. Talk to your installer about the right pattern for your specific tile.
Coverage and How Much to Buy
Each 18×18 tile covers 2.25 square feet (18 inches is 1.5 feet, and 1.5 times 1.5 equals 2.25). To estimate quantity, divide your room’s square footage by 2.25, then add waste. For example, a 225 sq ft room needs about 100 tiles before waste.
Always order extra to cover cuts, breakage, and future repairs. For a straight layout, add about 10%; for a diagonal or offset layout, add 15% to 20% because of the increased cutting. Buying all your tile from the same production batch (lot number) keeps color and shading consistent across the floor.
Installation Tips
Large-format tiles are unforgiving of an uneven subfloor, so flatness is critical. The substrate should be flat within roughly 1/8 inch over 10 feet for tiles this size; correct dips and humps before you start, since a wavy subfloor causes lippage where tile edges sit at different heights.
Use the right notched trowel and a proper amount of mortar to achieve full coverage under each tile, often back-buttering the tile as well, to avoid voids and cracks. Use tile leveling spacers to keep edges flush. The job is doable for an experienced DIYer with the right tools and a wet saw, but professional installation is a smart choice for large or visible floors.
Cost Expectations
Treat these as estimates that vary by material and region. Ceramic 18×18 tile often runs $1 to $5 per sq ft, porcelain $3 to $10 per sq ft, and natural stone $5 to $20 per sq ft for material. Professional installation typically adds $5 to $12 per sq ft depending on layout complexity and subfloor prep.
Diagonal patterns, extensive cuts, and subfloor leveling raise labor costs. Even so, 18×18 tile remains a strong value: it delivers the upscale, open look of large-format flooring while staying easier to install and more affordable than the biggest slabs, making it a smart choice for homeowners who want lasting style.
18×18 vs Other Tile Sizes
It helps to see where 18×18 sits among the options. Compared with 12×12, the larger format means noticeably fewer grout lines and a more open, modern feel, with less grout to clean over time. Against 24×24 and bigger slabs, 18×18 is easier to handle, cut, and set, and it tolerates a slightly less-than-perfect subfloor with marginally less risk of lippage.
The tradeoff is that the very largest tiles deliver an even more seamless, high-end look in big rooms, while smaller tiles handle tight spaces and curved or sloped areas, like shower floors, better. For most medium to large rooms where you want a contemporary, low-maintenance floor without the handling demands of oversized slabs, 18×18 is the practical middle ground that satisfies on both style and ease.
Choosing Color and Finish
With fewer grout lines drawing the eye, the tile’s own color and finish carry more of the room. Light tiles open up and brighten a space, hide less dust than dark tiles, and suit smaller or dim rooms. Dark tiles feel dramatic and ground a large, bright room but show dust and footprints more readily.
Finish matters for both look and safety. Polished tiles look luxurious but can be slick when wet, so choose a matte or textured finish for kitchens, bathrooms, and entries where water is a factor. Wood-look and stone-look porcelain in 18×18 give you the warmth of those materials with tile’s durability. As always, view large samples in your own lighting before committing, since a big tile reads differently than a small swatch.
Prefer to explore on your own?
See how new flooring looks in your actual room in seconds — free, no signup.
Try the free Floor Studio →