
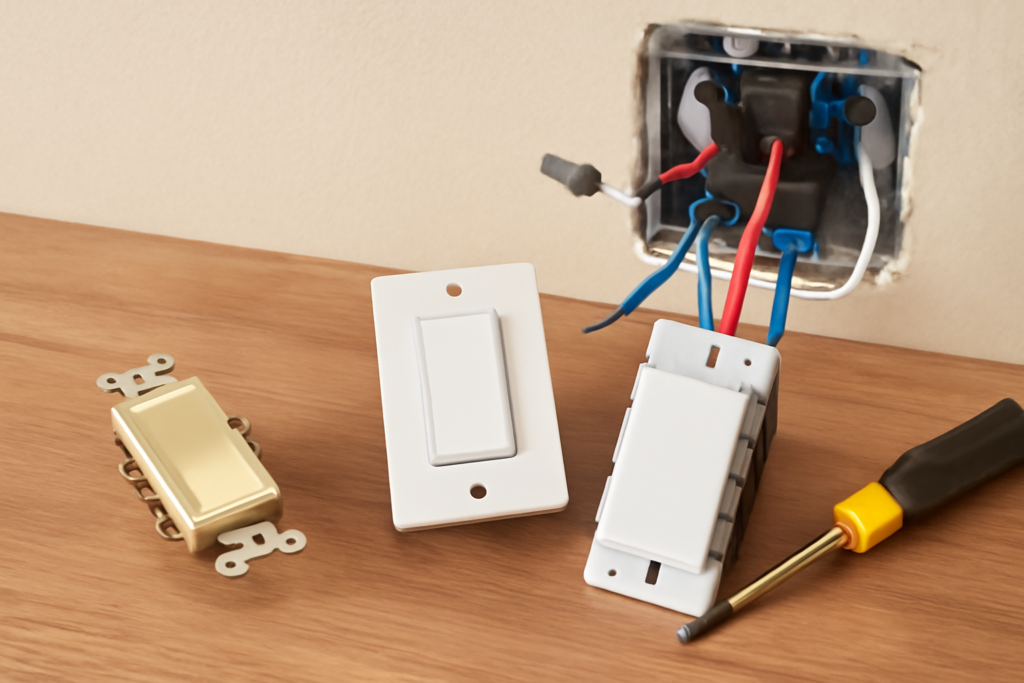
A hallway or staircase light controlled from two locations is the circuit most people get wrong when they go smart. Swap one end for a smart switch the usual way and the other switch either stops working or leaves the light stuck in the wrong state. A 3 way smart switch setup avoids that by pairing one smart main switch with a matching companion switch or a battery-powered wireless remote, so both locations control the light and the app always knows whether it is on.
There are two common approaches. The first keeps both boxes wired: a smart main switch at one location and a companion (sometimes called an add-on or auxiliary switch) at the other, connected through the existing traveler wire. The second wires only the smart main switch and replaces the second switch with a wireless remote mounted in the old box or on a wall plate. Both work well. Which one fits depends on your wiring and how much time you want to spend in each box.
- How a 3 Way Smart Switch Setup Works
- Tools and Materials
- Identify Travelers, Common and Neutral Safely
- Option 1: Smart Main Switch Plus Wired Companion
- Option 2: Smart Main Switch Plus Wireless Remote
- Common Mistakes With Smart Three-Way Circuits
- Troubleshooting
- Cost Ranges
- When to Call a Licensed Professional
- Frequently Asked Questions
Here is how to identify the line, load, travelers and neutral, walk through each install option step by step, and flag the mistakes that cause flickering, dead switches and tripped breakers.
How a 3 Way Smart Switch Setup Works
A standard three-way circuit uses two switches, each with three terminals: one common (usually a dark screw) and two travelers (usually brass). Power enters one box on the line wire and leaves the other box on the load wire to the light. The two travelers run between the switches, and flipping either one changes which traveler carries current.
Smart kits change the logic. The smart main switch does all the switching electronically and needs constant power, which is why most models require a neutral. The companion switch at the other end does not switch power itself. It simply sends a signal to the main switch, usually over one of the old traveler wires. With a wireless remote, even that wire is not needed; the remote talks to the main switch by radio.
Because the main switch handles the load, you can place it at whichever box has line or load plus a neutral. Many kits allow either location as long as the wiring is adjusted to match the instructions.
Tools and Materials
- Smart 3-way switch kit (main switch plus companion, or main switch plus wireless remote)
- Non-contact voltage tester
- Insulated screwdrivers (flat and Phillips)
- Wire strippers and needle-nose pliers
- Wire connectors sized for your conductors
- Painter’s tape and a marker for labeling wires
- Phone camera to photograph the existing wiring
- Deeper box or box extender if the smart switch body will not fit
- Flashlight or headlamp
Identify Travelers, Common and Neutral Safely
Turn off the breaker that feeds the light, then confirm power is off with a non-contact voltage tester at both switch boxes and at the fixture if you can reach it. Three-way circuits sometimes share boxes with other circuits, so test every wire in each box. Never try to identify wires by testing them while they are powered.
Remove both old switches and photograph them before disconnecting anything. On each switch, the wire on the dark or labeled “COM” screw is the common. The two wires on the matching brass screws are the travelers. Wrap the common in each box with a piece of tape and write “COM” on it. Travelers are usually a black and red pair or a black and white pair in the same cable.
To learn which common is line and which is load, most people rely on the kit’s instructions or a simple approach: in the box where a cable comes from the panel (often the one with extra cables and a bundle of whites), the common is typically line. If you cannot tell with certainty with the power off, stop and have a licensed electrician trace it. Guessing and flipping the breaker to see what happens is how switches get damaged.
Neutrals are the white wires spliced together at the back of the box and not connected to the old switch. Grounds are bare copper or green. If a box has no neutral bundle, check whether your kit offers a no-neutral main switch, or place the main switch in the box that does have one.
Option 1: Smart Main Switch Plus Wired Companion
- Kill power and verify. Breaker off, non-contact voltage tester on every wire in both boxes.
- Choose the main location. Pick the box with a neutral and a strong Wi-Fi or wireless signal.
- Wire the main switch. Connect line, load, neutral and ground as the instructions show. One of the old travelers becomes the “traveler” or “signal” wire to the companion. Cap the unused traveler with a wire connector at both ends and label it.
- Wire the companion. At the other box, connect the companion to the signal traveler, neutral (if required) and ground. If the old common at this box was line or load, you will splice it through to the matching wire instead of landing it on the companion; follow your kit’s diagram exactly.
- Fold and mount. Smart switches are bulky. Fold wires neatly, keep connectors tight and mount each switch without forcing it.
- Restore power and set up. Turn on the breaker, then add the main switch in its app and confirm the companion controls the light.
Option 2: Smart Main Switch Plus Wireless Remote
This is often the easier route in older homes, crowded boxes or setups where the travelers are hard to sort out. You replace the three-way wiring with a simpler single-location wiring at the main box and let a battery remote handle the second location.
- Kill power and verify at both boxes.
- At the second box, join the wires so the circuit passes straight through: typically the common is spliced to one traveler, and the unused traveler is capped at both ends. Your kit’s diagram shows the exact splice.
- At the main box, connect line, load, neutral and ground to the smart switch and cap the spare traveler.
- Mount the remote on a blank plate or a wall bracket over the second box, or in a standard plate if the kit includes an adapter. Never leave splices exposed; the box must have a cover.
- Pair the remote to the main switch following the app steps.
A wireless remote also lets you add a third or fourth control point with no wiring at all, which is handy for long hallways or bedrooms with two doors.
Common Mistakes With Smart Three-Way Circuits
- Mixing up line and load. The smart switch may not power on, or it may hum and flicker. Recheck with the breaker off.
- Using a standard switch at the second location. A dumb three-way switch left in the circuit usually breaks the smart logic. Use the matching companion or remote from the same product line.
- Mismatched products. Companions and mains from different product lines generally do not work together.
- Loose backstabs and splices. Use the screw terminals or the connectors specified. Tug-test every splice.
- Wrong load type. Match dimmers to LED, incandescent or fan loads. Smart dimmers on a ceiling fan motor can damage both.
- Overcrowded boxes. Smart switches in a multi-gang box, especially a 3 gang smart switch layout, generate heat and take space. Leave room and consider a deeper box.
Troubleshooting
The Companion Does Nothing
The signal wire may be landed on the wrong terminal or the wrong traveler. With power off, confirm the same traveler is connected at both ends.
The Light Flickers or Glows When Off
Common with LED bulbs on switches without a neutral. Use a neutral-wired main switch, adjust the minimum dim level in the app, or add the bypass accessory the maker recommends.
The Switch Drops Off Wi-Fi
Metal boxes and distance from the router weaken signal. Move the main switch to the other location if wiring allows, or improve coverage with a mesh node. A wifi 3 way switch needs reliable 2.4 GHz coverage at the box.
Breaker Trips When Power Is Restored
Turn it back off immediately. A bare ground or neutral may be touching a hot terminal, or two circuits may be tied together. Recheck every connection or call an electrician.
Cost Ranges
Smart 3-way kits with a companion or wireless remote generally cost more than a single smart switch, landing anywhere from moderate to premium depending on dimming, voice support and hub requirements. Some systems need a separate hub, which adds a one-time cost. Hiring an electrician usually means a service call fee plus per-switch labor, and more if a neutral must be pulled or a box replaced.
When to Call a Licensed Professional
Call a licensed electrician if either box lacks a neutral and your kit requires one, if you find aluminum wiring, cloth-insulated wire or scorched insulation, if more than one circuit shares a box, or if you cannot confidently identify line and load with the power off. Any new circuit, new switch location or panel work belongs to a licensed electrician, and some jurisdictions require a permit even for switch replacements. When in doubt, a short service visit costs far less than repairing a damaged switch or a wall.
Frequently Asked Questions
Do I need two smart switches for a 3 way circuit?
No. You need one smart main switch plus either a matching companion switch or a wireless remote. The companion does not switch power; it signals the main switch.
Can I use a 3 way smart switch without a neutral?
Some models are made for no-neutral boxes, but most require one. If only one box has a neutral, place the main switch there.
Can I keep my old switch at the other end?
Usually not. A standard three-way switch interferes with the smart switch logic. Use the companion or remote designed for your main switch.
Is a wireless remote as reliable as a wired companion?
For most homes, yes. Remotes use batteries that last a long time, and they avoid traveler wiring problems entirely.
Can a smart 3 way switch dim the light?
Yes, if you buy a dimmer version and the bulbs are dimmable. Adjust the low-end trim in the app to stop flicker.
How do I know which wire is line?
With the breaker off, look for the box where the supply cable enters and follow the kit’s diagram. If you are unsure, have a licensed electrician confirm it.


