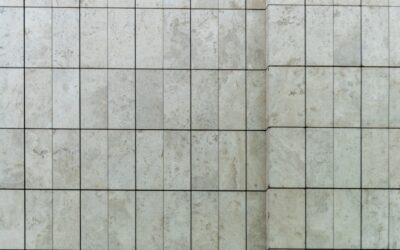
Few sizes have swung in and out of style as many times as the humble four-inch square, and right now 4×4 bathroom tile is firmly back in favor. I still remember stripping it out of 1970s bathrooms by the truckload a decade ago, yet last year I installed more 4×4 bathroom tile than any other wall format. The grid it creates reads as classic, slightly retro, and endlessly adaptable, which is exactly why designers keep specifying it for showers, backsplashes, and wainscot.
Part of our Bathroom Remodeling & Flooring guide — explore the full guide →
This guide walks through where the size shines, what it costs, how the grout lines change the whole look, and the install details that separate an amateur job from one that looks like it belongs in a magazine. I’ll keep the advice practical, the kind of thing I’d tell a homeowner standing in the tile aisle trying to decide.
Why the 4×4 Format Keeps Coming Back
A 4-by-4-inch tile hits a sweet spot. It’s small enough to wrap gentle curves and shower niches without a pile of cuts, but large enough that you aren’t fighting a thousand pieces like you would with mosaic sheets. On a standard 3-foot by 5-foot shower wall, you’re looking at roughly 135 tiles per wall, a manageable count for a weekend warrior.
The square grid also feels intentional. Stack the tiles in a straight grid and you get a crisp, architectural look popular in modern farmhouse and mid-century designs. Run them in an offset or brick pattern and the vibe softens toward traditional. That flexibility from a single box of tile is hard to beat, and it’s why the format survives every trend cycle.
Common Materials and Finishes
You’ll find the 4×4 size across nearly every tile material, but three dominate bathroom work:
- Glazed ceramic — the budget-friendly workhorse, usually $1.50 to $4 per square foot. Great for walls, easy to cut, wide color range.
- Porcelain — denser and more water-resistant, running $3 to $8 per square foot. The only real choice if you’re putting 4x4s on a shower floor or a bathroom floor that sees traffic.
- Natural stone — marble, travertine, and slate 4x4s land between $7 and $15 per square foot and need sealing, but nothing else delivers that veined, high-end look.
Finish matters as much as material. Glossy tiles bounce light and make small powder rooms feel bigger, though they show water spots. Matte and honed finishes hide spotting and add grip, which is why I steer clients toward matte porcelain any time the tile touches the floor. For shower walls, a satin or gloss glaze cleans up faster and resists soap scum better than a rough matte.
Layout Patterns That Change Everything
The same box of 4×4 bathroom tile can look completely different depending on how you set it. Here are the layouts I use most:
Straight Grid (Stacked)
Tiles align in perfect columns and rows. It’s the most modern option and it’s unforgiving, because any wall that’s out of plumb will telegraph through the grid lines. Only use it when your walls are dead straight or you’re prepared to shim and float.
Brick / Running Bond
Each row shifts by half a tile, hiding minor wall imperfections and lending a relaxed, timeless feel. This is my default for shower surrounds because it’s forgiving and the eye reads it as classic subway styling scaled down to a square.
Diagonal (Diamond)
Turn the grid 45 degrees and a small bathroom instantly feels wider. It burns more tile to waste (budget 15 percent overage instead of 10) and requires more cuts, but the payoff on a feature wall is worth it.
Grout: The Detail Everyone Underestimates
With a 4×4 tile you have a lot of grout lines, and that grout does real design work. A tight 1/16-inch line reads sleek and contemporary; a wider 1/8- to 3/16-inch line gives that vintage, hand-set character. Rectified tiles allow the tightest joints, while standard pressed tiles need at least 1/8 inch to absorb size variation.
Color is the bigger decision. Match the grout to the tile and the surface reads as one seamless plane, which flatters busy patterns. Contrast the grout, say white tile with charcoal grout, and you highlight the grid itself for that on-trend graphic look. I always recommend a quality stain-resistant grout or an epoxy grout in showers; the extra $30 to $50 per bag saves years of scrubbing mildew out of light-colored joints. Seal cement-based grout after it cures, and reseal annually in wet zones.
What a 4×4 Bathroom Tile Project Actually Costs
Materials are only part of the picture. Here’s a realistic breakdown for a standard tub-shower surround of about 90 square feet:
- Tile: $135 to $720 depending on material
- Thinset mortar, grout, and sealer: $80 to $150
- Backer board and waterproofing membrane: $120 to $250
- Professional labor: $8 to $15 per square foot, or $720 to $1,350
All in, a pro-installed surround typically runs $1,100 to $2,400. DIY drops that by the labor portion, but budget for tools: a wet saw rental at $50 to $70 per day, a notched trowel, tile spacers, and a grout float. Add 10 percent extra tile for cuts and future repairs, and keep a small stash of spares in the attic, because dye lots change and matching a discontinued tile years later is nearly impossible.
Where 4×4 Works Best in the Bathroom
This size is versatile, but it’s not universal. My honest take on placement:
- Shower and tub walls — ideal. The scale suits vertical surfaces and the many grout lines add slip texture where you least expect to fall.
- Backsplashes and vanity walls — excellent, especially in a contrasting grout for a focal point behind the mirror.
- Wainscot up to chair-rail height — a classic use that protects walls and adds architectural interest.
- Shower floors — good, but switch to a slip-rated matte porcelain 4×4 or drop to 2×2 mosaics for better drainage slope.
- Main bathroom floors — acceptable with porcelain, though larger formats mean fewer grout lines to clean.
Installation Tips From the Field
Prep is 80 percent of a good tile job. Start with a flat, waterproof substrate; cement backer board with a liquid or sheet membrane in showers, never green board alone. Snap level lines and dry-lay a row before you spread any mortar so you can plan where cut tiles land, keeping full tiles at eye level and cuts tucked into corners and edges.
Use a 1/4-by-1/4-inch square-notch trowel for these tiles, back-butter any tile going onto a curved or transitional surface, and check that you’re getting at least 85 percent mortar coverage by pulling one tile off periodically. Set spacers consistently, wipe excess mortar out of the joints before it sets, and don’t grout for at least 24 hours. When you do grout, work diagonally across the tile faces so you don’t dig product out of the joints, then haze off the film with a damp sponge and a clean water bucket.
Final Thoughts
A well-chosen 4×4 bathroom tile delivers a look that feels both current and timeless, and it does so at a price most renovations can absorb. Nail down your material for the location, pick a layout and grout combination that matches the mood you want, and don’t cut corners on waterproofing behind the pretty surface. Do that, and your 4×4 bathroom tile will still look sharp long after the next trend has come and gone. When in doubt, order a few loose tiles, tape them to the wall, and live with them for a couple of days before committing, because the light in your own bathroom tells you more than any showroom ever will.
Prefer to explore on your own?
See how new flooring looks in your actual room in seconds — free, no signup.
Try the free Floor Studio →