
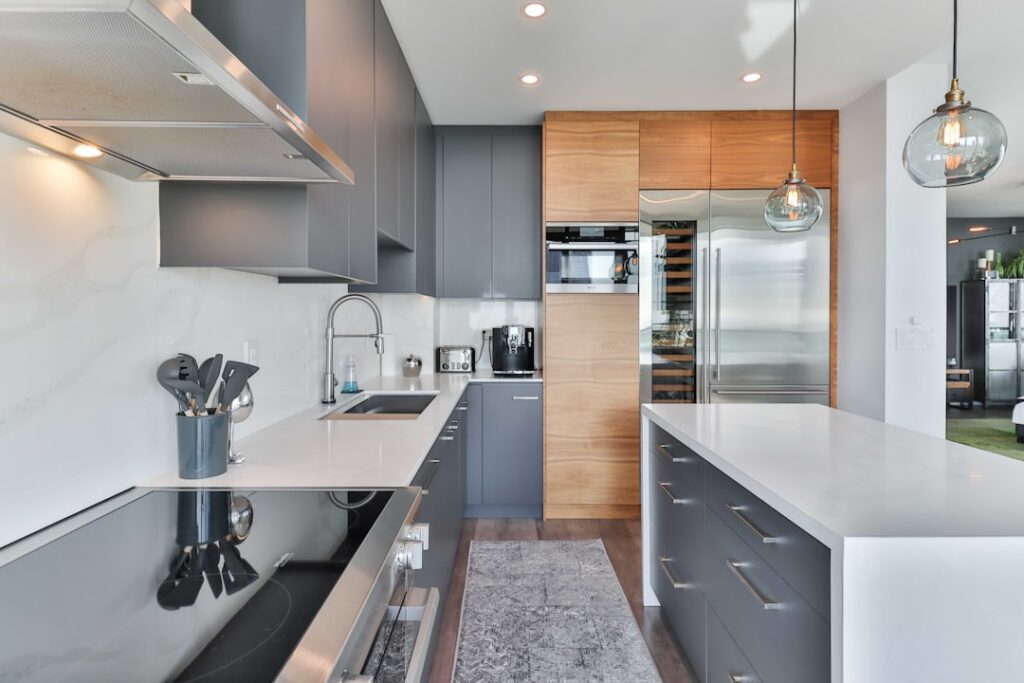
Five feet sounds like plenty of counter until you try to pull three stools up to it. A 60 inch kitchen island comfortably seats two adults along one long side, and it can squeeze in a third if everyone is friendly and nobody minds bumping elbows. It also fits a surprising amount of storage underneath, usually two to three base cabinets, which makes it one of the most popular sizes for mid-sized kitchens.
Part of our Kitchen Remodeling guide — explore the full guide →
The catch is the floor space around it. A 5 foot kitchen island needs clear aisles on every working side, a spot for the seating to push back and, in most jurisdictions, an outlet that has to be wired by a licensed electrician. Get those three pieces right and the island becomes the most used surface in the house. Get them wrong and it turns into an obstacle you walk around twenty times a day.
- How Many Seats Fit at a 60 Inch Kitchen Island?
- Common Depths and Cabinet Combinations
- Aisle Clearances and Minimum Room Size
- Outlets, Wiring and Electrical Safety
- Anchoring the Island to the Floor
- Countertop Materials and Weight
- Cost Ranges
- Troubleshooting Common Problems
- When to Call a Licensed Professional
- Frequently Asked Questions
Here is how to decide whether five feet is the right length, how many people it really seats, which cabinet combinations fill it, and what the room needs to look like before you order one.
How Many Seats Fit at a 60 Inch Kitchen Island?
Plan on about 24 inches of counter length per seated person. That width lets someone rest both forearms on the top and lift a fork without hitting a neighbor. Divide 60 inches by 24 and you get two and a half, which is why two seats feel generous and three feel snug.
- Two seats: 30 inches each. Roomy, with space for a serving platter between plates.
- Three seats: 20 inches each. Works for kids, quick breakfasts and stools without arms. Adults on armless backless stools manage fine for short meals.
- Four seats: Only if you wrap seating around one short end, which requires an overhang on that end and a deeper island, usually 42 inches or more.
Overhang depth matters as much as length. At standard counter height (36 inches), leave at least 12 inches of overhang so knees fit under the top; 15 inches is more comfortable. At bar height (42 inches), a 12 inch overhang is typically enough because people sit higher and more upright. Stool seat height should run about 10 to 12 inches lower than the counter surface, so 24 to 26 inch stools for counter height and 28 to 30 inch stools for bar height.
If you are comparing a 6ft kitchen island against a 5 footer, the extra 12 inches is exactly one more comfortable seat. That is the main functional difference. Storage and prep space grow a little, but seating is the reason most people stretch to 72 inches.
Common Depths and Cabinet Combinations
Island depth is usually 24 to 42 inches. A 24 inch deep island is basically a single row of base cabinets with no seating overhang. Most people end up with 36 to 42 inches total: 24 inches of cabinet plus 12 to 18 inches of overhang for stools.
Stock base cabinets come in 3 inch increments, so a 60 inch run is easy to fill. Popular combinations include:
- Two 30 inch bases: The simplest option. One drawer bank and one door cabinet is a practical pairing.
- 24 plus 36: A 36 inch base can hold a sink or a large pot drawer, with a 24 inch drawer stack beside it.
- 18 plus 24 plus 18: Symmetrical, with a center drawer bank and two narrower door cabinets on the ends.
- 15 plus 30 plus 15: Narrow end cabinets work well for trays, cutting boards or spice pullouts.
Remember that end panels and finished backs add thickness. Two 30 inch cabinets plus a pair of 3/4 inch end panels gives you 61.5 inches of cabinet footprint, so the countertop typically lands around 62 to 64 inches with a small overhang on each end. If the island must be exactly 60 inches overall, shave the cabinet run to 57 inches or so.
Adding a sink or cooktop changes the math. A sink base needs plumbing and venting routed through the floor, and a cooktop needs ventilation plus a dedicated circuit. Both eat into the usable counter surface, so on a five foot island many designers keep the top clear for prep and dining and leave the sink on the perimeter.
Aisle Clearances and Minimum Room Size
This is where most island plans fail. Widely used kitchen design guidelines call for:
- 42 inches of clear aisle on working sides for a one-cook kitchen.
- 48 inches on working sides if two people cook at once or the aisle faces a range or dishwasher.
- 36 inches on sides that are just walkways with no appliances.
- 44 inches behind seated diners if people need to walk behind them, or about 36 inches if nobody passes.
Measure clearance from the edge of the countertop, not from the cabinet box, and remember that an open dishwasher door sticks out roughly 24 inches. A 42 inch aisle in front of a dishwasher leaves just enough room to stand beside the open door and unload it.
To find the minimum room size, add it up. A 36 inch deep island with 42 inches on each side, sitting between two 25 inch deep perimeter counters, needs about 170 inches, or a little over 14 feet, wall to wall in that direction. Along the length, a 60 inch top plus 36 inches of walkway on each end needs about 11 feet. If your kitchen is smaller than roughly 13 by 11 feet, look at a narrower island, a rolling cart or a peninsula instead.
Before buying anything, tape the island footprint on the floor with painter’s tape and live with it for two or three days. Open the oven, the fridge and the dishwasher against the tape lines. It is the cheapest design tool you will ever use.
Outlets, Wiring and Electrical Safety
Most local codes require at least one receptacle serving an island countertop, and kitchen countertop receptacles must be GFCI protected. Rules have shifted in recent national code editions, including allowances for future receptacle provisions and where outlets may be mounted, so confirm current requirements with your local building department before finalizing the layout.
Running power to a freestanding island almost always means a new circuit or an extension of an existing one through the floor, and that is work for a licensed electrician. A permit is usually required. Plan the outlet location before cabinets are set: common spots are the end panel, the side of a cabinet facing the work aisle, or a pop-up unit rated for countertop use. Avoid mounting a receptacle on the seating side where knees and stool legs will hit it.
If you are only swapping an existing island outlet cover or checking a device, turn off the breaker and confirm power is off with a non-contact voltage tester before touching anything. Never probe live terminals. Anything beyond replacing a like-for-like device, such as adding a receptacle or relocating one, belongs to the electrician.
Plug countertop appliances directly into the receptacle rather than running an extension cord across the top, and keep cords away from the sink area.
Anchoring the Island to the Floor
An island with a seating overhang is a lever. When someone leans on the overhang or a child climbs onto it, an unanchored cabinet can tip or slide. Securing the base to the floor is not optional.
- Mark the footprint. Set the cabinets in place, level them, and trace the inside edge of the toe kick or cabinet base onto the floor.
- Install cleats. Cut 2×4 blocks to fit just inside the traced lines and screw them into the subfloor, hitting joists where possible. On concrete, use masonry anchors.
- Set the cabinets over the cleats. Screw through the cabinet sides or toe kick into the cleats with cabinet screws.
- Join the boxes. Clamp adjacent cabinets together and screw them through the face frames or side panels so they act as one unit.
- Support the overhang. Stone tops typically need brackets or corbels once the overhang passes about 10 to 12 inches. Hidden steel supports keep knee space clear.
If you plan to install new flooring, decide whether it runs under the island or stops at it. Floating floors generally should not be pinned under heavy cabinets, so the usual approach is to build the island on the subfloor and run the flooring up to it. Solid hardwood and tile can go under, which makes future layout changes easier.
Countertop Materials and Weight
A 64 by 40 inch top is about 17.8 square feet of material. Quartz and granite in 3 centimeter thickness weigh roughly 18 to 20 pounds per square foot, so the slab alone can top 350 pounds. That weight is another reason for well-joined, anchored base cabinets and a floor that does not flex.
Butcher block is lighter and warmer to the touch, and it suits a prep-focused island, though it needs oiling. Laminate is the budget choice and weighs the least. Whatever you pick, a single slab with no seam looks best on a five foot island, and most suppliers can cut one from a standard slab.
Cost Ranges
Prices vary widely by region and finish, but general ranges look like this:
- Ready-to-assemble or freestanding kitchen island: a few hundred dollars to around $2,000.
- Stock cabinets plus a stone top, installed: roughly $2,500 to $6,000.
- Custom or semi-custom island: $5,000 to $12,000 or more, especially with a sink or cooktop.
- Electrician to add an island receptacle: commonly a few hundred dollars, more if the floor is concrete or the panel is full.
If you want an island without the wiring and anchoring project, a well-built freestanding kitchen island on locking casters is a reasonable middle ground for renters or smaller kitchens.
Troubleshooting Common Problems
Stools crowd the walkway. Increase the overhang to 15 inches so stools tuck further under, or switch to backless stools that slide fully under the top.
Island wobbles after install. The cleats are probably loose or missing, or the cabinets were not shimmed level before fastening. Shim, re-level and re-screw into the cleats.
Top cracks near the overhang. Stone was cantilevered too far without support. Add steel brackets or corbels, and have the fabricator assess the crack.
Outlet trips often. A GFCI that trips frequently can signal a failing appliance, moisture or an overloaded circuit. Unplug everything and test with one appliance at a time. If it continues, call the electrician.
When to Call a Licensed Professional
Hire a licensed electrician for any new island receptacle, circuit or relocation, and pull a permit where required. Bring in a licensed plumber if the island will hold a sink or dishwasher. If you are removing a wall or cutting floor joists to route utilities, a contractor or structural engineer should review the plan. A cabinet installer is worth the fee when leveling over an uneven floor or supporting a long stone overhang.
Frequently Asked Questions
How many stools fit at a 60 inch island?
Two stools fit comfortably at about 30 inches each. Three will fit at roughly 20 inches each if you use armless stools and accept a snug fit.
What size kitchen do I need for a 5 foot island?
Plan on roughly 13 to 14 feet in the depth direction and about 11 feet along the island’s length, assuming 42 inch working aisles and 36 inch walkways.
Does a kitchen island need an outlet?
Most local codes require at least one GFCI protected receptacle serving the island countertop. Requirements differ by code edition, so check with your building department.
How do you keep a kitchen island from moving?
Screw 2×4 cleats to the subfloor inside the cabinet footprint, then fasten the cabinets to the cleats and to each other.
Is 60 inches too small for a kitchen island?
Not for most mid-sized kitchens. It gives two seats and solid storage. If you want three comfortable seats, look at 72 inches instead.


