I go through more acrylic caulk than every other sealant in my van combined, and I also see it misused more than every other sealant combined. Acrylic latex caulk, the white tube most people call painter’s caulk, is a water-based sealant designed to fill gaps in trim and drywall so paint looks seamless. At that job it is cheap, fast, forgiving, and genuinely excellent. The trouble starts when it gets pushed into jobs it was never engineered for: shower surrounds, exterior joints in full sun, anything that moves or stays wet. This guide covers what acrylic caulk actually is, exactly where it belongs, where it fails, and how to apply it so your paint job looks like a pro did it.
Part of our Paint & Walls guide — explore the full guide →
What Acrylic Caulk Is
Acrylic latex caulk is a suspension of acrylic polymer in water with fillers (typically calcium carbonate). It cures by evaporation: the water leaves, the polymer particles fuse, and you get a flexible-ish, paintable solid. That chemistry explains everything about its behavior. Because it’s water-based, it cleans up with a damp rag, has almost no odor, and takes paint beautifully. Because it dries by losing water, it shrinks as it cures, typically 15 to 30 percent by volume, and it can wash out if rain hits it before it skins. Movement capability is modest: roughly ±7.5 percent of joint width for basic grades, up to ±12.5 or so for premium “elastomeric” acrylics. Price runs $2 to $6 for basic tubes and $5 to $9 for premium lines like Big Stretch or top-shelf Alex formulations.
The Siliconized Question
Most tubes on the shelf now say “siliconized acrylic” or “acrylic with silicone.” A small dose of silane or silicone additive improves water resistance and adhesion slightly, and it’s worth the extra dollar. But be clear-eyed: 2 percent silicone additive does not make an acrylic behave like 100 percent silicone. Siliconized acrylic is still a paint-prep product with modest water tolerance, fine for a kitchen backsplash top edge or a bathroom baseboard, not for a tub-to-tile joint that sees standing water daily. The marketing on these tubes (“kitchen and bath!”) oversells them, and re-caulking a moldy tub joint every 18 months is the predictable result.
Where Acrylic Caulk Is the Right Answer
- Trim to wall joints: baseboards, casing, crown molding, chair rail. This is the product’s home turf. It fills the shadow line, paints over invisibly, and flexes enough for seasonal trim movement.
- Drywall gaps and corner cracks too small to justify tape and mud.
- Nail holes and pin holes in painted trim when you’re moving fast (a dab, a wipe, paint).
- Interior window and door frame perimeters before painting.
- Cabinet crown and filler strips in painted kitchens.
- Stair skirt boards and shoe molding joints.
- Protected exterior joints under deep porch ceilings where sun and rain never land, if a paintable finish matters and movement is minimal. Even then, a paintable hybrid is the better spend.
The common thread: joints that will be painted, stay dry, and move very little. That describes 80 percent of the caulking in a house interior, which is why acrylic dominates by volume.
Where It Fails, and What to Use Instead
| Job | Why acrylic fails | Use instead |
|---|---|---|
| Tub/shower joints | Constant water; mildew feeds on it; shrink cracks wick water | 100% silicone (mildew-resistant) |
| Exterior siding/trim in sun | UV embrittlement + movement beyond ±7.5% | Hybrid or polyurethane |
| Concrete/driveway joints | Movement, abrasion, standing water | Self-leveling polyurethane |
| Countertop to backsplash | Repeated wiping, water exposure, movement | Silicone or hybrid, color-matched |
| Around sinks/faucets | Standing water lifts the bead | Silicone |
| Metal roofing/flashing | Thermal movement, poor metal adhesion | Butyl or polyurethane |
| Expansion joints of any kind | Movement rating is a fraction of what’s needed | ASTM C920 class 25+ sealant |
Applying It Like a Painter
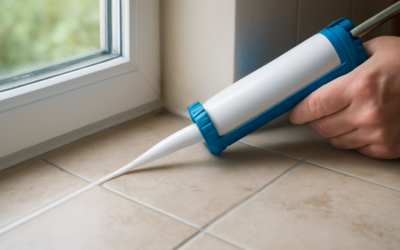
- Cut the tip small. An eighth-inch opening at 45 degrees. Trim gaps are small; the giant bead from a fat tip is what makes DIY caulking look smeared.
- Gun a steady bead, then tool immediately. Acrylic skins fast. Work in 4-to-6-foot sections, then run a lightly dampened fingertip or tooling stick down the joint in one continuous pass. A spray bottle of water helps on long runs.
- Wipe the excess off your finger every pass. Redepositing yesterday’s caulk on today’s wall is how hazy smears end up on flat paint. Keep a damp rag in your other hand.
- Two thin passes beat one deep fill. Gaps beyond about 3/8 inch will shrink and crack in one shot. Fill deep gaps with backer rod or a first pass, let it dry overnight, then finish.
- Respect the paint window. Most acrylics accept paint in 30 to 60 minutes, but full cure takes days; painting fat beads too early causes cracking as the caulk shrinks under the paint film. On big gaps, wait until the next day.
Dry Time, Shelf Life, and Storage
Acrylic latex skins in 10 to 30 minutes, takes paint in 30 minutes to 2 hours depending on the label, and fully cures in 1 to 14 days depending on bead size, humidity, and temperature. Cold, damp rooms slow it dramatically. Application range is roughly 40°F to 90°F, and it must not freeze in the tube: frozen-and-thawed acrylic turns grainy and won’t tool smooth, so don’t store it in the garage over winter. An opened tube sealed with a nail and a wrap of tape lasts a few weeks; unopened shelf life is typically 12 to 24 months, and old caulk that’s stiff in the gun should go in the trash, not on your walls.
Premium Acrylics: When the $8 Tube Earns It
Elastomeric acrylics (Big Stretch is the best-known) stretch several times their original size and are worth every penny on problem joints: the recurring crack where stair stringer meets drywall, MDF trim in rooms with big seasonal humidity swings, and log or timber homes where wood moves constantly. Urethane-modified acrylics (Alex Flex class) split the difference for crown molding and flexible door casings. If a joint has cracked twice with standard caulk, stop repeating the experiment: either the joint needs an elastomeric acrylic or it’s moving too much for acrylic at all and needs a hybrid sealant.
Reading the Tube in 10 Seconds
- “Paintable” plus a paint-ready time — the core spec for trim work.
- Stated flexibility or movement class — basic tubes won’t list one; elastomerics will brag.
- Interior vs. interior/exterior — take “exterior” claims on acrylic with a grain of salt; think protected exterior only.
- Mildew-resistant additive — nice for bathroom trim, not a license for wet zones.
- Warranty years — loosely correlated with polymer quality; a 40-year tube tools and lasts noticeably better than a 15-year tube.
Fixing Common Acrylic Failures
Three failures account for nearly every acrylic callback, and each has a specific fix. Shrink cracks down the center of a bead mean the gap was filled too deep in one pass: rake the cracked bead out with a painter’s tool, refill in two lifts with overnight drying between, and repaint. A bead that peeled cleanly off one surface means that surface was dusty, glossy, or unprimed: sand or wipe the surface, spot-prime, and re-caulk, because caulking over the same contamination repeats the result on the same schedule. And a bead that looks fine but shows as a dull stripe through the finish paint, flashing, means the caulk was painted before its dry time; the cure there is one more properly timed topcoat over the whole run, not more caulk.
The verdict from someone who empties a case of this stuff every month: acrylic caulk is the best product in the store for exactly one category of work, making painted interiors look seamless, and it should almost never leave that lane. Buy the mid-grade or better tube (the $2 bargain bin shrinks and cracks enough to cost you a repaint), cut the tip small, tool with a damp finger, and give fat beads a day before paint. And the moment a joint involves standing water, sunshine, or real movement, put the acrylic down and pick up silicone, polyurethane, or a hybrid. Using each chemistry in its lane is the entire secret to caulk that never gets noticed, which is the whole point of caulk.