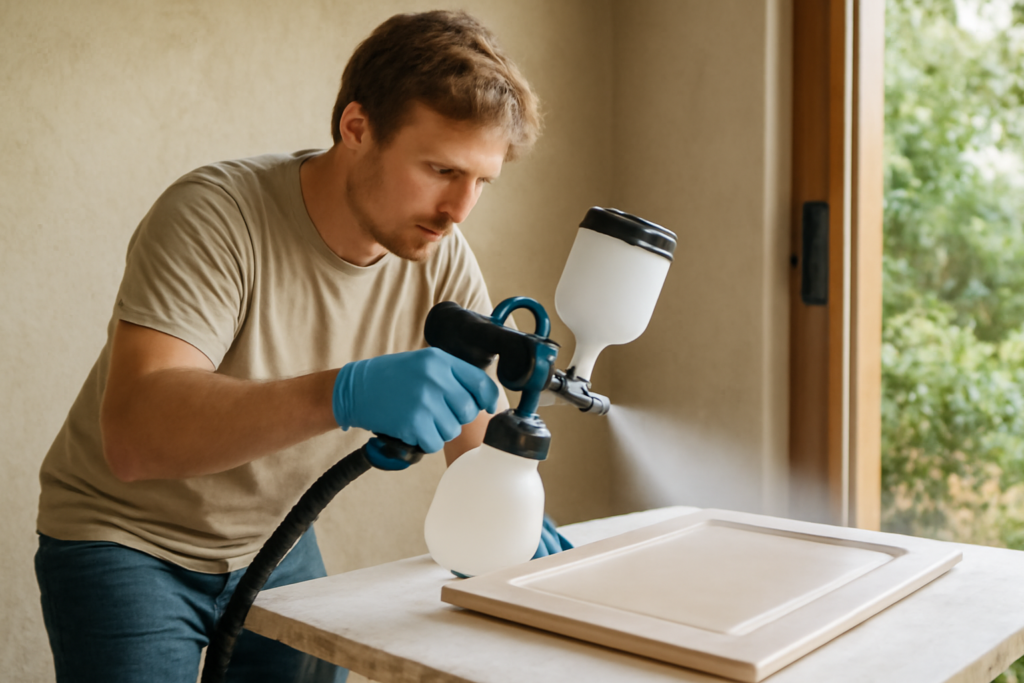
When the goal is a glass-smooth finish on cabinet doors, trim, or furniture — the kind of finish where you cannot see a single brush mark — an air paint sprayer is the tool that gets you there. Unlike a high-pressure airless rig built for covering walls fast, an air-atomized (HVLP) sprayer uses a large volume of low-pressure air to lay down a fine, controlled coat with very little overspray. It is the finish carpenter’s sprayer.
- How an Air Paint Sprayer Works
- Types of Air Sprayers
- CFM and Compressor Requirements
- Tip / Needle Selection
- Spraying Technique
- Air Sprayer vs. Airless — Which to Buy
- Troubleshooting a Bad Finish
- Prep and Environment Matter
- Best Projects for an Air Sprayer
- Turbine vs. Compressor: Which to Buy
- Cleanup and Maintenance
This guide explains how an air paint sprayer works, the difference between HVLP setups, the CFM and compressor you need, tip and paint selection, and the technique for a flawless finish.
How an Air Paint Sprayer Works
HVLP stands for high volume, low pressure. Instead of forcing paint through a tiny orifice at 2,000-plus PSI like an airless, an HVLP gun mixes paint with a large stream of low-pressure air — typically under 10 PSI at the cap — that gently atomizes it into a soft, fine cloud. Because the paint leaves the gun slowly and at low pressure, far more of it lands on the surface instead of bouncing off as overspray. That “transfer efficiency” is why HVLP is the choice for fine finishing and for spraying expensive coatings where waste matters.
The trade-off is speed and coating thickness. An air sprayer is slower than airless and struggles with heavy, thick materials. It shines on thinner finishes: lacquers, stains, sealers, thinned latex and enamels, automotive coatings, and cabinet-grade paints.
Types of Air Sprayers
- Compressor-driven HVLP guns: A conventional or dedicated HVLP spray gun fed by an air compressor. Lowest cost of entry if you already own a compressor. The catch is air demand — many need more CFM than small compressors deliver.
- Turbine HVLP systems: A self-contained unit with a turbine that generates the high-volume, low-pressure air, plus a hose and gun. No compressor needed, warm dry air, very portable. $150 for a hobby unit up to $600-plus for a multi-stage pro system.
- Gravity-feed vs. siphon-feed guns: Gravity-feed cups sit on top and use paint more efficiently; siphon-feed hang below. Gravity-feed dominates finish work.
For most homeowners doing cabinets and furniture, a turbine HVLP system is the easier path because it sidesteps the compressor sizing headache.
CFM and Compressor Requirements
This is where people get frustrated. A conventional HVLP gun can demand a lot of continuous air — often 10 to 15+ CFM at 40 PSI or so. Small pancake and hot-dog compressors (2 to 5 CFM) cannot keep up, so the gun sputters as the tank drains. Check the gun’s CFM requirement against your compressor’s CFM output at the required PSI, and match a comfortable margin.
- Small trim guns / detail work: some run on 4 to 7 CFM.
- Full-size HVLP finishing guns: often need 10 to 14+ CFM sustained, which means a 60-gallon stationary compressor.
Add an inline water/oil separator and a regulator at the gun — moisture in the air line is the enemy of a clean finish. If matching a compressor sounds like a hassle, that is exactly why turbine systems exist; they are engineered to supply the right air on their own.
Tip / Needle Selection
Air sprayers use a matched fluid nozzle and needle set sized in millimeters to the coating’s viscosity:
- 1.0 to 1.3 mm: thin materials — stains, sealers, lacquers, dyes.
- 1.4 mm: the do-everything size for most finishes and thinned enamels.
- 1.7 to 2.0 mm: thicker latex and primers — the upper limit of what HVLP handles well.
Most latex paints must be thinned to spray through an HVLP gun — follow the paint’s spray-thinning guidance, often 10 percent water or a conditioner like Floetrol. If you find yourself fighting thick paint, you are asking an HVLP gun to do an airless gun’s job.
Spraying Technique
- Strain your paint through a mesh filter — one speck of debris ruins a finish.
- Set the air pressure per the gun’s spec, then dial in fluid, fan, and air controls on a test card.
- Hold the gun 6 to 8 inches from the surface (closer than airless), perpendicular, and move parallel — no arcing.
- Overlap each pass by 50 percent, triggering just before and releasing just after each stroke.
- Lay multiple thin coats rather than one heavy one; thin coats are what prevent runs and give that furniture finish.
- Let each coat flash off per the product’s recoat window, and sand lightly between coats for the smoothest result.
Practice on cardboard until your test pattern is an even, tapered oval with no heavy center or dry edges.
Air Sprayer vs. Airless — Which to Buy
- Choose an air (HVLP) sprayer for cabinets, doors, trim, furniture, and any job where finish quality beats speed. It wastes less paint and lays a finer coat.
- Choose airless for walls, ceilings, fences, exteriors, and thick coatings where you need to move fast and material thickness is high.
Plenty of serious painters own both: airless to cover the big areas, an air paint sprayer to make the cabinets and trim look like they came from a factory.
Troubleshooting a Bad Finish
When an HVLP finish goes wrong, the fault is almost always in one of a few places, and the fixes are quick once you know the symptom:
- Orange peel (a bumpy, textured finish): paint is too thick or air pressure too low. Thin the paint a bit more or raise the air pressure.
- Runs and sags: too much paint per pass or holding the gun too close. Speed up, back off to 6 to 8 inches, and lay thinner coats.
- Dry, sandy finish: too far from the surface or too much air. Move closer and reduce air.
- Spitting or sputtering: low paint in a gravity cup, a loose fluid nozzle, or moisture in the air line. Tighten the nozzle and add a water separator.
- Split or fishtail pattern: a clogged air-cap horn hole — clean the cap with a brush, never a metal pick.
Nearly every finish flaw traces back to viscosity, distance, or a dirty cap. Dial those in on a test card before you touch the real workpiece.
Prep and Environment Matter
A fine finish is 80 percent preparation. Sand the workpiece smooth, remove all dust with a tack cloth, and work in a clean, still space — HVLP produces less overspray than airless, but airborne dust and bugs still ruin a wet finish. Control temperature and humidity where you can; finishes lay out best in the 65 to 80 degree range with moderate humidity. If you are spraying cabinet doors, build a simple spray rack or set them on painter’s pyramids so you can coat the faces without touching wet edges. Good lighting raked across the surface lets you see the wet film and catch thin spots or runs before they dry. These habits separate a factory-smooth result from a passable one.
Best Projects for an Air Sprayer
An HVLP gun earns its keep on jobs where finish quality is the whole point:
- Kitchen cabinets: the marquee use — spraying doors and boxes off their hinges yields a factory-smooth finish no brush can match.
- Interior doors and trim: crisp, even enamel with no brush marks.
- Furniture and built-ins: dressers, tables, bookcases, and shelving in lacquer, enamel, or stain.
- Crafts and small projects: the fine control suits detailed work and small parts.
- Automotive and specialty coatings: where transfer efficiency and a fine atomized coat matter.
What an air sprayer is not for: large wall and ceiling areas, exteriors, and thick coatings — those are airless territory. Reach for the HVLP when the surface will be seen up close and the finish has to be flawless.
Turbine vs. Compressor: Which to Buy
For most homeowners the decision comes down to what air source you use. A turbine HVLP system is self-contained, portable, and engineered to deliver exactly the right air, so it just works out of the box — ideal if you do not already own a big compressor or do not want to size one. Entry turbine units start around $150; multi-stage pro systems run $400 to $700-plus and atomize even thicker materials. A compressor-fed gun is the cheaper entry if you already own a 60-gallon compressor that can supply the CFM, and it doubles for other air tools, but a small compressor will sputter and frustrate you. My general advice: if you are buying specifically to finish cabinets and furniture and do not have a large compressor, buy a turbine system and skip the CFM headaches entirely.
Cleanup and Maintenance
Clean the gun immediately after use — disassemble the cup, nozzle, needle, and air cap and flush with the appropriate solvent (water for latex, lacquer thinner for lacquers). Use the brushes that come with the gun to clear the fluid passages and air holes; a single clogged air-cap hole throws the fan off. Never soak the entire gun in solvent long-term, and keep the needle packing lightly lubricated. A well-maintained HVLP gun lasts many years and rewards you with a finish no brush can match — which is the whole reason to own an air paint sprayer in the first place.