
Aluminum fence installation is one of the most rewarding do-it-yourself projects a homeowner can tackle, delivering the elegant look of wrought iron without the rust, the maintenance, or the professional price tag. Powder-coated aluminum fencing resists corrosion, never needs painting, and comes in pre-assembled panels that make it far easier to install than wood or chain link. For pool enclosures, front yards, and decorative boundaries, it hits a sweet spot of durability, curb appeal, and reasonable cost.
Part of our Decks & Outdoor guide — explore the full guide →
This guide walks through planning, tools, laying out the line, setting posts, attaching panels, working on slopes, realistic costs, and the mistakes that cause a crooked or leaning fence. With careful measuring and a weekend of work, most homeowners can install a professional-looking aluminum fence themselves.
Why Choose Aluminum Fencing
Aluminum offers advantages that explain its popularity. It will not rust like steel or rot like wood, and the baked-on powder coat keeps its color for decades with only occasional rinsing. Panels arrive pre-welded, so there is no piece-by-piece assembly. It suits sloped yards better than most materials because the panels can be racked, or angled, to follow grade. And it meets pool safety codes when configured with the right picket spacing and self-latching gates. The main limitation is privacy, since it is an open picket style, so it is chosen for looks and containment rather than blocking views.
Planning and Permits
Good planning prevents expensive mistakes. Before buying anything, confirm your property lines, ideally from a survey, so you do not build on a neighbor’s land. Call 811 at least a few days ahead to have underground utilities marked for free, which is legally required in most areas before digging post holes. Check with your local building department and homeowners association about permits, height limits, and setback rules. Pool fences in particular have strict code requirements for height, typically 48 inches minimum, and picket gaps no wider than 4 inches.
Tools and Materials
Gather everything before you start so you are not stopping mid-project.
- Aluminum fence panels, posts, gate kit, and caps
- Post-hole digger or a powered auger
- Fast-setting concrete mix
- Mason’s string line, stakes, and marking paint
- A good level, preferably a post level
- Tape measure, rubber mallet, drill, and self-tapping screws
- Gravel for the bottom of each hole for drainage
Laying Out the Fence Line
Accuracy at this stage determines the whole result. Drive stakes at each corner and gate location, then run a tight mason’s string between them to mark the exact fence line. Measure and mark each post location along the string. Standard aluminum panels are 6 feet long, so posts typically sit 72 inches apart measured center to center, but always confirm the spacing from your panel’s actual bracket-to-bracket dimension since it varies slightly by manufacturer. Mark each hole with spray paint.
Setting the Posts
Posts carry the fence, so setting them plumb and at consistent height is the most important part of the job.
- Dig each hole about 10 inches wide and 24 to 30 inches deep, going below the frost line in cold climates so heaving does not lift the posts.
- Add a few inches of gravel to the bottom for drainage.
- Set the first post, check it plumb on two sides with a post level, and brace it.
- Attach a panel to establish the exact next post position, then set that post so the panel brackets align.
- Pour fast-setting concrete around each post, re-check plumb, and let it cure before heavy handling.
Working post-panel-post in sequence keeps spacing perfect. Do not dig every hole first and hope the panels reach, because small errors compound down the line.
Attaching Panels
Aluminum panels attach to posts with brackets and self-tapping screws, or by inserting the panel rails into pre-punched holes in the posts, depending on the system. Most residential kits use bracket-mount panels that screw to the flat post face, which is the more forgiving method for DIYers. Keep the bottom rail a consistent height above the ground, usually 2 to 4 inches, for a clean look and easy trimming underneath.
Handling Slopes
Sloped yards are where aluminum shines. Rackable panels flex at the pickets so the top and bottom rails can angle to follow the grade while the pickets stay vertical, giving a smooth stair-free line. For steeper grades, stepped installation keeps each panel level and drops it down at each post, creating a stair-step appearance. Rackable is generally preferred for looks unless the slope is severe. Confirm your panels are rated for the amount of rack your yard needs before buying.
Installing Gates
Gates get the most use and abuse, so hang them carefully. Set the gate posts slightly deeper and, for wide or heavy gates, larger, because they bear swinging loads. Use the manufacturer’s hinges and, for pool code, a self-closing hinge and self-latching latch mounted on the inside at the required height. Allow the specified gap on the latch side and shim the hinges until the gate swings freely and latches cleanly.
What Aluminum Fence Installation Costs
Materials for DIY aluminum fencing run roughly $20 to $40 per linear foot depending on height and grade, with gates adding $150 to $400 each. A typical 150-foot yard in materials lands around $3,000 to $6,000. Hiring a professional installer adds labor of roughly $10 to $25 per linear foot, so the same job professionally installed might run $6,000 to $10,000. Doing it yourself commonly saves 30 to 50 percent, and the panelized system makes that saving realistic for a capable homeowner.
Choosing the Right Grade of Aluminum Fence
Aluminum fencing is sold in residential, commercial, and industrial grades, and picking the right one matters for both looks and durability. Residential grade uses thinner-walled pickets and rails, which is perfectly adequate for decorative yard boundaries and most pool enclosures, and it is the most affordable. Commercial grade uses heavier extrusions that resist bending and suit taller fences or areas with more abuse. Industrial grade is the heaviest, used for security applications. For a typical backyard, residential grade in a quality powder-coat finish is the sensible, cost-effective choice.
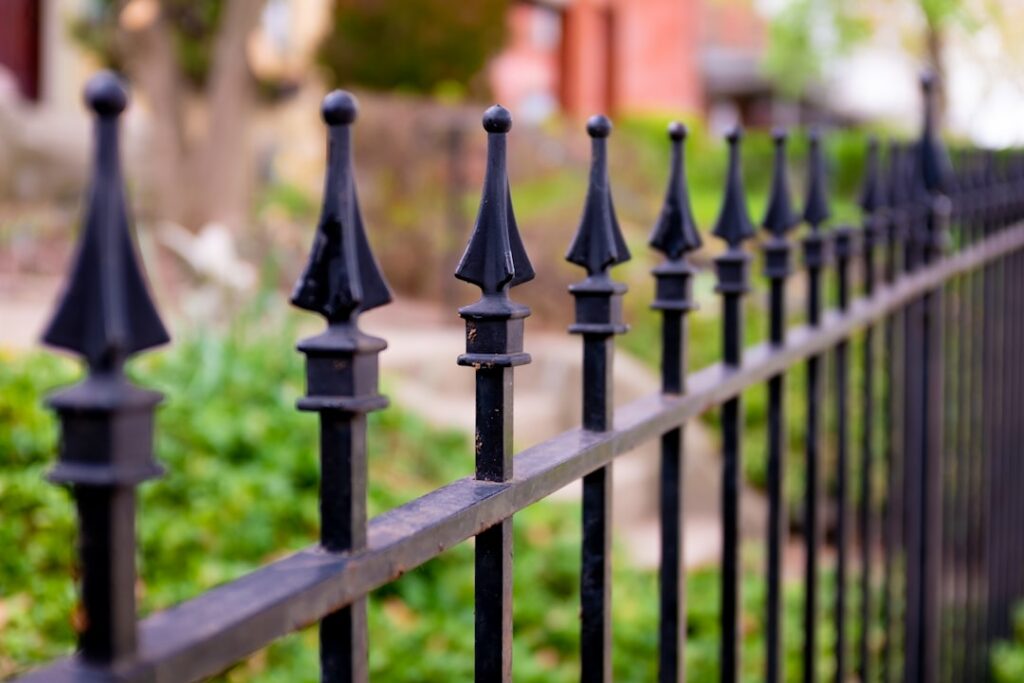
Also consider the picket style and spacing. Flat-top and arched styles look decorative, while pickets that extend above the top rail, called spear or finial tops, add a more formal, wrought-iron appearance and some deterrence. If the fence is for a pool, confirm the picket spacing and any horizontal rail placement meet the barrier code, which limits gaps and controls how easily the fence could be climbed. Buying the correct grade and code-compliant style up front avoids a failed inspection or a fence that looks flimsy.
Maintenance and Longevity
One of the biggest reasons homeowners choose aluminum is how little care it needs after installation. The powder-coat finish resists fading, chipping, and rust, so there is no painting or staining ever required. Routine maintenance amounts to occasionally rinsing the panels with a hose to remove dust and pollen, and washing with mild soap and water once or twice a year if the fence gets grimy. In coastal areas, a periodic rinse removes salt that could otherwise dull the finish over many years.
Check the gate hardware annually, since hinges and latches are the only moving parts and take the most wear. Tighten any loose fasteners and add a drop of lubricant to hinge pins so gates continue to swing and latch smoothly. Inspect the base of posts after severe frost heave in cold climates to confirm nothing has shifted. With this minimal attention, a quality aluminum fence commonly lasts decades and often carries a lifetime finish warranty, making it one of the lowest-maintenance fencing materials available.
Common Mistakes to Avoid
The frequent errors are skipping the 811 utility locate, digging post holes too shallow so frost heaves them, failing to check posts plumb on two sides before the concrete sets, and spacing posts by guesswork instead of matching the panel brackets. Rushing the concrete cure and hanging panels too soon can also pull posts out of plumb. Take your time on the posts, and the panels and gates fall into place easily. A carefully installed aluminum fence will stand straight and hold its finish for decades with almost no upkeep.


