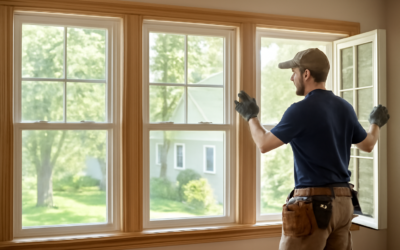
A torn or sagging window screen lets in bugs, looks shabby, and is one of the easiest home repairs to put off far too long. An Andersen window screen replacement is more approachable than most homeowners expect, whether you order a factory screen or re-mesh the existing frame yourself. Because Andersen makes many window series with different screen systems, a successful Andersen window screen replacement starts with correctly identifying your window and choosing between a full-frame replacement and a simple re-screen.
Part of our Windows & Doors guide — explore the full guide →
Identify Your Window Series First
Andersen has produced dozens of window lines over the decades, and screens are not universal across them. The most common residential series include the 400 Series, 200 Series, A-Series, E-Series, and older 100 Series units. Each uses a specific screen frame size and clip system, so ordering the right part depends on knowing which you have.
Look for a product identification label, often etched into the glass corner or printed on a sticker inside the jamb or on the sash. That label lists the series and the window size code. If you cannot find it, note whether the window is double-hung, casement, or gliding, and measure carefully, since Andersen dealers can often match a screen from the window dimensions and style.
Full-Frame Screen vs. Re-Screening
You have two basic paths, and the right one depends on the condition of the screen frame. If the aluminum or vinyl frame is bent, corroded, or broken, order a complete replacement screen assembly. If the frame is straight and intact but the mesh is torn or stretched, you can simply replace the screen material yourself for a few dollars.
Re-screening is by far the cheaper route when the frame is sound. A full replacement screen from Andersen or an authorized dealer typically costs $30 to $80 depending on size and series, while re-screening an existing frame costs only $10 to $25 in materials. The tradeoff is a little labor versus the convenience of a ready-made part.
Measuring for a Replacement Screen
Accurate measurements prevent the frustration of a screen that will not seat properly. When ordering a full replacement, measure the existing screen frame itself, not the window opening.
- Measure the width of the old screen frame at the top, middle, and bottom.
- Measure the height at the left, center, and right.
- Note the frame thickness and the location of any clips, tabs, or pull handles.
- Record your window series and size code from the identification label.
Provide these details to an Andersen dealer or the official parts store. For casement windows, the screen mounts on the interior and clips into the frame, while double-hung and gliding screens sit in the exterior track, so specify the window type to get the correct mounting hardware.
How to Re-Screen a Frame Yourself
If your frame is good and only the mesh needs replacing, re-screening is a satisfying 30-minute job that requires just a few inexpensive tools. You will need replacement screen mesh, new spline, a spline roller tool, and a utility knife.
- Lay the frame flat and pry the old spline out of the groove with a flat screwdriver, then remove the torn mesh.
- Cut new mesh a couple of inches larger than the frame on all sides.
- Lay the mesh over the frame and use the convex wheel of the spline roller to press it into the groove along one side.
- Roll the spline into the groove over the mesh with the concave wheel, working around all four sides and keeping the mesh taut but not overstretched.
- Trim the excess mesh just outside the spline with a utility knife held at an angle.
Choose the right mesh for your needs: standard fiberglass is easy to work with and forgiving, aluminum is more durable, and specialty pet-resistant or solar-shading mesh costs more but adds function. Fiberglass is the best choice for a first-time re-screen because it does not crease permanently if you make a mistake.
Screen Mesh Options
Not all screen material is the same, and choosing the right type improves the result:
- Fiberglass: The standard, affordable and flexible, with good visibility and easy installation.
- Aluminum: Stronger and longer lasting, resists sagging, but dents and shows creases.
- Pet-resistant: Heavy-duty vinyl-coated polyester that stands up to claws and paws.
- Solar screen: Denser weave that blocks 60 to 90 percent of sun heat and glare, ideal for hot, sunny windows.
- No-see-um: Tighter weave that keeps out tiny insects like gnats and sand flies.
Andersen also offers its own screen options, including a high-transparency mesh that is nearly invisible for clearer views. If a view is important, that finer, low-profile mesh is worth the small upgrade.
What It Costs
Doing it yourself keeps costs low. Re-screening supplies for one window run $10 to $25, and a roll of mesh will handle several windows. A factory replacement screen from Andersen typically costs $30 to $80 per window, plus shipping if ordered online.
Hiring a handyman or a local screen shop to replace the mesh runs $20 to $50 per screen in labor, while ordering and installing full factory screens through a dealer can total $60 to $150 per window. For a whole house of screens, DIY re-screening offers the biggest savings by far.
Tools and Supplies You Will Need
Gathering the right supplies before you start makes re-screening far smoother. For a basic re-screen you need a roll of screen mesh sized a few inches larger than your frame, a matching roll of spline in the correct diameter, and a spline roller tool that costs about $8 to $15. A sharp utility knife with fresh blades, a flat-head screwdriver, and a pair of scissors round out the kit.
Spline diameter matters more than people expect. If the new spline is too thin, the mesh pulls loose; too thick and it will not seat in the groove. Bring a short piece of your old spline to the hardware store, or measure the groove width, to match it. Buy a slightly longer roll of spline than you think you need, since it is cheap and running short mid-project is frustrating.
Casement vs. Double-Hung Screen Differences
Andersen casement windows crank outward, so their screens mount on the interior and clip into the frame, often with spring-loaded tabs or pull tabs at the bottom. These screens are removed by releasing the tabs and lifting the screen straight in and out. Because they sit inside, casement screens tend to last longer, shielded from direct weather.
Double-hung and gliding windows use screens that ride in an exterior track and are held by tension springs or small clips. To remove one, you typically lift it up into the top of the track and swing the bottom out. Knowing which system you have determines both the replacement part you order and how you take the old screen out, so identify it before you begin.
Keeping Screens in Good Shape
A few habits extend screen life. Remove and gently wash screens once a year with mild soap and a soft brush, then let them dry fully before reinstalling. Store removable screens flat or upright in a dry place over winter if you take them out. Handle aluminum screens carefully, since a single crease is permanent.
Catch small tears early with a screen patch kit before they spread. With basic care, a quality screen lasts 10 to 15 years, and when it finally gives out, you now know exactly how to handle an Andersen window screen replacement quickly and affordably.
One last tip worth remembering: label your screens as you remove them, especially in a house with many similar windows. A small piece of painter’s tape with the room and window location on the frame edge saves confusion when you reinstall them, since even same-size Andersen screens can differ slightly in clip placement between series. Store the matching hardware, springs, and pull tabs in a labeled bag so nothing goes missing over the winter. A little organization turns a whole-house screen project from a guessing game into a quick afternoon task, and keeps every screen paired with the exact opening it was made to fit.