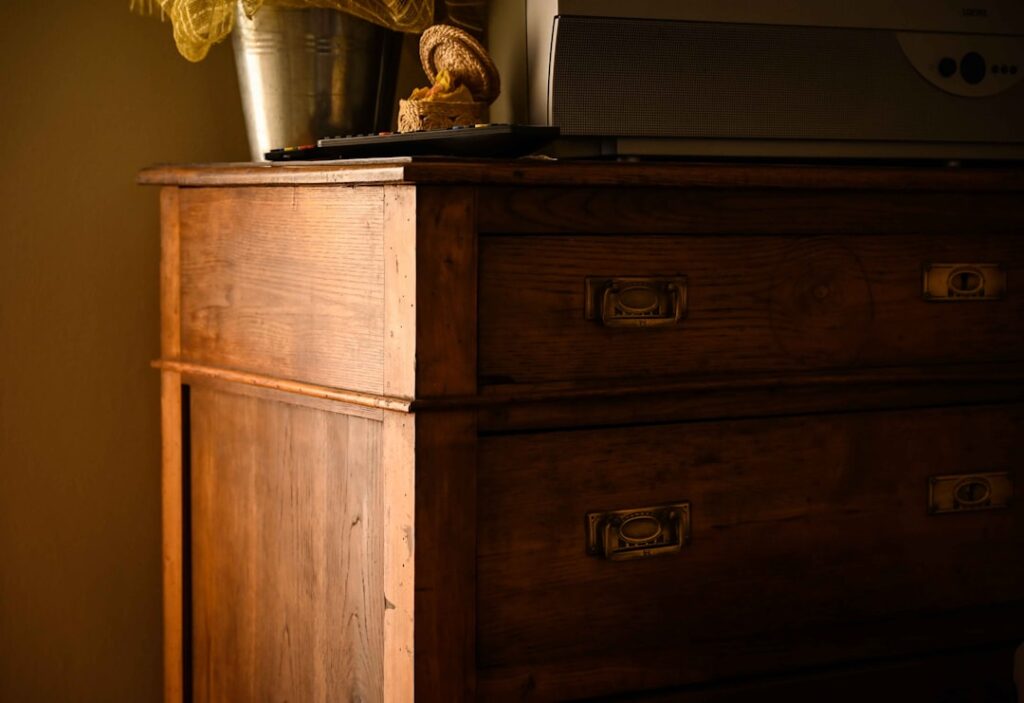
Nothing gives a bathroom instant character like a piece with real history. An antique dresser bathroom vanity takes a solid old chest of drawers and reworks it into a sink base, and the result is something no showroom can sell you: authentic patina, hand-cut joinery, and a story. I’ve converted several, and the process is very doable for a confident DIYer, but it lives or dies on two things, choosing the right dresser and sealing it properly against bathroom moisture. Skip either and you’ll ruin a beautiful antique. Do it right and you’ll have a vanity that gets compliments for decades.
Part of our Bathroom Remodeling & Flooring guide — explore the full guide →
- Choosing the Right Dresser
- Deciding on a Sink Style First
- Mapping the Plumbing and Drawers
- Cutting the Top for the Sink
- Sealing Against Bathroom Moisture
- Mounting the Sink and Faucet
- Choosing a Countertop for the Dresser
- Refreshing the Dresser's Look
- What This Project Costs
- Anchoring and Final Details
Choosing the Right Dresser
Not every old dresser makes a good vanity. You’re looking for the right height, the right depth, and solid construction that can take a sink cutout without falling apart.
- Height: Aim for 30 to 36 inches tall. Many antique dressers sit around 32 inches, close to a traditional vanity height. Very low dressers feel cramped; very tall ones are awkward at a sink.
- Depth: At least 18 to 20 inches front to back so a standard basin fits without overhang problems.
- Construction: Solid wood with dovetailed drawers and a sturdy frame. Avoid veneered particleboard, which swells the moment it meets bathroom humidity.
- Top condition: A flat, solid top you can cut into. Water-stained or split tops complicate the sink cutout.
Flea markets, estate sales, and Facebook Marketplace are gold mines. Expect to pay $75 to $400 for a solid candidate. Wobble it, open every drawer, and check the back and bottom for rot before you buy.
Deciding on a Sink Style First
Your sink choice changes how much you cut into the dresser, so decide before you touch a saw. A vessel sink that sits on top of the dresser requires only a small hole for the drain and faucet, which preserves the most wood and the most drawer space. A drop-in or undermount basin requires a full cutout in the top and eats into the top drawer.
For most antique conversions I recommend a vessel sink. It keeps the cutting minimal, protects the vintage top, and the raised basin looks intentional on an old piece. If you want a more integrated, flush look, a drop-in works but plan to sacrifice the top drawer and rebuild it as a false front. Buy the sink and faucet before you cut so you can template exactly.
Mapping the Plumbing and Drawers
The drains and supply lines have to go somewhere, and in a dresser that somewhere is through the drawers. Pull the top drawer and dry-fit your plumbing to see what clears.
Most conversions sacrifice the back portion of the top drawer or two to make room for the P-trap and supply lines. You have two common approaches: notch the backs of the affected drawers so they still slide in and function around the plumbing, or convert the top drawer to a fixed false front and use the space behind it for the trap. Notching preserves usable drawer storage, which is a big part of the appeal, so I do that whenever the plumbing layout allows. Map it out in cardboard before cutting real wood.
Cutting the Top for the Sink
With the sink in hand, trace your cutout. For a vessel sink you’re marking just the drain hole and a faucet hole; for a drop-in you’re tracing the full bowl template that comes with the sink.
Drill a starter hole inside the waste area, then cut the opening with a jigsaw fitted with a fine down-cutting blade to reduce splintering on the vintage top. Go slow and let the blade do the work. Sand the cut edges smooth. This is the point of no return on an antique, so measure the template placement two or three times, and make sure the drain lines up over the drawer space you cleared for the plumbing below.
Sealing Against Bathroom Moisture
This is the step that separates a lasting conversion from a swollen, mildewed disaster. Antique wood was never meant to live in a steamy bathroom, so you have to armor it against moisture, especially the cut edges and the top around the sink.
Seal all exposed wood, including the fresh cut edges and the underside near the drain, with several coats of a marine-grade spar urethane or a catalyzed water-resistant topcoat. Pay extra attention to the top surface where water will splash and the drain hole where it will run. Add a generous bead of 100 percent silicone around the sink drain and any faucet penetration to keep water from wicking into the end grain. If the dresser is painted, prime any bare cuts before topcoating. Skimp here and the top will cup and the drawer fronts will swell within a season.
Mounting the Sink and Faucet
Once the finish has cured, set the sink. A vessel sink beds down on a ring of silicone around the drain hole; tighten the drain assembly from below, then connect the faucet. For a drop-in, run silicone under the rim, drop it in, and clip it down per the sink’s hardware.
Mount the faucet before you set a vessel bowl if the faucet is a deck-mount type, since reaching the mounting nut is easier with the bowl off. Connect the supply lines to the shutoff valves with braided flexible connectors, and hook the drain tailpiece to the P-trap you fitted into the notched drawer space. Run water and check every joint for weeping before you call it done.
Choosing a Countertop for the Dresser
You have a choice to make about the dresser’s top surface, and it affects both the look and the durability. Option one is to keep the original wood top, seal it heavily, and set a vessel sink on it, which preserves the antique character but demands vigilant sealing since wood and water don’t mix long term.
Option two is to add a stone or solid-surface top over the dresser, cut with the sink opening, which protects the vintage wood underneath and gives you a bulletproof, waterproof work surface. A slab of quartz or granite cut to the dresser’s footprint, roughly $200 to $500 for a small piece, dies the water-resistance problem completely and still lets the beautiful drawers and legs show. If you love the wood grain of the original top too much to cover it, go with the sealed-wood-and-vessel route but accept that you’ll need to re-seal it periodically. For a bathroom that sees heavy daily use, I usually recommend adding a stone top; for a lightly used powder room, a well-sealed original top can be gorgeous.
Refreshing the Dresser’s Look
Part of the fun is deciding how much of the antique’s character to keep. Some dressers are best left with their original patina and hardware, which is the whole reason you bought a vintage piece. Others benefit from a refresh to fit your bathroom’s palette.
If the finish is sound and the patina is charming, clean it, seal it, and leave it alone. If it’s damaged or the color clashes, you can paint it in a bathroom-durable enamel or restain it, following the same prep-and-seal discipline any furniture refinish requires. Swapping the drawer pulls is the fastest way to shift the style, and it’s easy to do. Just remember that if you paint or refinish, you still need the moisture-resistant topcoat over everything, because a decorative paint job alone won’t protect old wood from steam. Whatever you decide, keep the finish choices in service of durability first, since a beautiful vanity that swells and warps in a year isn’t a win.
What This Project Costs
Adding up a dresser conversion, it usually lands well below a comparable custom vanity while delivering far more character. The dresser itself runs $75 to $400 depending on quality and where you shop.
Add a vessel or drop-in sink at $60 to $250, a faucet at $80 to $300, a drain and P-trap kit and supply lines for $40 to $80, and sealing and finishing supplies for $40 to $100. If you add a stone top, tack on $200 to $500. All in, most conversions come together for $300 to $900 in materials, plus a weekend of your time. That’s competitive with a mid-range stock vanity, except you end up with a one-of-a-kind piece with real history instead of a factory box. The labor is the investment here, so if you’re comfortable with a jigsaw and basic plumbing, the value is excellent.
Anchoring and Final Details
A dresser is heavier and less stable than a wall-mounted vanity, so secure it. Anchor the back of the dresser to wall studs with an L-bracket or a cleat, which stops it from tipping and locks it against the wall for a finished look.
Add a side or back splash if the dresser butts a wall, seal the seam to the wall with silicone, and consider felt pads or leveling feet if the floor is uneven. Give the whole piece a final coat of protective wax or topcoat on the vintage areas you want to preserve. When it’s done, an antique dresser bathroom vanity delivers something a big-box unit never can, genuine age and craftsmanship, for the price of a weekend and a well-chosen old chest of drawers.