Nothing warms up a room quite like weathered wood with real history in its grain, and that is exactly what draws people to reclaimed lumber. A barnwood accent wall brings instant character, texture, and a cozy, lived-in feel that brand-new materials struggle to fake, turning a plain wall into the visual anchor of a room. Whether you use genuine century-old barn siding or a convincing faux product, the rustic patina works in farmhouse kitchens, modern lofts, and everything between. This guide covers real versus faux options, honest costs, layout choices, and a step-by-step process to build a wall that looks authentic rather than gimmicky.
The Appeal of Reclaimed Wood
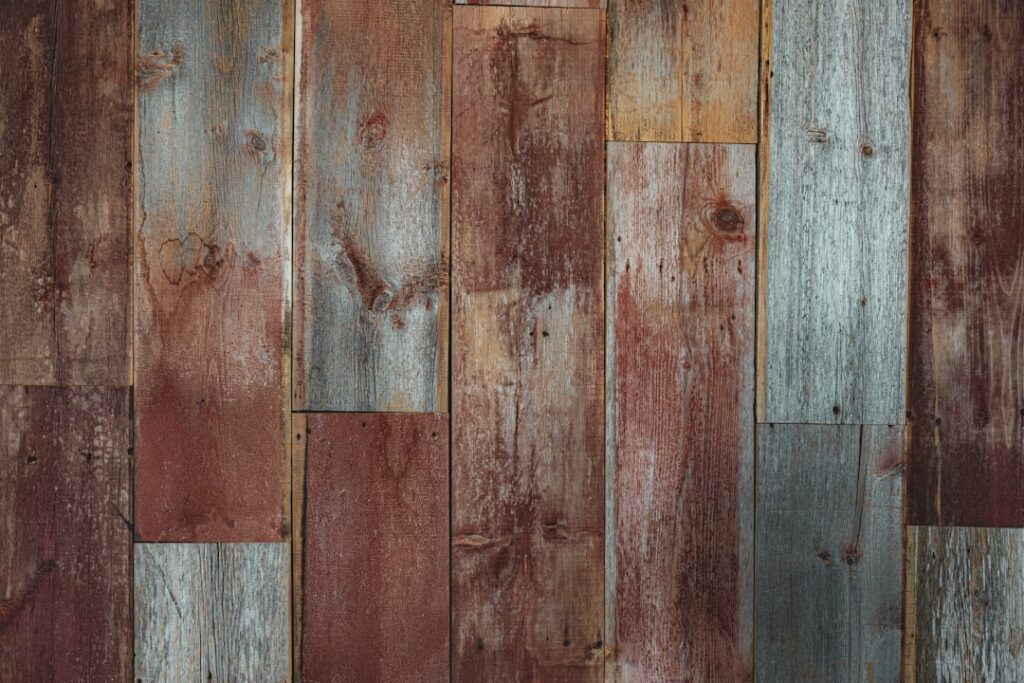
Barnwood carries something no new board can replicate: decades of weathering that left behind silvered grays, sun-bleached browns, faded paint, and nail holes that tell a story. That authentic patina is the whole point, adding depth and warmth that make a room feel established and collected rather than freshly decorated.
Beyond looks, reclaimed wood appeals to homeowners who value sustainability, since it repurposes lumber that would otherwise be discarded. It also happens to be forgiving; the natural variation in color and texture hides minor installation imperfections that would show on a uniform surface. That means a barnwood wall is a genuinely achievable project even if your carpentry skills are still developing.
Real Barnwood vs. Faux Options
The first decision is whether to invest in genuine reclaimed wood or choose a faux product that mimics the look. Both have a place, and the right pick depends on budget, effort, and how much authenticity you want.
- Genuine reclaimed barnwood: The real deal, salvaged from old barns and buildings. Maximum authenticity, but boards vary in thickness, may harbor pests, and require cleaning and prep. Often $5 to $15 per square foot.
- Peel-and-stick faux planks: Thin wood or engineered boards with adhesive backing that mimic barnwood tones. The easiest option for renters and beginners, around $4 to $8 per square foot.
- Pre-finished reclaimed-look boards: New wood distressed and stained to imitate age, sold in uniform thicknesses that install cleanly.
- Manufactured wood panels: Larger panels printed or textured to resemble barnwood, fast to install but less convincing up close.
If authenticity matters most, real reclaimed wood is worth the extra effort. If you want the look with predictable boards and less prep, high-quality faux planks deliver 90 percent of the effect with a fraction of the hassle.
Prepping Real Reclaimed Wood
Genuine barnwood needs care before it goes on your wall. Old lumber can carry dirt, mold, insects, and protruding nails, so proper prep protects both your home and your finished result. Skipping this step is how people end up with bugs in the wall or splinters everywhere.
Follow these prep steps for real barnwood:
- Remove all old nails and metal hardware with a pry bar and pliers.
- Brush off loose dirt and debris, then clean the boards with a stiff brush.
- Treat for pests; a period in a sealed space with insect treatment, or professional kiln drying, kills any borers.
- Let the wood acclimate indoors for several days so it adjusts to your home’s humidity.
- Optionally seal the boards with a clear matte finish to lock in the patina and reduce dust shedding.
Kiln-dried reclaimed wood from a reputable supplier arrives already treated, which is worth paying for to avoid the risk of introducing pests into your home.
Choosing a Layout
Barnwood looks best when the layout feels natural rather than rigidly uniform. The most authentic approach mixes board widths and lengths, staggering the end seams so no two joints line up. This random, organic pattern mirrors how real barns were built and reads as genuine.
Horizontal orientation is the classic choice and makes a room feel wider. Vertical planks draw the eye up and suit rooms with lower ceilings. For extra visual interest, some homeowners run boards in a herringbone or chevron pattern, though this requires more cutting and material. Mixing gray, brown, and faded-paint tones across the wall, rather than sorting them into blocks, keeps the color distribution believable.
Step-by-Step Installation
Installing a barnwood wall follows the same core process as any plank wall, with a little extra attention to the uneven nature of reclaimed boards. Gather a miter or circular saw, a brad nailer, a level, a stud finder, and construction adhesive before starting.
- Locate and mark the wall studs, then snap a level chalk line for your first row so everything references true level.
- Start at the bottom with a level first board, checking it carefully since every board above depends on it.
- Apply construction adhesive to the back of each board and secure with brad nails into the studs.
- Stagger the seams row by row and vary board widths for a natural pattern.
- Scribe and cut around outlets and switches, and add box extenders so receptacles sit flush.
- Work to the top, trimming the final row to fit the ceiling line.
Because reclaimed boards vary in thickness, expect a slightly uneven surface, which is part of the charm. Do not force boards flat; let the natural texture show, and use adhesive plus nails to hold thinner or warped pieces securely.
Finishing and Maintenance
The finishing touches tie the wall together. Frame the edges with a simple trim piece or leave them raw for a more rugged look. A thin cap or baseboard cleans up the top and bottom transitions. If you did not seal the boards beforehand, a wipe-on matte clear coat now reduces dust shedding and makes the wall easier to dust.
Maintenance is minimal; occasional dusting with a soft brush or vacuum attachment is usually all a barnwood wall needs. Avoid wet cleaning, which can raise the grain or damage aged finishes. Kept simple, the wall ages gracefully and only gets more character with time.
Best Rooms for a Barnwood Wall
Barnwood’s rustic warmth suits some rooms more naturally than others, so placement matters. It feels right at home in a living room behind the sofa or television, where its texture anchors the seating area and adds instant coziness. A primary bedroom wall behind the headboard is another classic, turning the bed into a warm, grounded focal point. Entryways and mudrooms benefit too, greeting you with character the moment you walk in and hiding the scuffs that high-traffic areas collect.
The style pairs especially well with farmhouse, rustic, industrial, and transitional interiors, but a restrained barnwood wall can even soften a modern space, adding organic warmth against clean lines and concrete or steel. In a home office, a barnwood backdrop reads beautifully on video calls. Kitchens and dining rooms can carry it too, though in a kitchen keep the wood away from the cooktop and sink where grease and moisture would be hard to clean from the porous surface.
Design Tips for a Balanced Look
A barnwood wall is bold by nature, so the rest of the room should let it breathe rather than compete. Keep the adjacent walls light and neutral, which lets the wood stand out and prevents the space from feeling dark or heavy. Because reclaimed wood carries a lot of visual texture, pair it with simpler furnishings and a restrained color palette rather than busy patterns that would fight it.
Lighting brings the wall to life. A wash of warm light across the boards, whether from wall sconces, a picture light, or track lighting, deepens the grain and shadow lines that give reclaimed wood its character. Metal accents in black iron or aged brass complement the rustic tones, and a few live plants soften the look and reinforce the natural, organic feel. The goal is to make the barnwood the clear hero of the room while everything around it plays a supporting role.
Final Thoughts
A well-built barnwood accent wall delivers warmth and authentic character that few other projects can match, and it forgives the small imperfections that come with DIY work. Decide between genuine reclaimed wood and a quality faux product based on your budget and appetite for prep, mix board widths and tones for a natural look, and nail a level first row. Handle the pest treatment and acclimation on real wood, and you will have a rustic feature wall that anchors the room and feels like it has always been there.