Ask a finish carpenter their secret to gap-free trim and you will often hear the same answer: it is not just the nails, it is the adhesive behind them. Baseboard glue pulls trim tight against the wall, fills the small voids that nails alone leave behind, and holds molding rock-solid on surfaces where fasteners cannot bite. Whether you are running trim over concrete, tile, or plaster, the right adhesive turns a frustrating job into a clean, professional-looking one.
The catch is that not all adhesives are created equal, and gluing when you should be nailing (or vice versa) leads to callbacks and popped-off molding. This guide covers the best products, when to reach for glue, and exactly how to apply it for a bond that lasts.
- When to Glue Baseboards Instead of Nailing
- Best Types of Adhesive for Baseboards
- Glue vs. Nails: You Usually Want Both
- What You Will Need
- How to Apply Baseboard Glue Step by Step
- Common Mistakes to Avoid
- Removing Glued Baseboards Later
- Gluing Baseboard to Different Surfaces
- Frequently Asked Questions
- Final Takeaway
When to Glue Baseboards Instead of Nailing
Nails remain the backbone of most trim work, but glue shines in specific situations. Reach for adhesive when you are installing over masonry or tile where nails will not penetrate, when the wall surface is too hard or brittle to fasten cleanly, or when you want to eliminate nail holes entirely on a paint-grade job.
Glue also solves the classic problem of a baseboard that will not sit flat because the drywall bows or the stud spacing does not line up with where you need a fastener. A bead of construction adhesive bridges those gaps and pulls the trim snug where a nail alone would leave a visible space.
Best Types of Adhesive for Baseboards
Walk the adhesive aisle and the choices multiply fast. Here are the categories that actually matter for trim.
Construction Adhesive
The workhorse for baseboards. Polyurethane and hybrid-polymer construction adhesives, sold in caulk-gun tubes, grab fast, stay slightly flexible, and bond wood to drywall, concrete, tile, and masonry. Look for a product labeled for interior trim and paneling that dries paintable.
Hybrid Polymer and MS Polymer Adhesives
These premium adhesives offer excellent grab, low odor, and strong flexibility that tolerates seasonal wood movement. They cost more but are the pro’s choice for demanding installs.
Adhesive Caulk
For lightweight or small profiles, a paintable adhesive-caulk hybrid can both bond and seal the top edge. It is not as strong as construction adhesive but is convenient for touch-up work.
Avoid ordinary wood glue for wall installation; it is designed for wood-to-wood joints and will not bond baseboard reliably to drywall or masonry.
Glue vs. Nails: You Usually Want Both
Here is the pro reality: on standard drywall-over-stud walls, the strongest, cleanest installs use glue and nails together. The adhesive provides continuous holding power and pulls the trim flat, while the nails act as clamps that hold the board in position until the glue cures. Nails alone can let a slightly warped board pull away between fasteners; glue alone can shift before it sets. Combined, they give you a board that stays put with minimal gaps.
The main exception is masonry, tile, or any surface where you cannot or do not want to nail. There, a quality construction adhesive plus temporary bracing does the whole job.
What You Will Need
- Construction or hybrid-polymer adhesive (one 10-ounce tube covers roughly 30 to 40 linear feet)
- A caulk gun, preferably a dripless model
- Painter’s tape or bracing to hold trim while it cures
- A brad nailer or finish nails for drywall installs
- A damp rag and mineral spirits for cleanup
- Paintable caulk to finish the top seam
A tube of quality construction adhesive costs about $5 to $9, making glue one of the cheapest ways to upgrade the quality of a trim job.
How to Apply Baseboard Glue Step by Step
- Dry-fit and cut each piece first so you are not fighting adhesive while measuring. Confirm every joint before anything is glued.
- Clean the back of the trim and the wall surface. Dust, grease, and loose paint all weaken the bond.
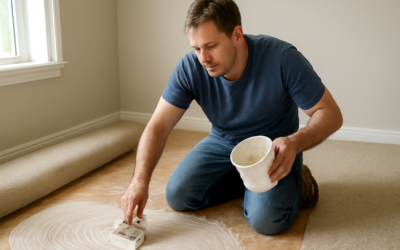
- Run a continuous 3/8-inch zigzag or S-shaped bead of adhesive along the back of the baseboard, keeping it toward the top and bottom edges where the trim contacts the wall.
- Press the board firmly into position, then slide it slightly to spread the adhesive and improve contact before setting the final placement.
- Tack it with brad nails or brace it against the wall to hold the board while the glue grabs, usually within a few minutes.
- Wipe any squeeze-out immediately with a damp rag before it skins over.
- Let the adhesive fully cure, typically 24 hours, before caulking, filling nail holes, and painting.
Common Mistakes to Avoid
A few missteps account for most failed glue-ups. Applying too much adhesive causes messy squeeze-out that is hard to hide on paint-grade trim, so keep the bead moderate. Skipping surface prep is another killer; glue will not stick to dusty or glossy surfaces. And walking away before the adhesive grabs on a masonry install, without bracing, lets gravity pull the board loose.
Finally, do not rely on adhesive to fix a badly cut joint. Glue holds trim to the wall, but tight miters and coped inside corners still depend on accurate cuts. Adhesive is a helper, not a substitute for careful measuring.
Removing Glued Baseboards Later
One downside of gluing is that removal is harder than pulling nailed trim. To take off a glued baseboard, score the caulk line at the top, then work a flexible putty knife or pry bar behind the board and pull gently while running a wide taping knife behind it to protect the drywall. Expect some drywall paper to tear where the adhesive held strongest; plan to skim-coat and sand those spots before repainting. If you anticipate frequent changes, favor nails over heavy adhesive.
Gluing Baseboard to Different Surfaces
The surface behind your trim changes the approach. Matching adhesive and technique to the wall is what separates a bond that holds for decades from one that lets go in a season.
Drywall
The easiest case. A moderate bead of construction adhesive plus brad nails through the studs gives a permanent, gap-free result. The nails hold the board while the glue cures, and together they resist the seasonal movement that opens gaps.
Concrete and Masonry
Here glue does the heavy lifting because nails will not penetrate. Clean off dust and any concrete dust film, apply a generous bead of polyurethane construction adhesive rated for masonry, and brace the trim firmly against the wall until it grabs. On uneven block, apply extra adhesive to bridge the low spots.
Tile and Tile Backer
Glossy tile needs a solvent-based or hybrid-polymer adhesive that bonds to non-porous surfaces. Wipe the tile with mineral spirits first to remove any film, and hold the trim with tape or bracing while it sets. Never try to nail into tile; you will crack it.
Frequently Asked Questions
How long does baseboard glue take to dry?
Most construction adhesives grab within 10 to 30 minutes and reach full cure in about 24 hours. Wait for full cure before caulking and painting so the bond is not disturbed.
Can I use only glue with no nails?
On masonry or tile, yes, with proper bracing. On drywall over studs, pairing glue with brad nails gives a far stronger, more reliable hold and keeps the board flat while it cures.
Will construction adhesive damage my walls?
It bonds tightly, so removal can tear drywall paper. That is a fair trade for a solid install, but if you expect to change trim often, lean on nails instead of heavy adhesive.
Final Takeaway
Baseboard glue is one of the simplest upgrades a DIYer can add to a trim project. On drywall, pair it with brad nails for gap-free results; on tile, concrete, or masonry, let a quality construction adhesive carry the load with temporary bracing. Choose an interior-rated, paintable hybrid or polyurethane adhesive, prep your surfaces, and keep your bead controlled. Do that, and your baseboards will sit tight and flat for the life of the room.